

If you've been around this space for a post or two (it really doesn't take longer than that) - you'll know that one of the only things that rivals my love for making things is my love for researching making things. Today I want to tell you about something I spent HOURS of my life researching. Snaps!
I’m going to talk mainly about baby clothes as the context for snap comparison because it was the context of my research, and also because it’s an area where the snaps have a bit more variability - often in other types of projects there’s a clear choice of snap to use, whereas in baby clothes you can sometimes end up with too many options.
At the risk of chasing you away from this post prematurely, I'll unload my best pun right at the start: Snaps are a common feature in baby clothes (and various other garments!) because they're a snap to use, and with the right tools and knowledge, they can be a snap to attach as well!
Buttons can be fiddly, zippers can be stiff and sometimes scratchy, but snaps are reliable, quick to install, and so much fun! There are, however, an intimidatingly large range of snap options available, and really, not all of them are suitable for all projects - especially when it comes to baby clothes. Today, we're going to investigate four common snap options you'll come across in your search for closures, and discuss the pros and cons of each.
Utility Snap
This was the first snap I found in my search, very common but called many different things like a Heavy Duty snap, a Dome snap, or sometimes just a regular old metal snap - mine came from GDL Trading here in New Zealand, but these are plentifully available. They're all metal, and consist of a ring-shaped socket which fits over a stud.
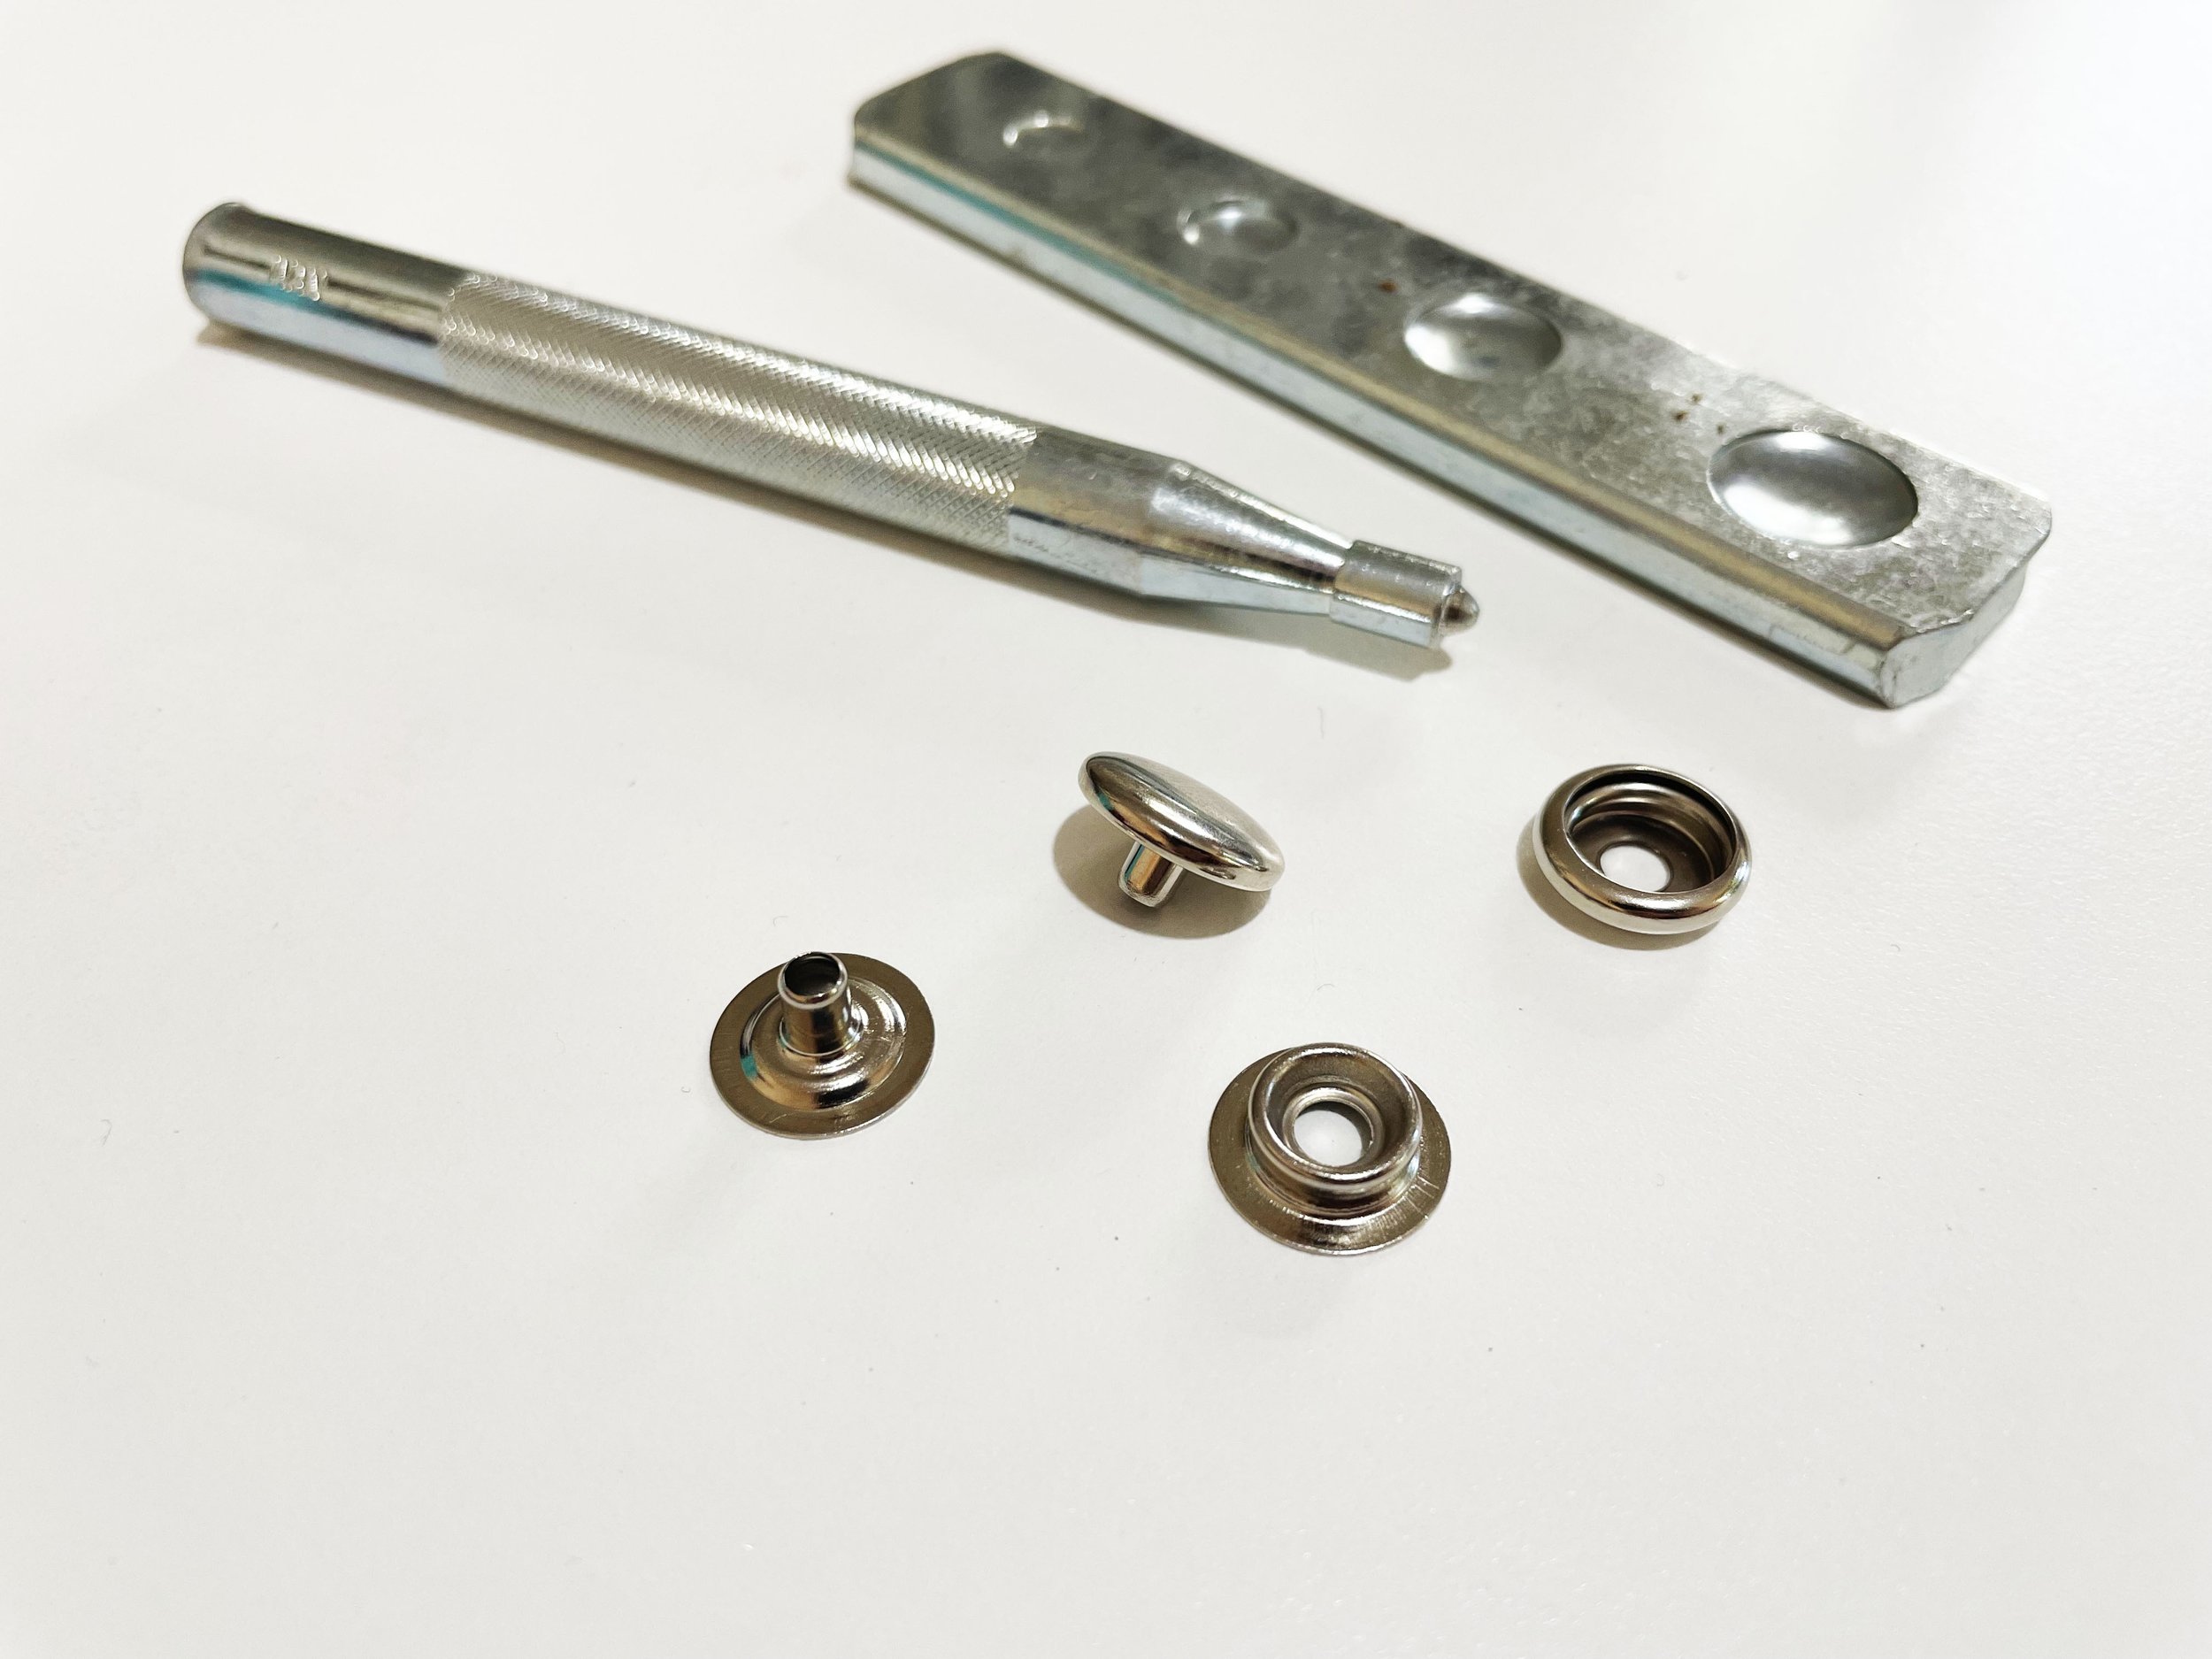
The dome has a hollow shank, and the snap is applied with a specially shaped metal tool and a hard surface, hammering until the shank curls up on itself and seals the pieces together on either side of the piece of fabric. These snaps are quite durable, but I would highly recommend testing one on a swatch before applying them to a baby garment because all of the ones I've sampled have been much too durable/stiff of a snap for delicate baby fabrics. By this, I basically mean that if you pull on the fabric to un-snap the snap, the fabric will rip before the snap comes apart. Not good! With a thicker, more durable fabric, these snaps can be very useful (I used them on my kelly anorak and also my vinyl project organizers with great success), but I wouldn't recommend them for baby-wear use.
Utility snaps on my Kelly Anorak
Pros: Durable, low-cost installation method, easy to install. Great for strong fabrics like canvas and denim, great for utility projects.
Cons: This type of snap can be too stiff/firm for delicate fabrics, and may rip delicate fabrics.
Overall: Test this type of snap before you apply it to your babywear! It's possible you'll find success, but in my opinion there are better-suited options out there.
Spring Snap
The spring snap is a close cousin of the utility snap, but is a slightly more sophisticated option. Inside the socket side of the snap is a small spring which holds two wires just inside the opening. These gently hang on to the stud side of the snap, which often has a small indentation halfway up the shaft to hold the spring, so the act of snapping and unsnapping is spring-based rather than the brute-force mechanism of a ring snap.
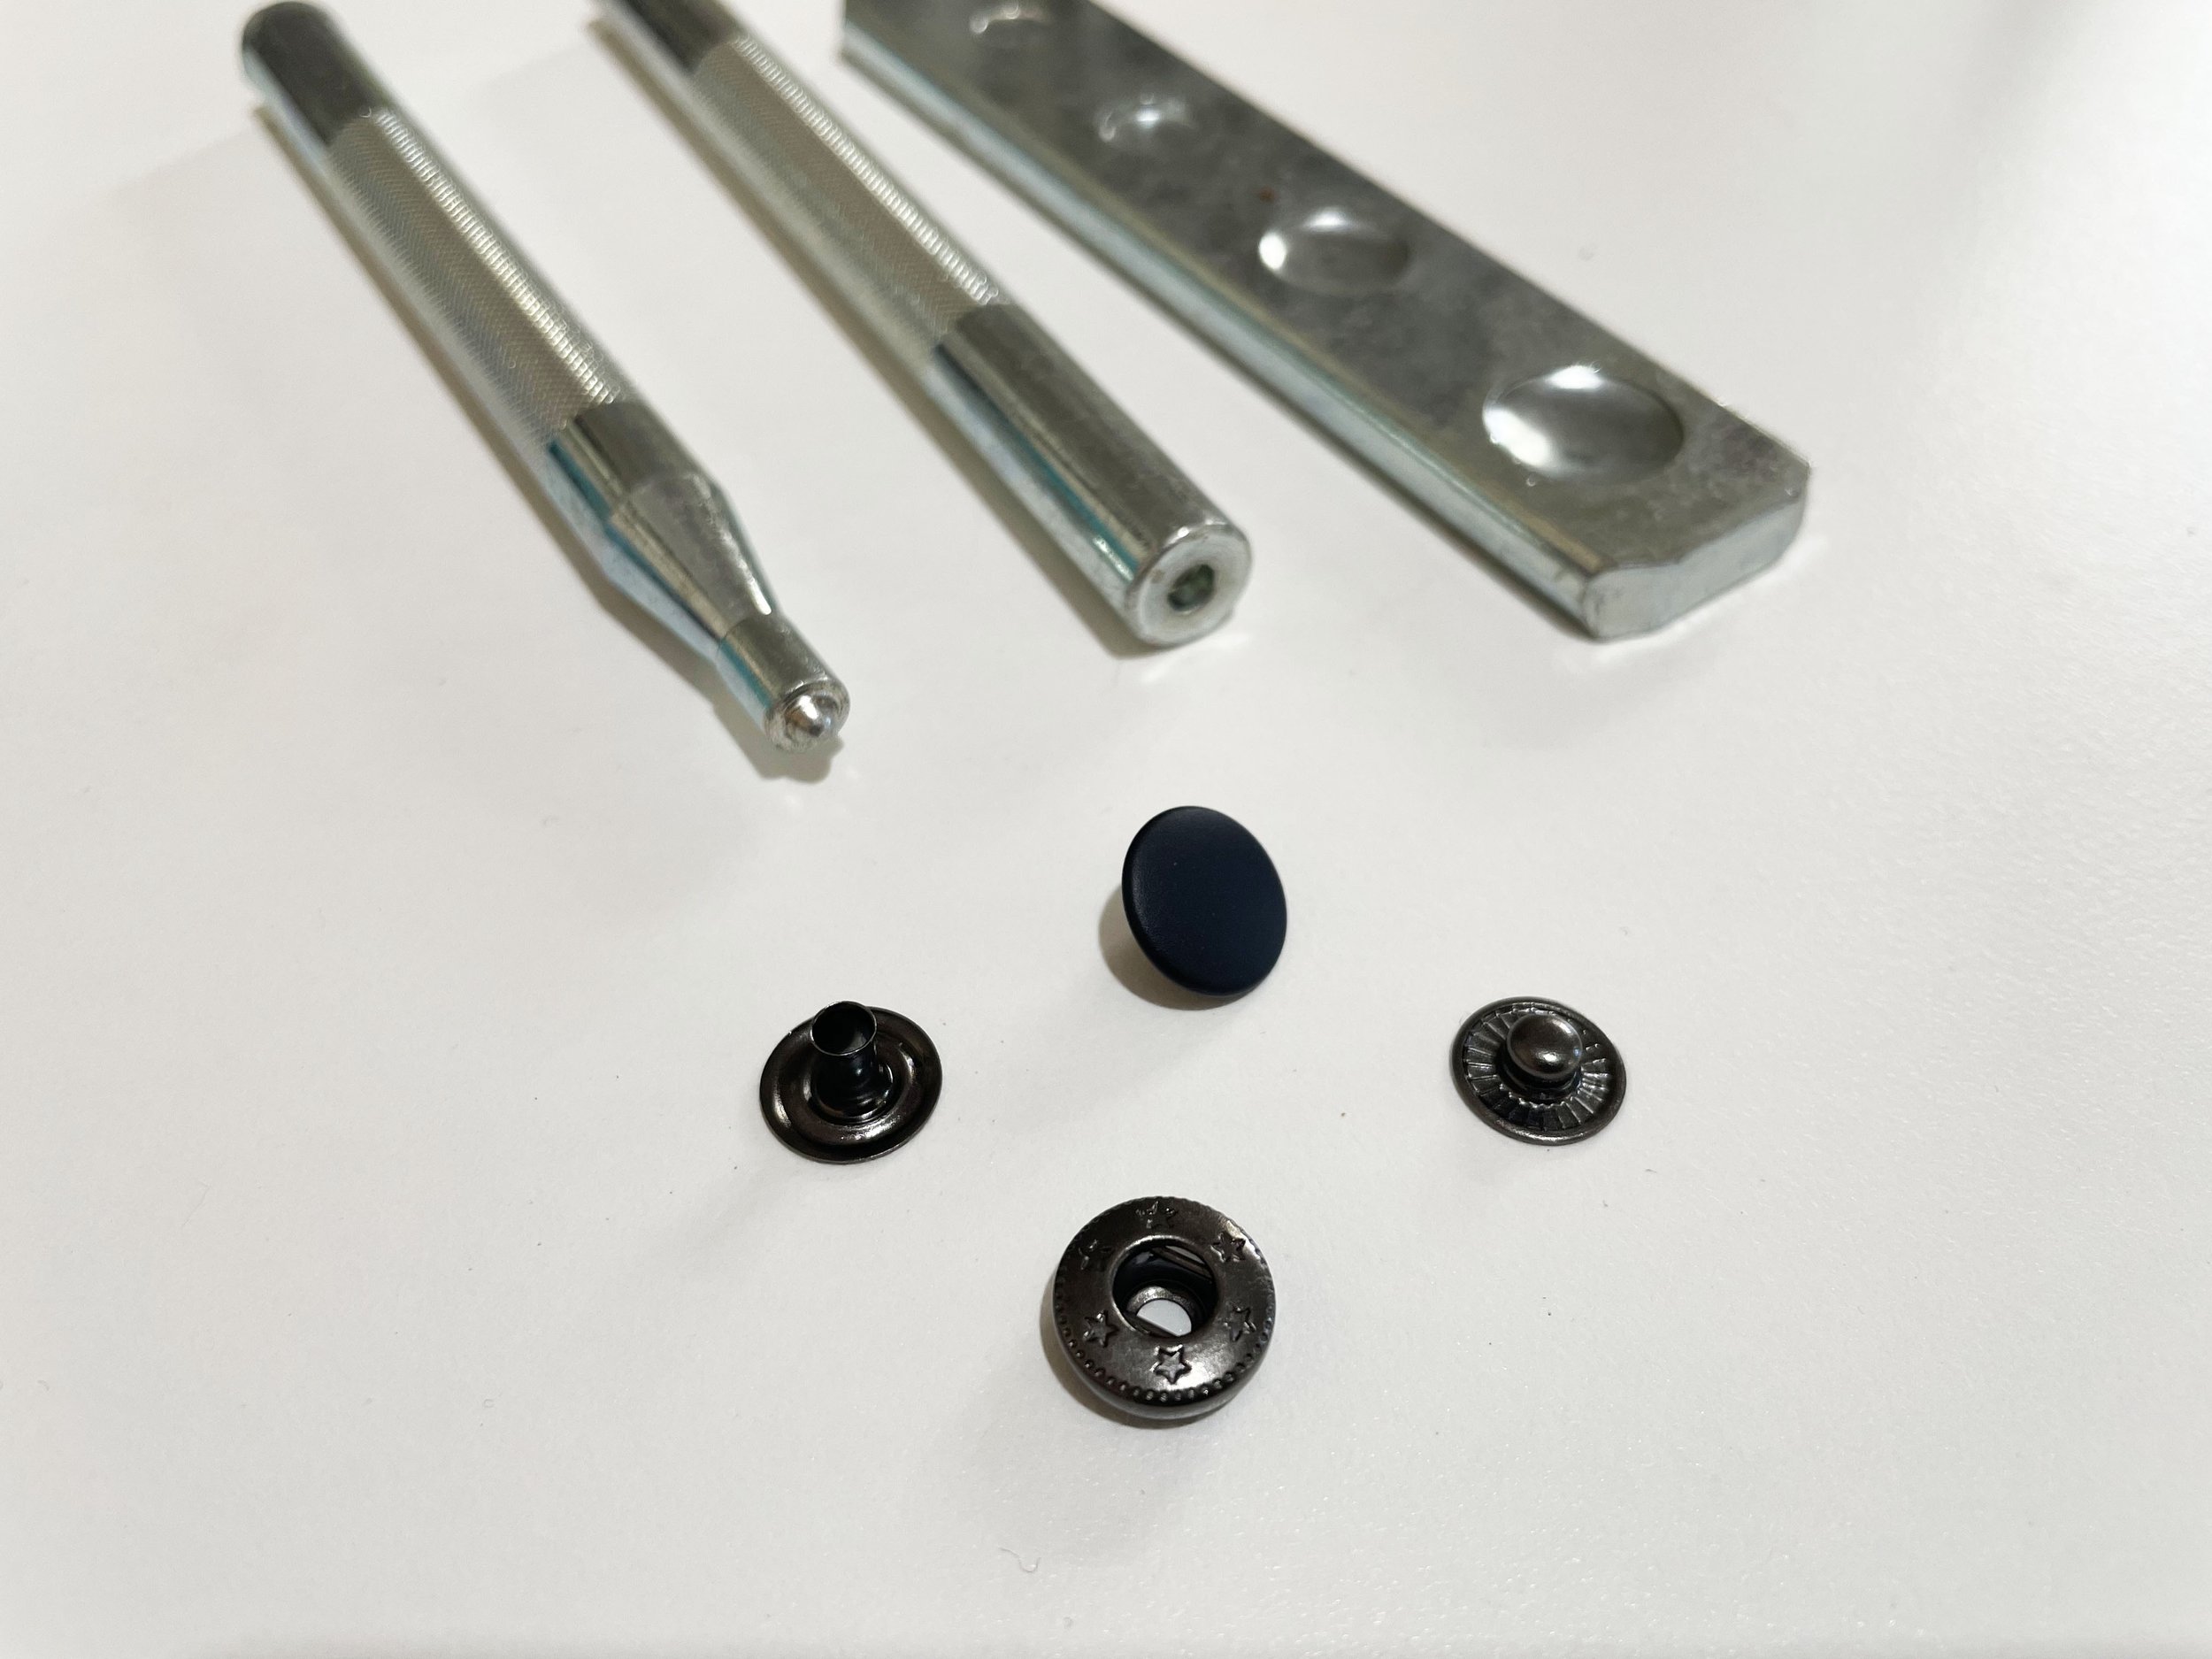
The spring snap is applied similarly to the utility snap - a hollow shanked cap goes through a hole in the fabric and into the socket side of the snap, and you use a hammer to coil the shank inside the snap so that the two are sandwiched together. The difference here, is that the shank side requires an additional tool which is designed not to crush the snap. It's still a relatively low-cost investment, but the extra hardware is a thing to note. The biggest difference between these and the ring snaps is that they are a gentler hold, so they are easier to release than utility snaps - great for delicate fabrics! However, the spring mechanism gives them a taller profile than some other types of snaps, so you may find that they're too bulky for some types of baby-wear. Also, these snaps for the most part come with one 'outside' cap and one less attractive 'inside' cap - if you're looking for something for a double-sided application, these snaps may not be your best bet. Lastly, on a per-snap cost basis, they're definitely on the more expensive side, even more so if you’re looking for double sided ones. This is fine if you’re making, say, a bag or wallet - but if you’re making a whole wardrobe of onesies with five snaps each, it adds up. If cost is an issue you might want to check out the KAM snaps further down.
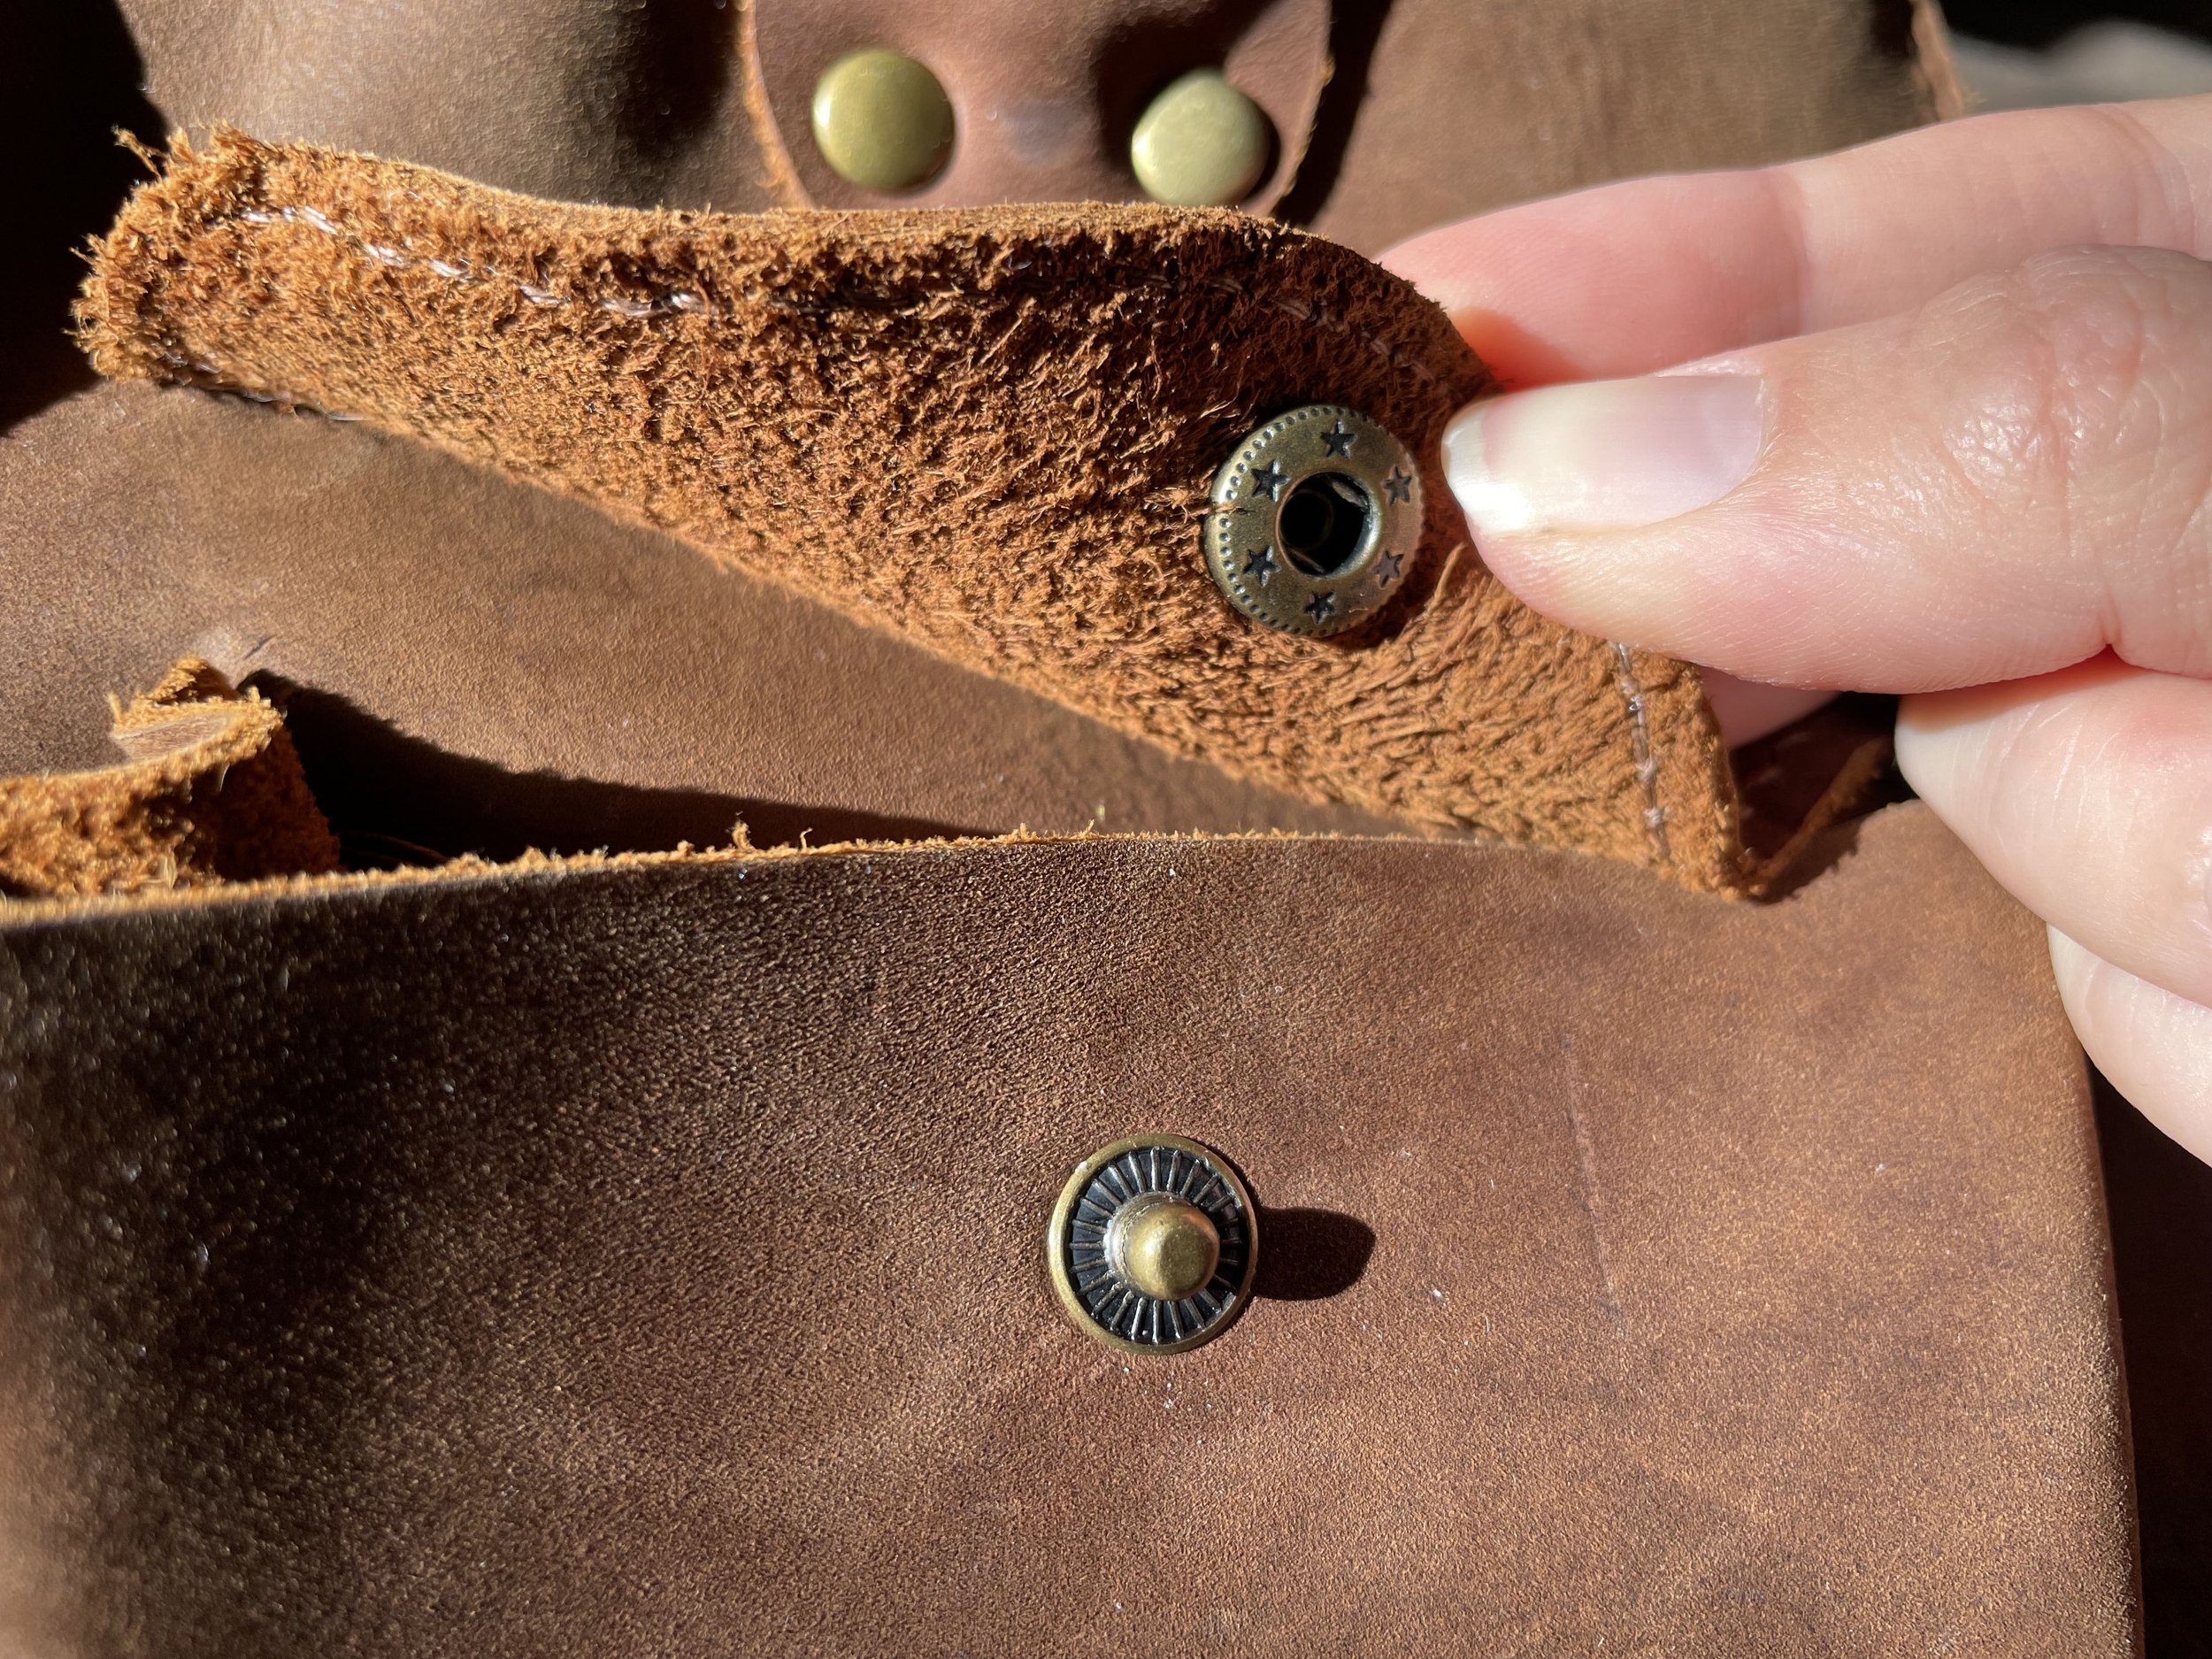
Spring snap on the pocket of a leather bag I made for work
Pros: Durable, low-cost installation method, decently easy to install. Lovely spring-controlled snapping action.
Cons: Higher profile can be bulky, requires one additional installation device, and often cannot be used double-sided with a 'right' and 'wrong' side cap. A bit on the more expensive side in large quantities.
Overall: A good snap choice for most babywear applications, so long as cost isn’t an issue and the bulky profile is considered. Perfect for bags, purses, and wallets. The sew-on ones are lower profile and great as well, so long as the time it takes to sew them on isn’t an issue.
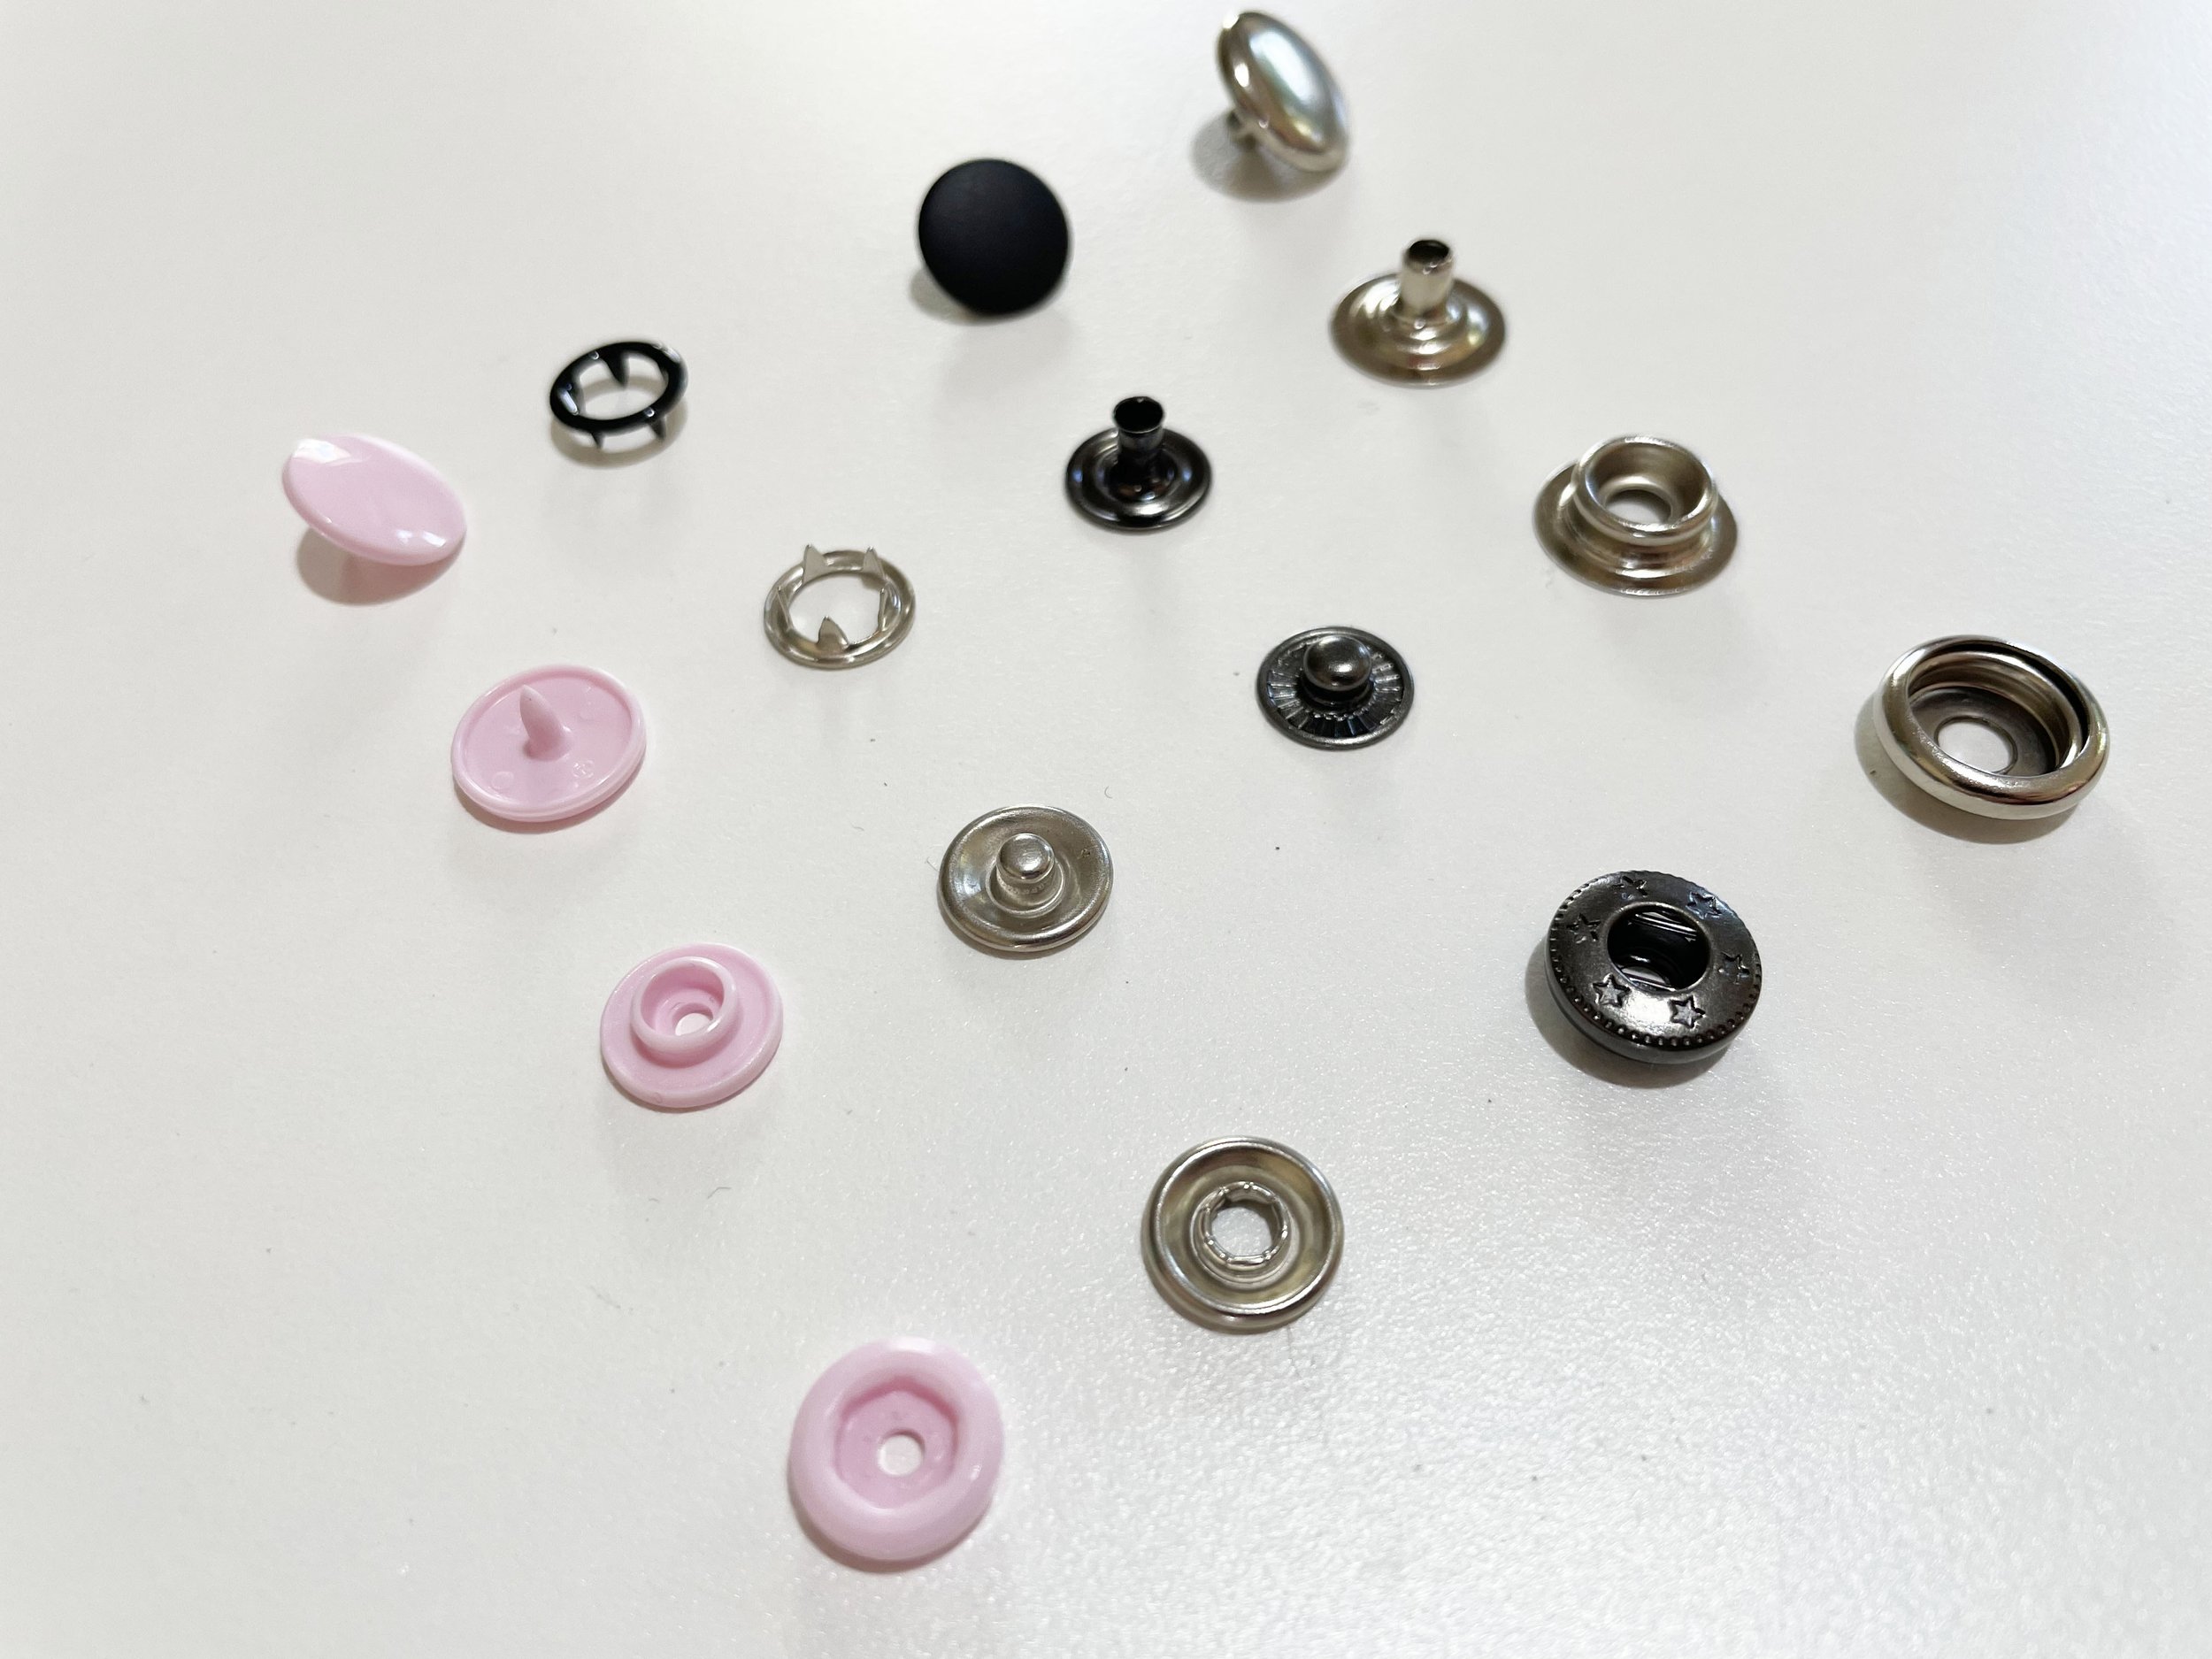
Open-Ring or Prong Snap
Probably the most easily accessible variety of metal snaps, you'll recognise these from the fasteners section of pretty much any sewing shop. Instead of a hollow shank, the cap on this style of snap has five little triangular prongs that fit into the ring on the other side of the snap. I have found that there's a difference between name-brand and off-brand prong snaps: the name-brand ones are made from a thicker metal so the prongs are less likely to make little indentations in the other side of the snap - don’t worry though: there are lots of name brands to choose from. These snaps require the least amount of additional hardware to install - the packet comes with the little dome-shaped tool to hold the snap, and all you need is a hammer and a hard surface. These snaps also have a very low profile, unlike the spring snaps, so they're great for baby clothes that are meant for layering, and places like an inseam or crotch on a bodysuit where you may need multiple snaps close together. They often come coated in enamel for different color options, and you can even get the kind that are filled with pearl rather than ring shaped!

They sound amazing, right? They mostly are, but there’s one drawback to consider. This snap doesn’t have a centre-hole design. Instead, there are multiple prongs that are located near the edges of the snap; you may find that they're more likely to rip fabrics that are more delicate. I would recommend an extra layer of interfacing on more delicate fabrics if you use a prong snap. Additionally, the prongs are shorter than the hollow shank of the other types of snaps, so there is a limit to how thick your material can be. Although it is possible, It can be a bit of a trick to get my prongs through the five layers of fabric that a knit binding creates on a baby onesie, for example.
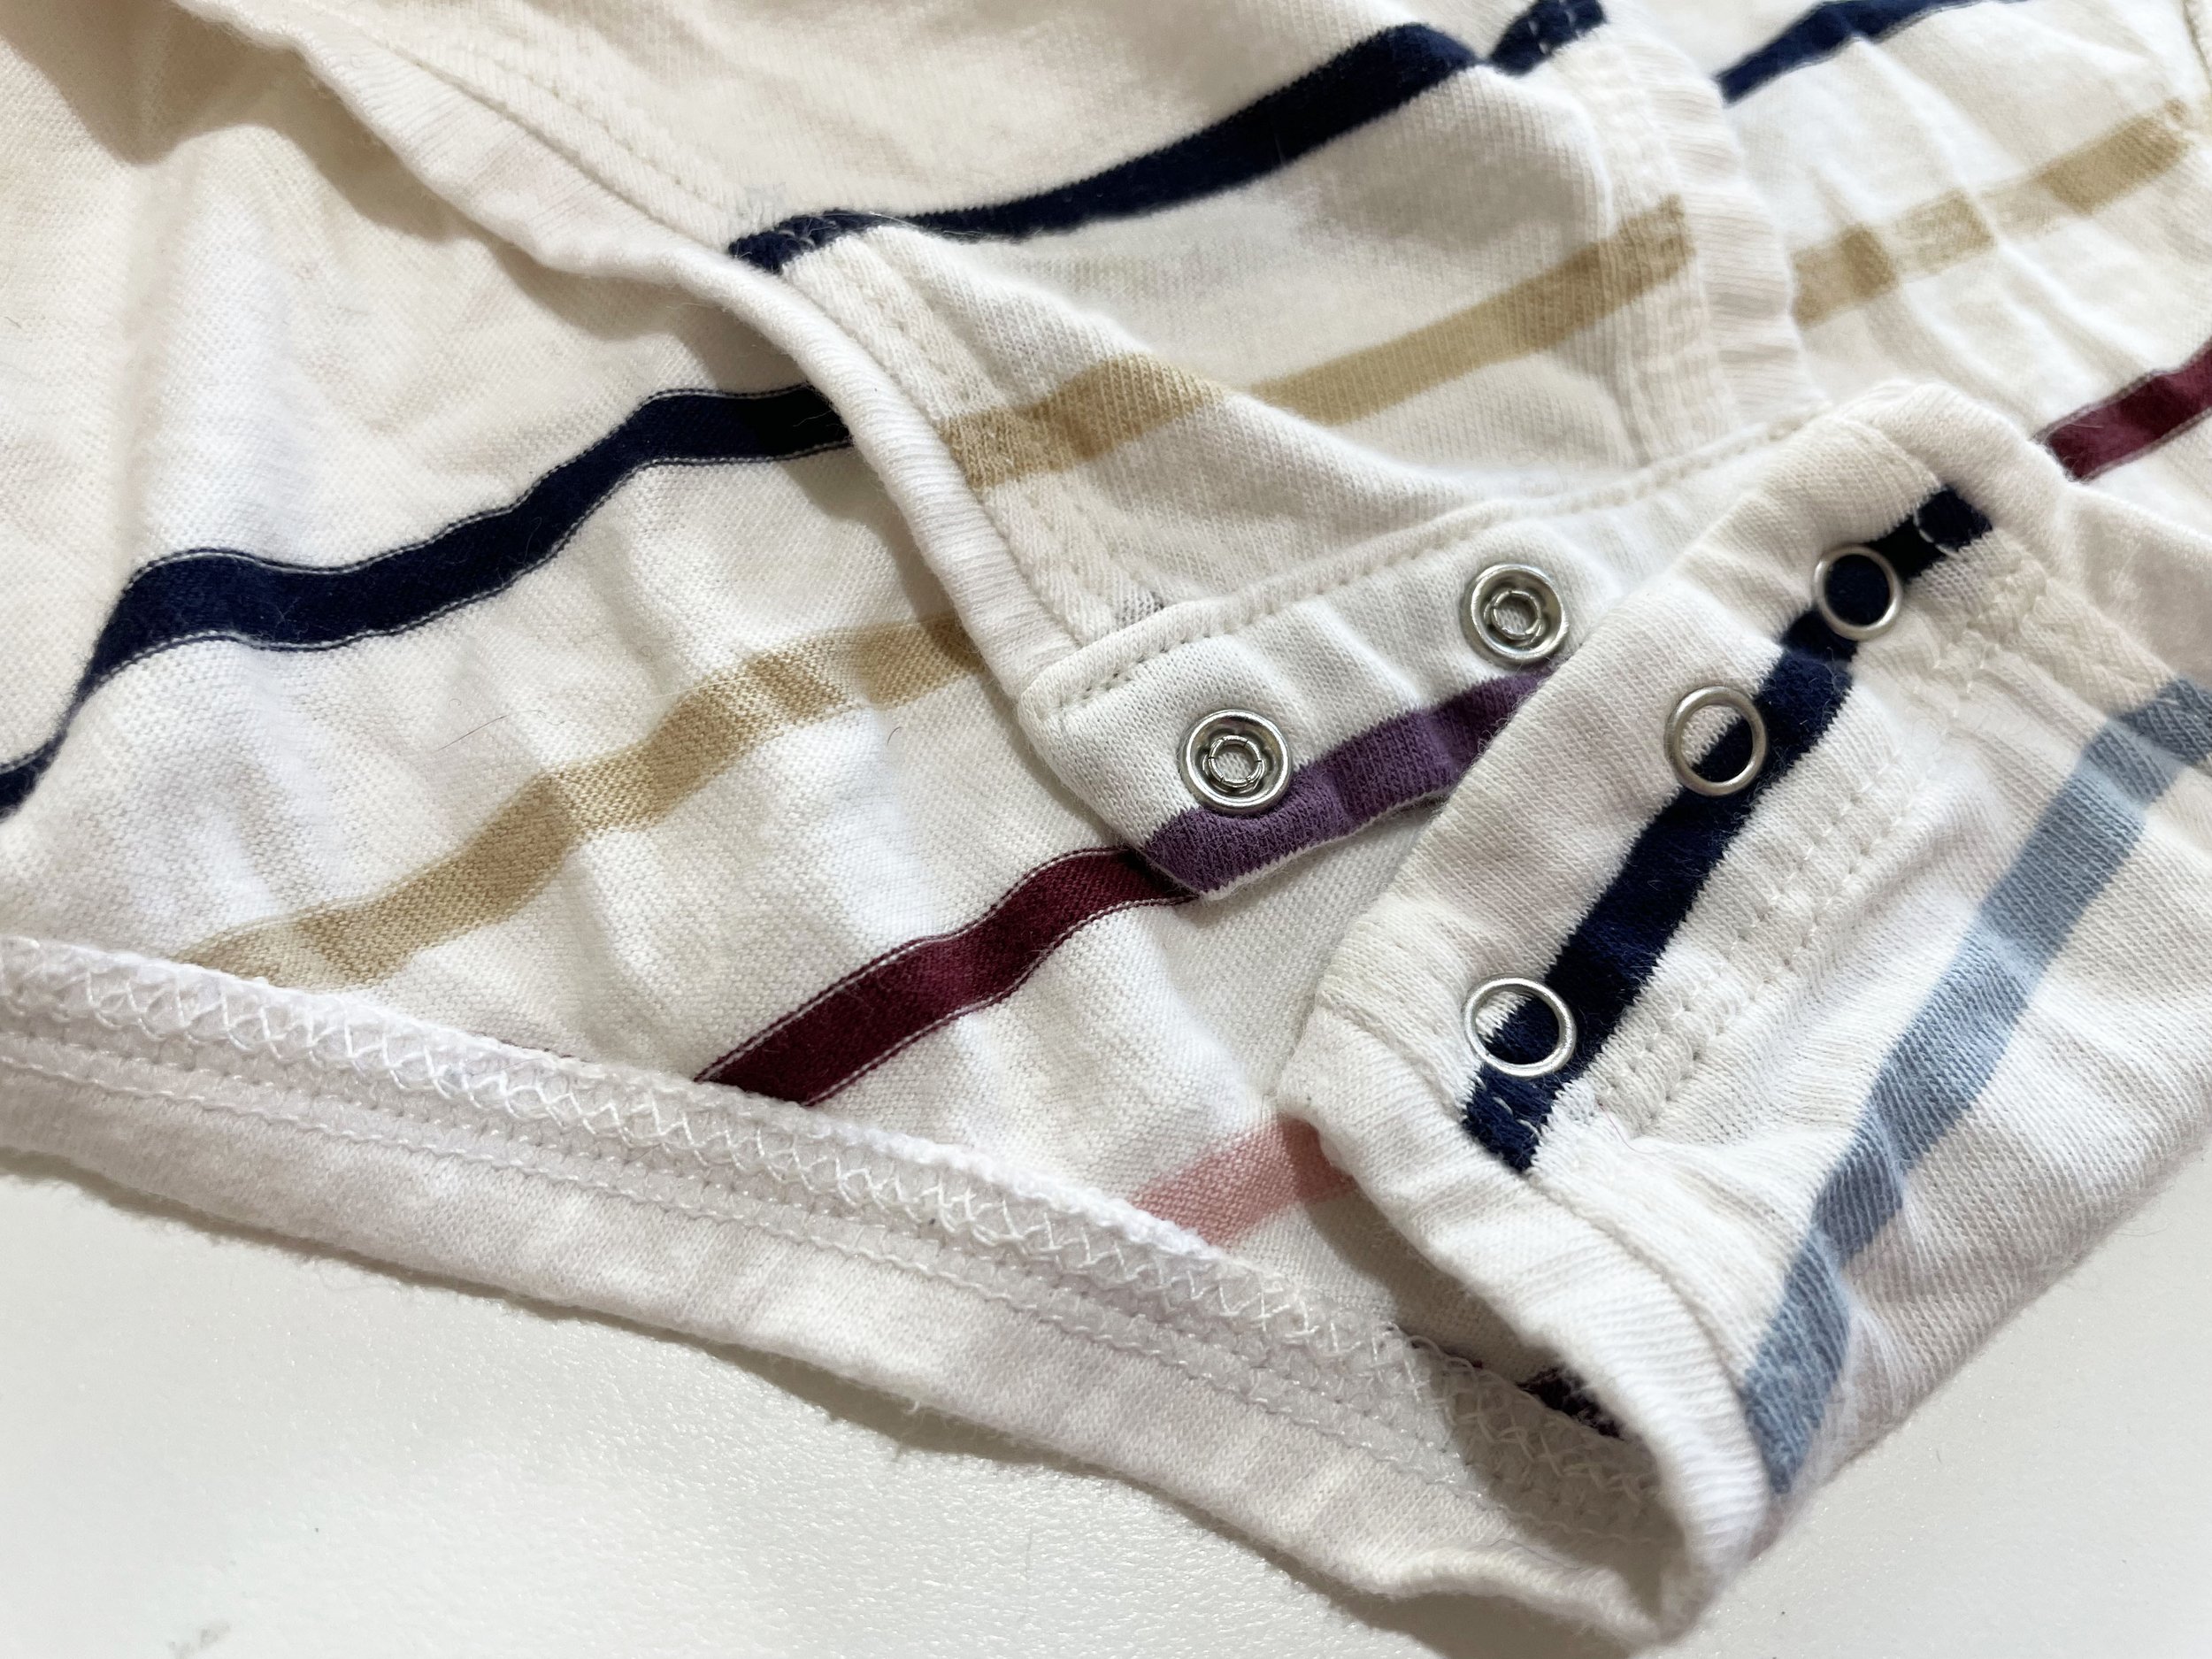
ring snaps on a bodysuit I made a few years ago
Pros: Easy to find, comes in colors, very flat profile. Delicate snapping action and tools to install are usually included.
Cons: May poke holes in more delicate fabrics and can be tricky for thicker fabrics.
Overall: A solid choice, and I'd say definitely the best option if you're sewing one or two quick baby gifts and don't want to be bothered buying separate installation equipment. Just make sure you interface the snap area!
KAM Snap
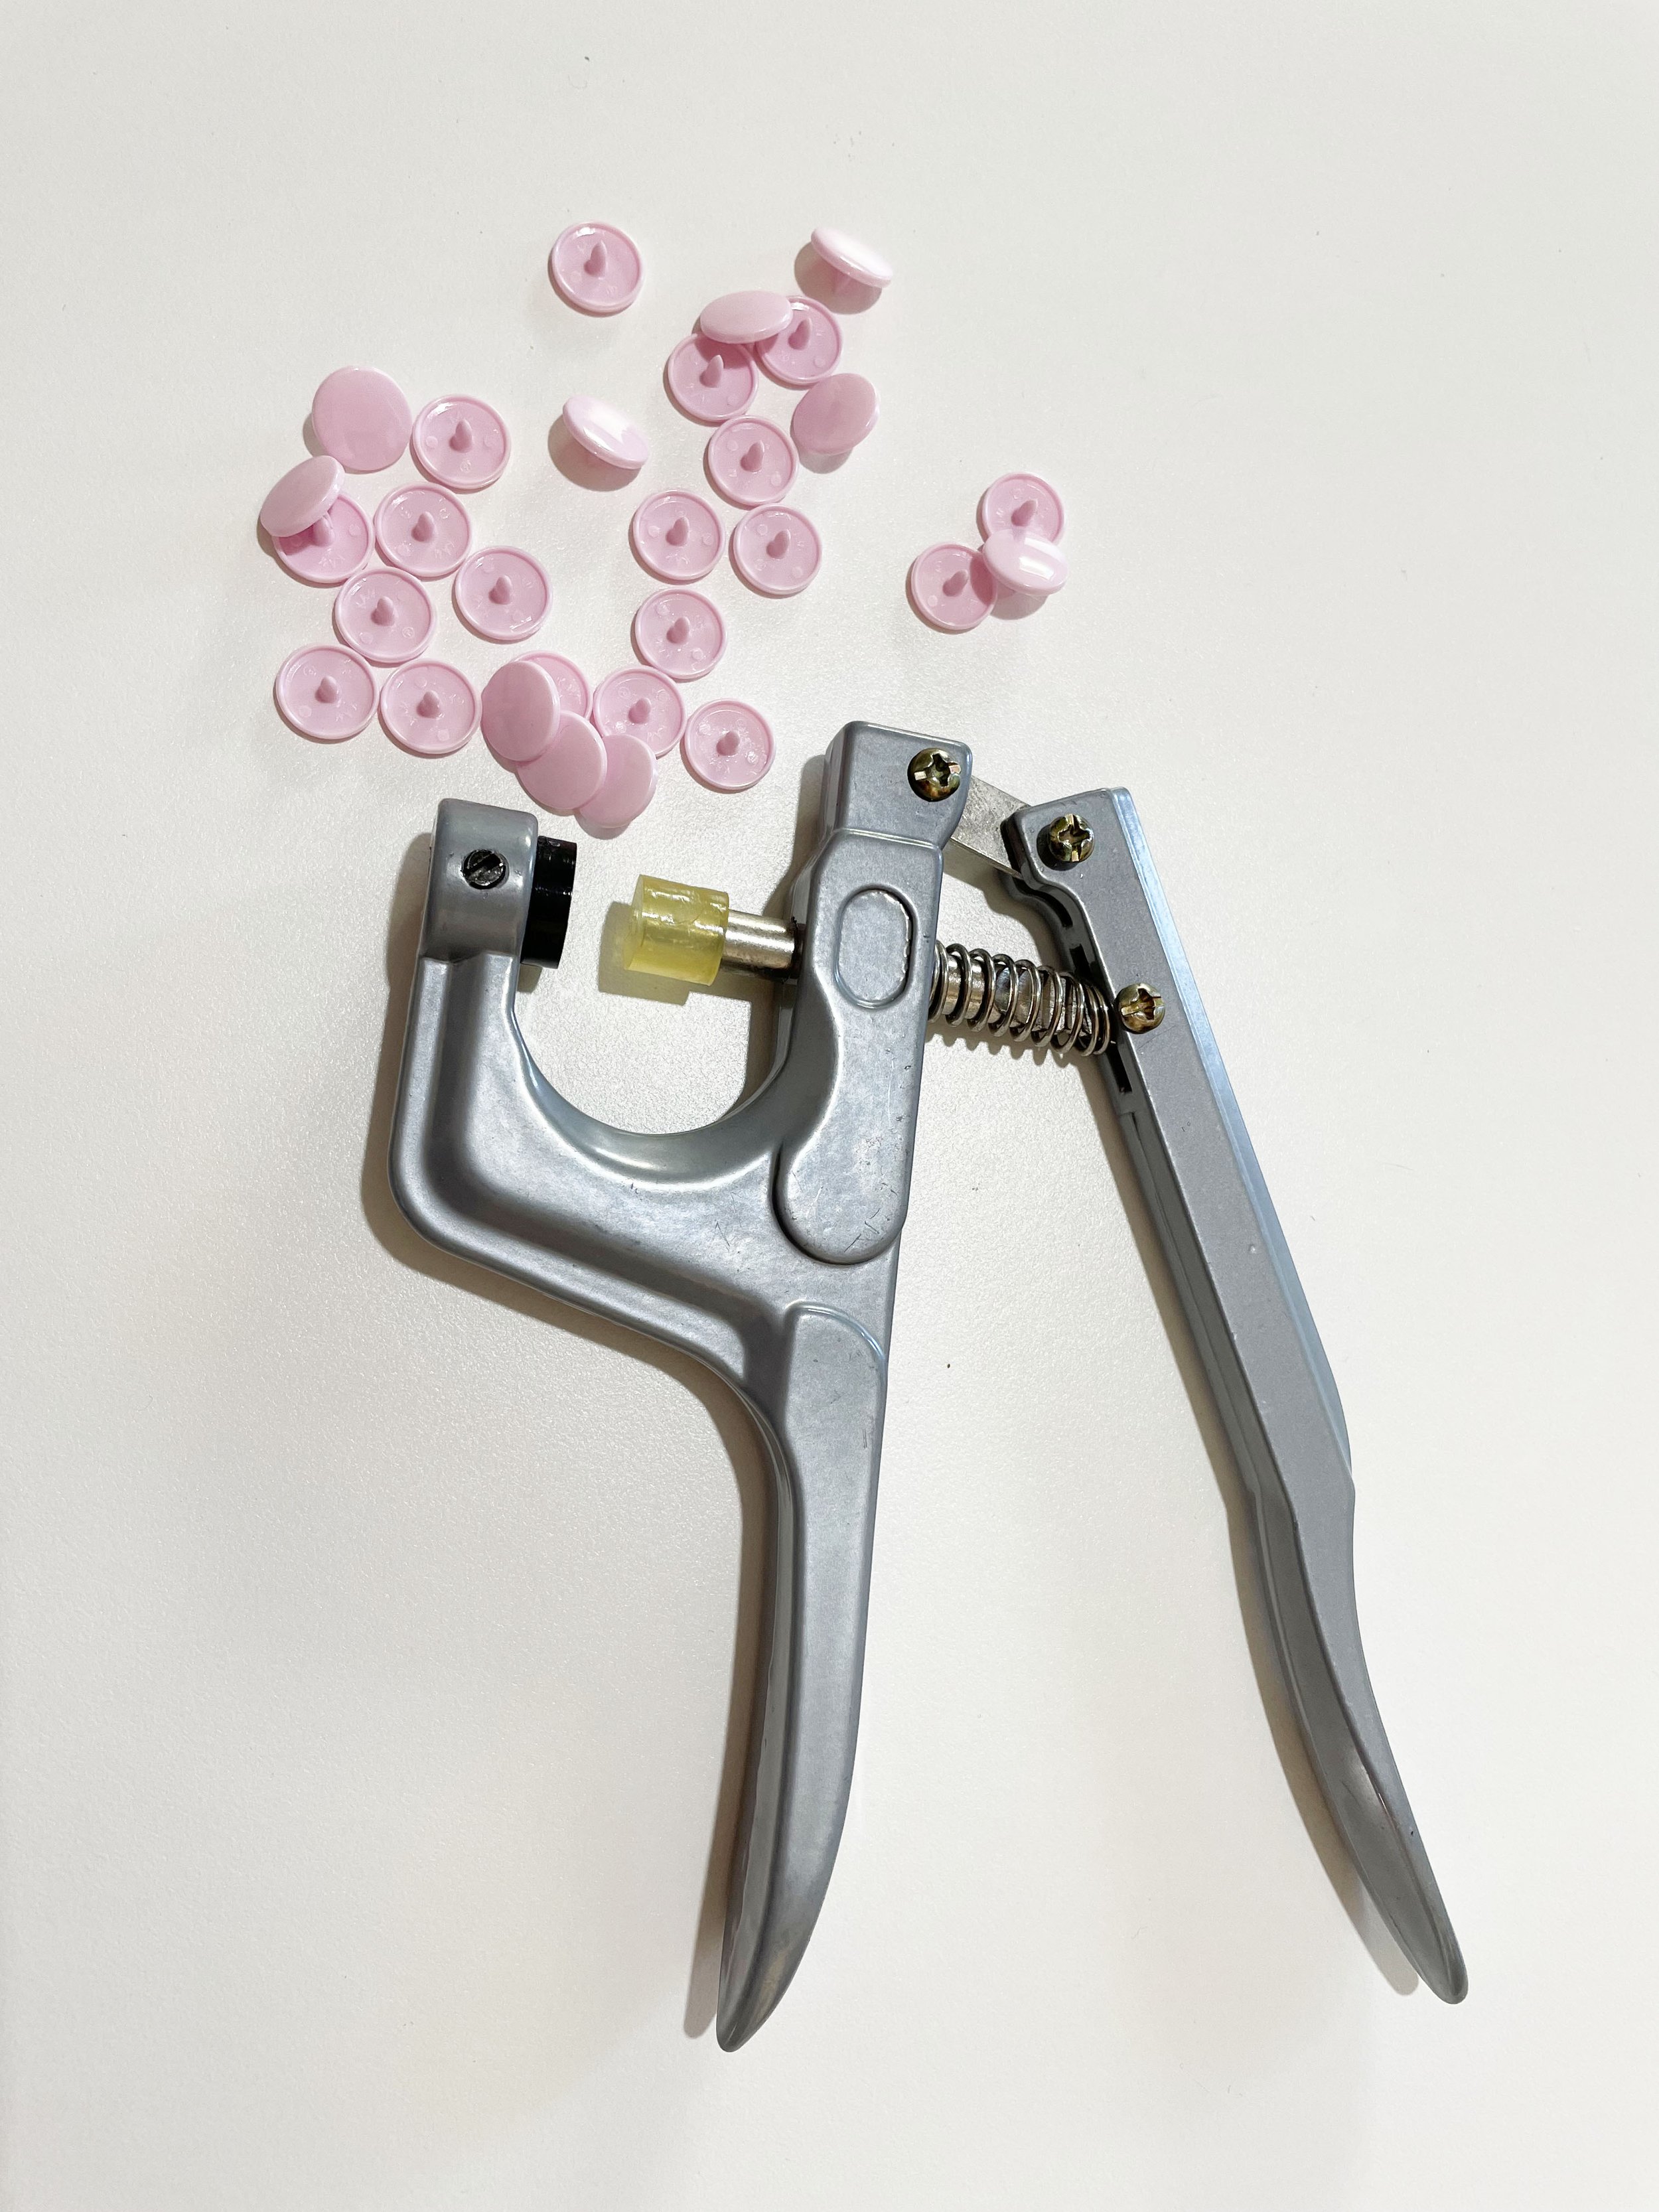
KAM snaps are a bit of an outlier in this little grouping - the only plastic in a sea of metal alternatives. If you're worried that the kiddo might have sensitive skin (if a parent has a nickel allergy, for example) these are a good pick. They're also heckin' cheap in large quantities, so great if you're planning on starting up a cloth diaper business or a onesie factory. The other thing that sucks people in to team KAM Snap is that they come in a veritable cornucopia of different colors. Regardless of your onesie color, there will be a close match in KAM snap form. The thing that deters people (this was me) is that KAM snaps require a special tool for installation. There is a specialized pair of pliers which are around $25-$35 NZ - and are known for the speed at which they fall apart - and there is a snap press for around $50-$75 NZ. Now, if I were in the aforementioned cloth diaper business, or thinking of starting up that onesie factory - the snap press would be awesome. However - at the gifts-for-friends level, $75 is a LOT to shell out on a piece of equipment that's going to get minimal use - though KAM snaps can also be used to keep things like pillowcases and duvet covers closed, and I also used them to attach my curtain linings to my curtain tape so they’d be a snap (sorry) to remove and clean. Plus, you can get different attachments for snap presses to install things like grommets and rivets, and all the other snaps covered in this post - though those attachments also cost extra!
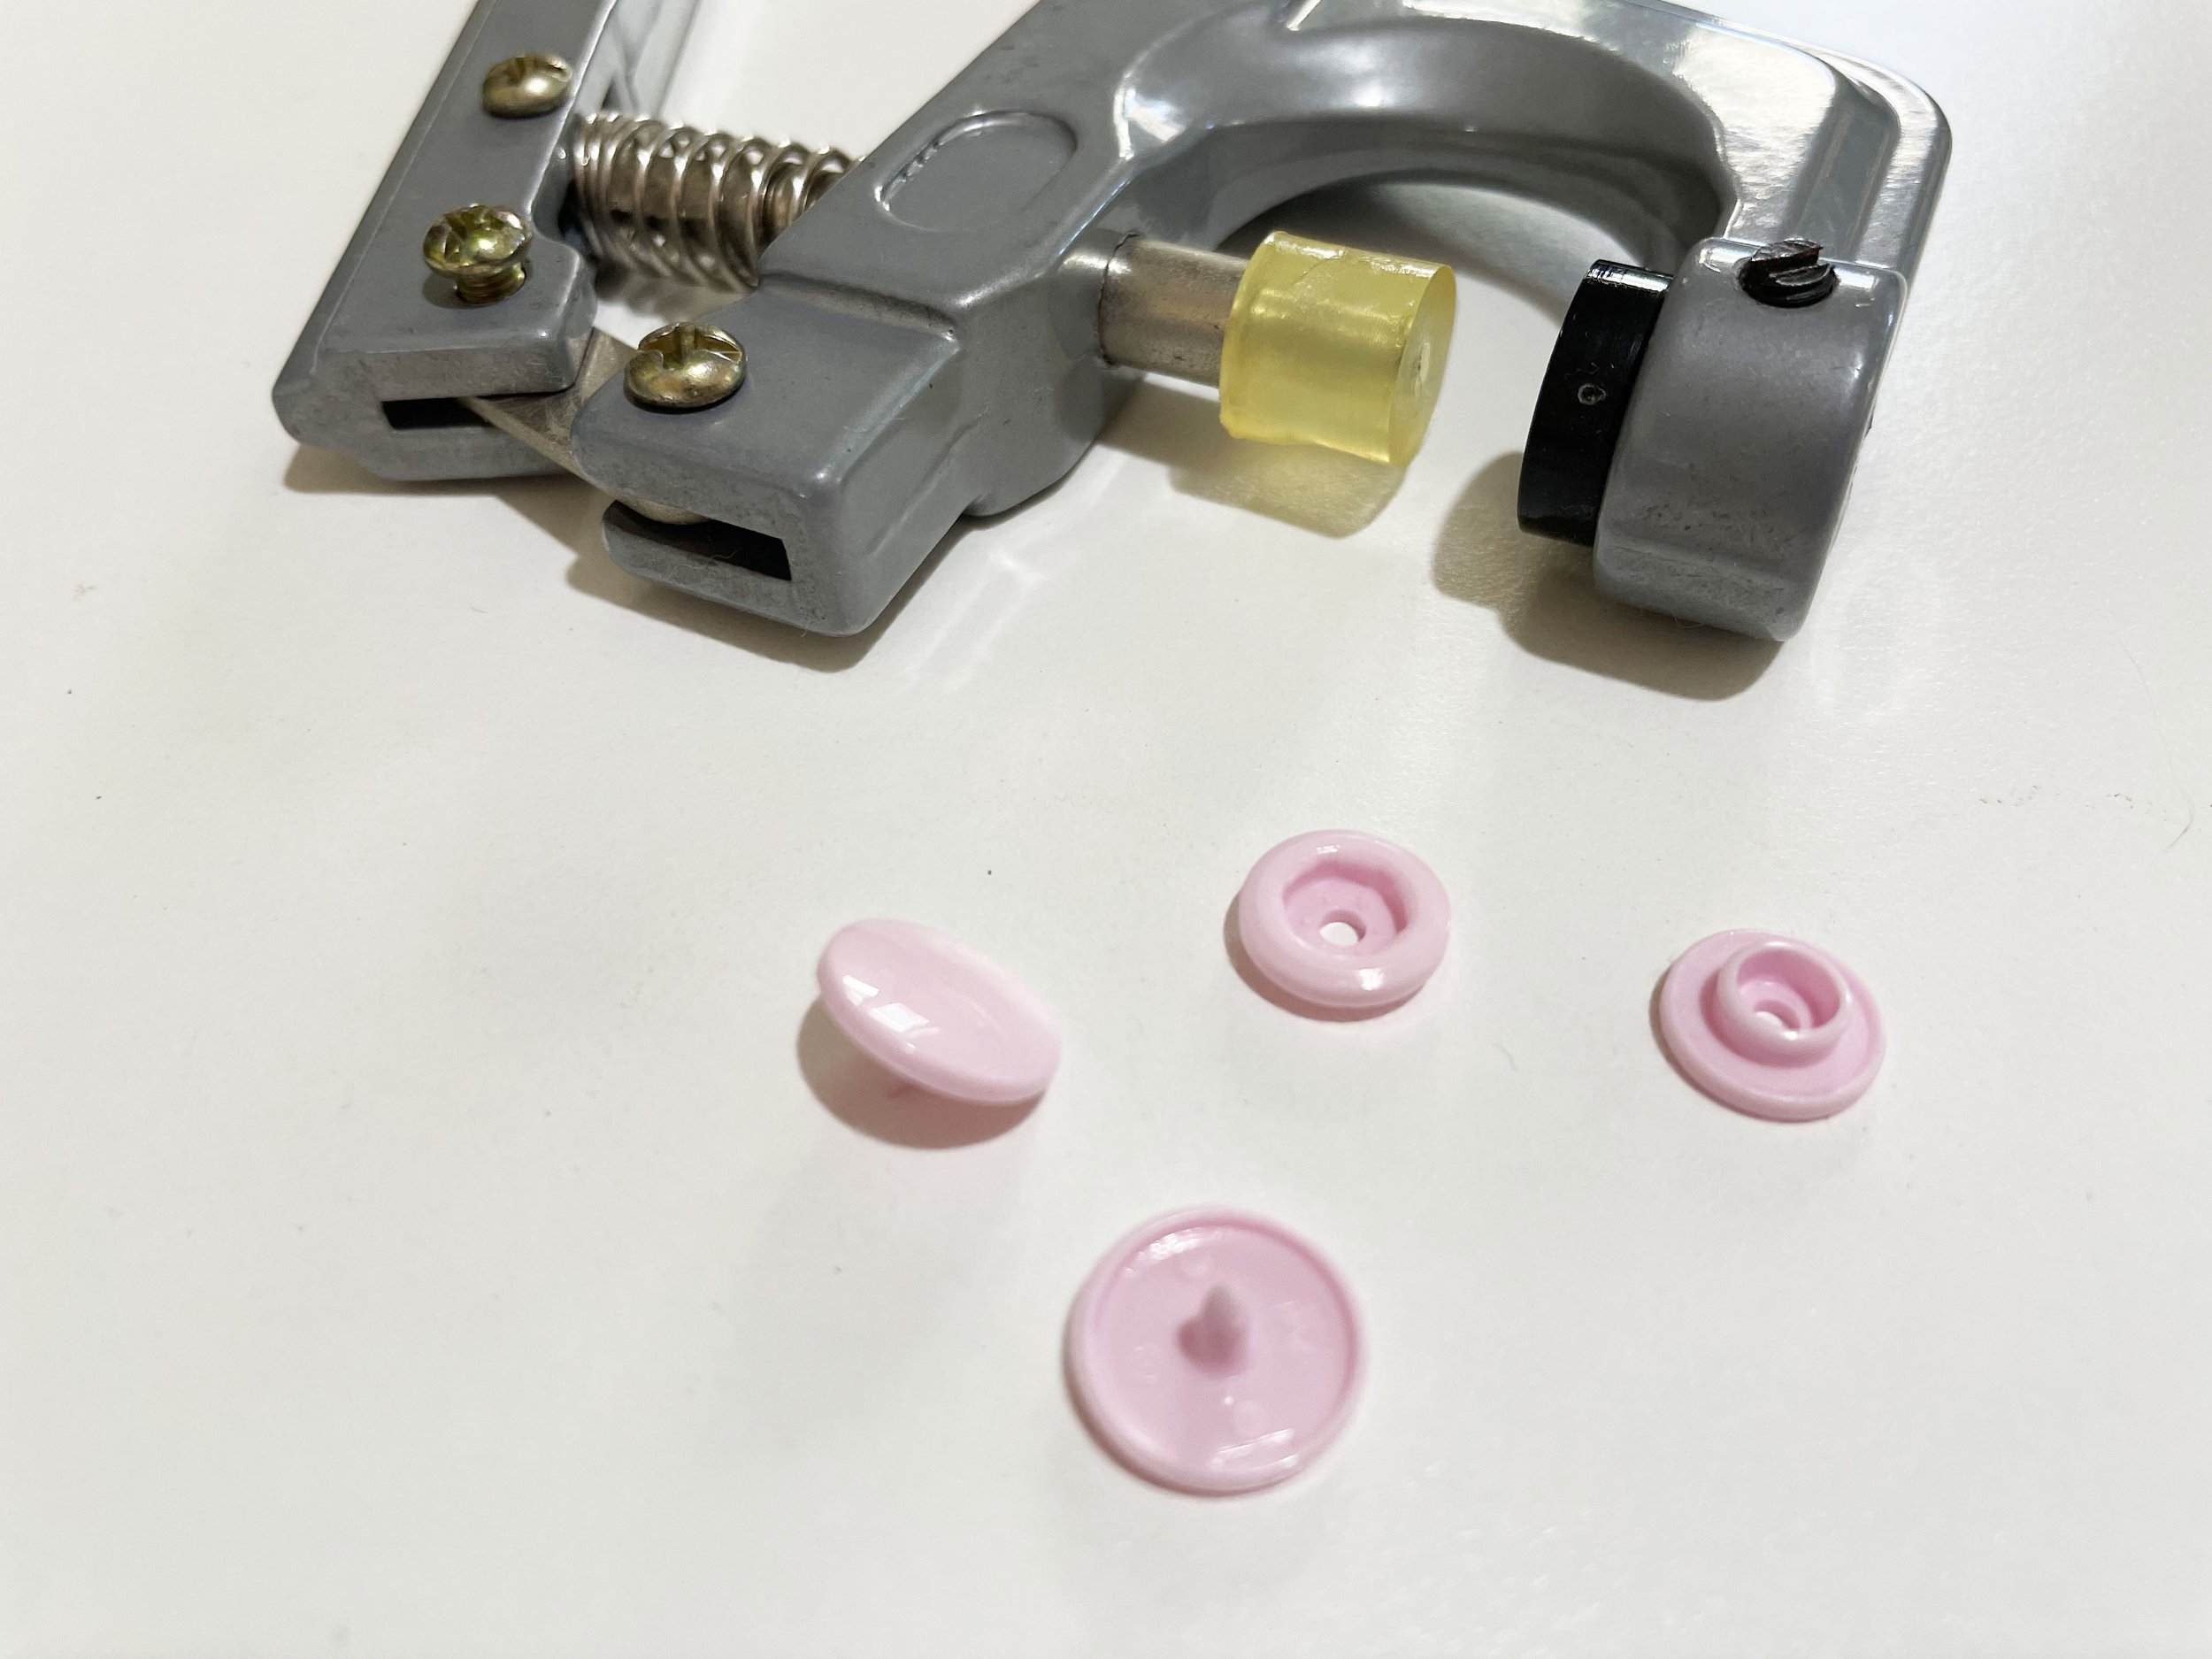
I'd say if you're looking at snap quantities in the dozens, the pliers will most likely work just fine for you. That's the option I chose, for now anyways. I’ve applied 100ish snaps with my pliers and encountered no issues, but there’s no denying it’s not the most smartly made piece of technology. Perhaps when they fall apart I’ll get a press.
The KAM snap itself consists of two dome caps with central shanks, plus one of each socket and stud. Both sides are applied in exactly the same way - you pierce your fabric with an awl or the pointy shank of the snap, insert one of the snap ends onto the shank to sandwich the fabric, and squeeze the whole thing gently with your pliers (or snap press!). I'm not exactly known for the strength of my hands and I had no issues squeezing the snap pliers several times in a row - it’s spring loaded and doesn't really take all that much pressure. The press pushes down on the pointy shank, and the plastic is soft enough that it moulds to a little doughnut which holds the snap in place. The central shank means the fabric is less likely to rip than with some other options, but I'd still interface the area. The domes are the same on the top and bottom, so these are great for applications where both the front and back of the snap will show. They also don't require a hammer like the three other options, but if you're planning on installing snaps of more than one size, keep in mind that your pliers or snap press will need new heads for each new size.
KAM snaps are perhaps most well known for their applications in the phenomenon known as Modern Cloth Diapers. As a non-baby-having human, I know exactly zero things about Modern Cloth Diapers (Nappies), let alone any other kind of diaper, except that they sound scary, and also that Instagram refers to them with the same abbreviated hashtag (#mcn) that applies to my favourite blend of yarn for sock knitting - Merino Cashmere Nylon. Very Confusing.
Pros: COLORS! good snapping action, practically foolproof to apply, and inexpensive in large quantities.
Cons: The installation tool is the most expensive of the bunch, and changing snap sizes makes this even more so. If you're looking for KAM Snaps in the dozens rather than the hundreds, they can get more expensive when the cost of the installation tool is included, so only go this route if you’re happy to spend a bit extra on the setup.
Overall: Far and away the best option for bulk snapping, especially baby clothes, and I'd say probably the best overall snap action of the bunch. I do find them a bit big on some garments, but that’s purely aesthetic and I feel like a sleep-deprived parent might argue that bigger snaps are easier to use.
Magnetic snap
Full disclosure - I don’t think there’s a good reason to use the snaps we’re discussing in this category for baby clothes - but they are very useful for things like bags and even adult utility type clothes!
You’re probably familiar with the type of magnetic closure with the prongs on the back - again, you can find these at pretty much any fabric store that has a haberdashery section… however, the fun doesn’t end there! You can also get them with a rivet style backing! These are great for when the back of the snap area will show. You will need a rivet setting tool to cup the rivet while the magnetic side is hammered into place, but overall the installation method for these snaps is quite straightforward. The big bonus here is you get the hold power of a magnet on your garment - they’re strong enough to resist accidentally popping open, but they’re easy enough to open when you actually mean to.
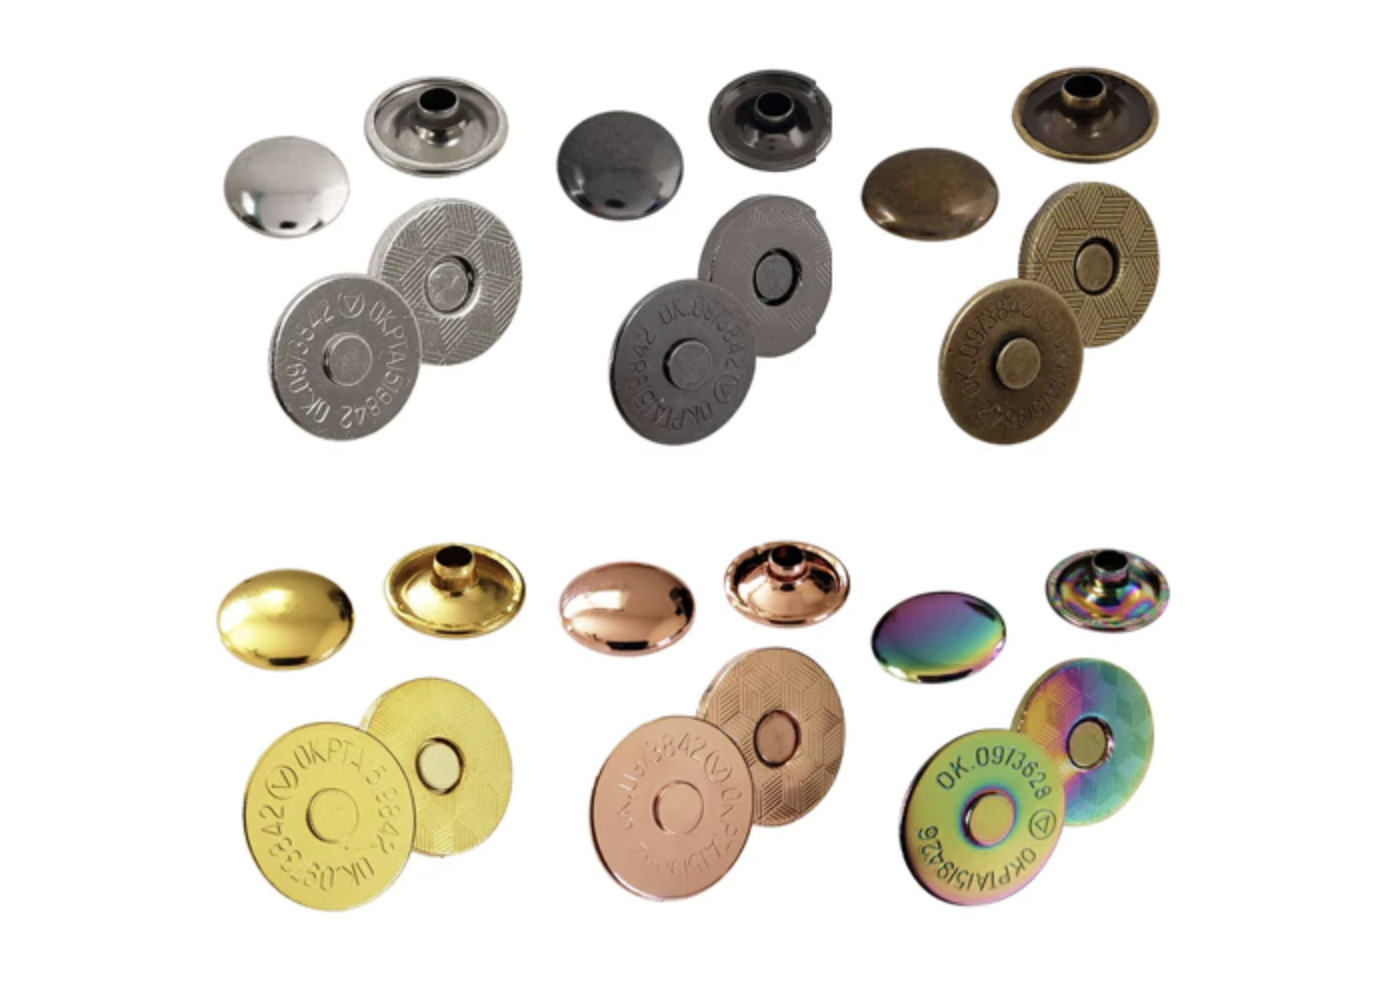
this is a product photo from kamsnaps.com - I am apparently out of magnetic rivet snaps, so it’s time to order more!
Pros: It’s a magnet! easy to install, very nice finish compared to the pronged variety and perfect when you need extra holding power
Cons: They’re big - the smallest I’ve found is 14mm which is prohibitive for smaller applications, but still great for bags. Cost per unit is a bit high, you wouldn’t want to use 12 of these on a single project
Overall: a fabulous option for bagmaking, but limited in their applications for garments - especially baby garments.
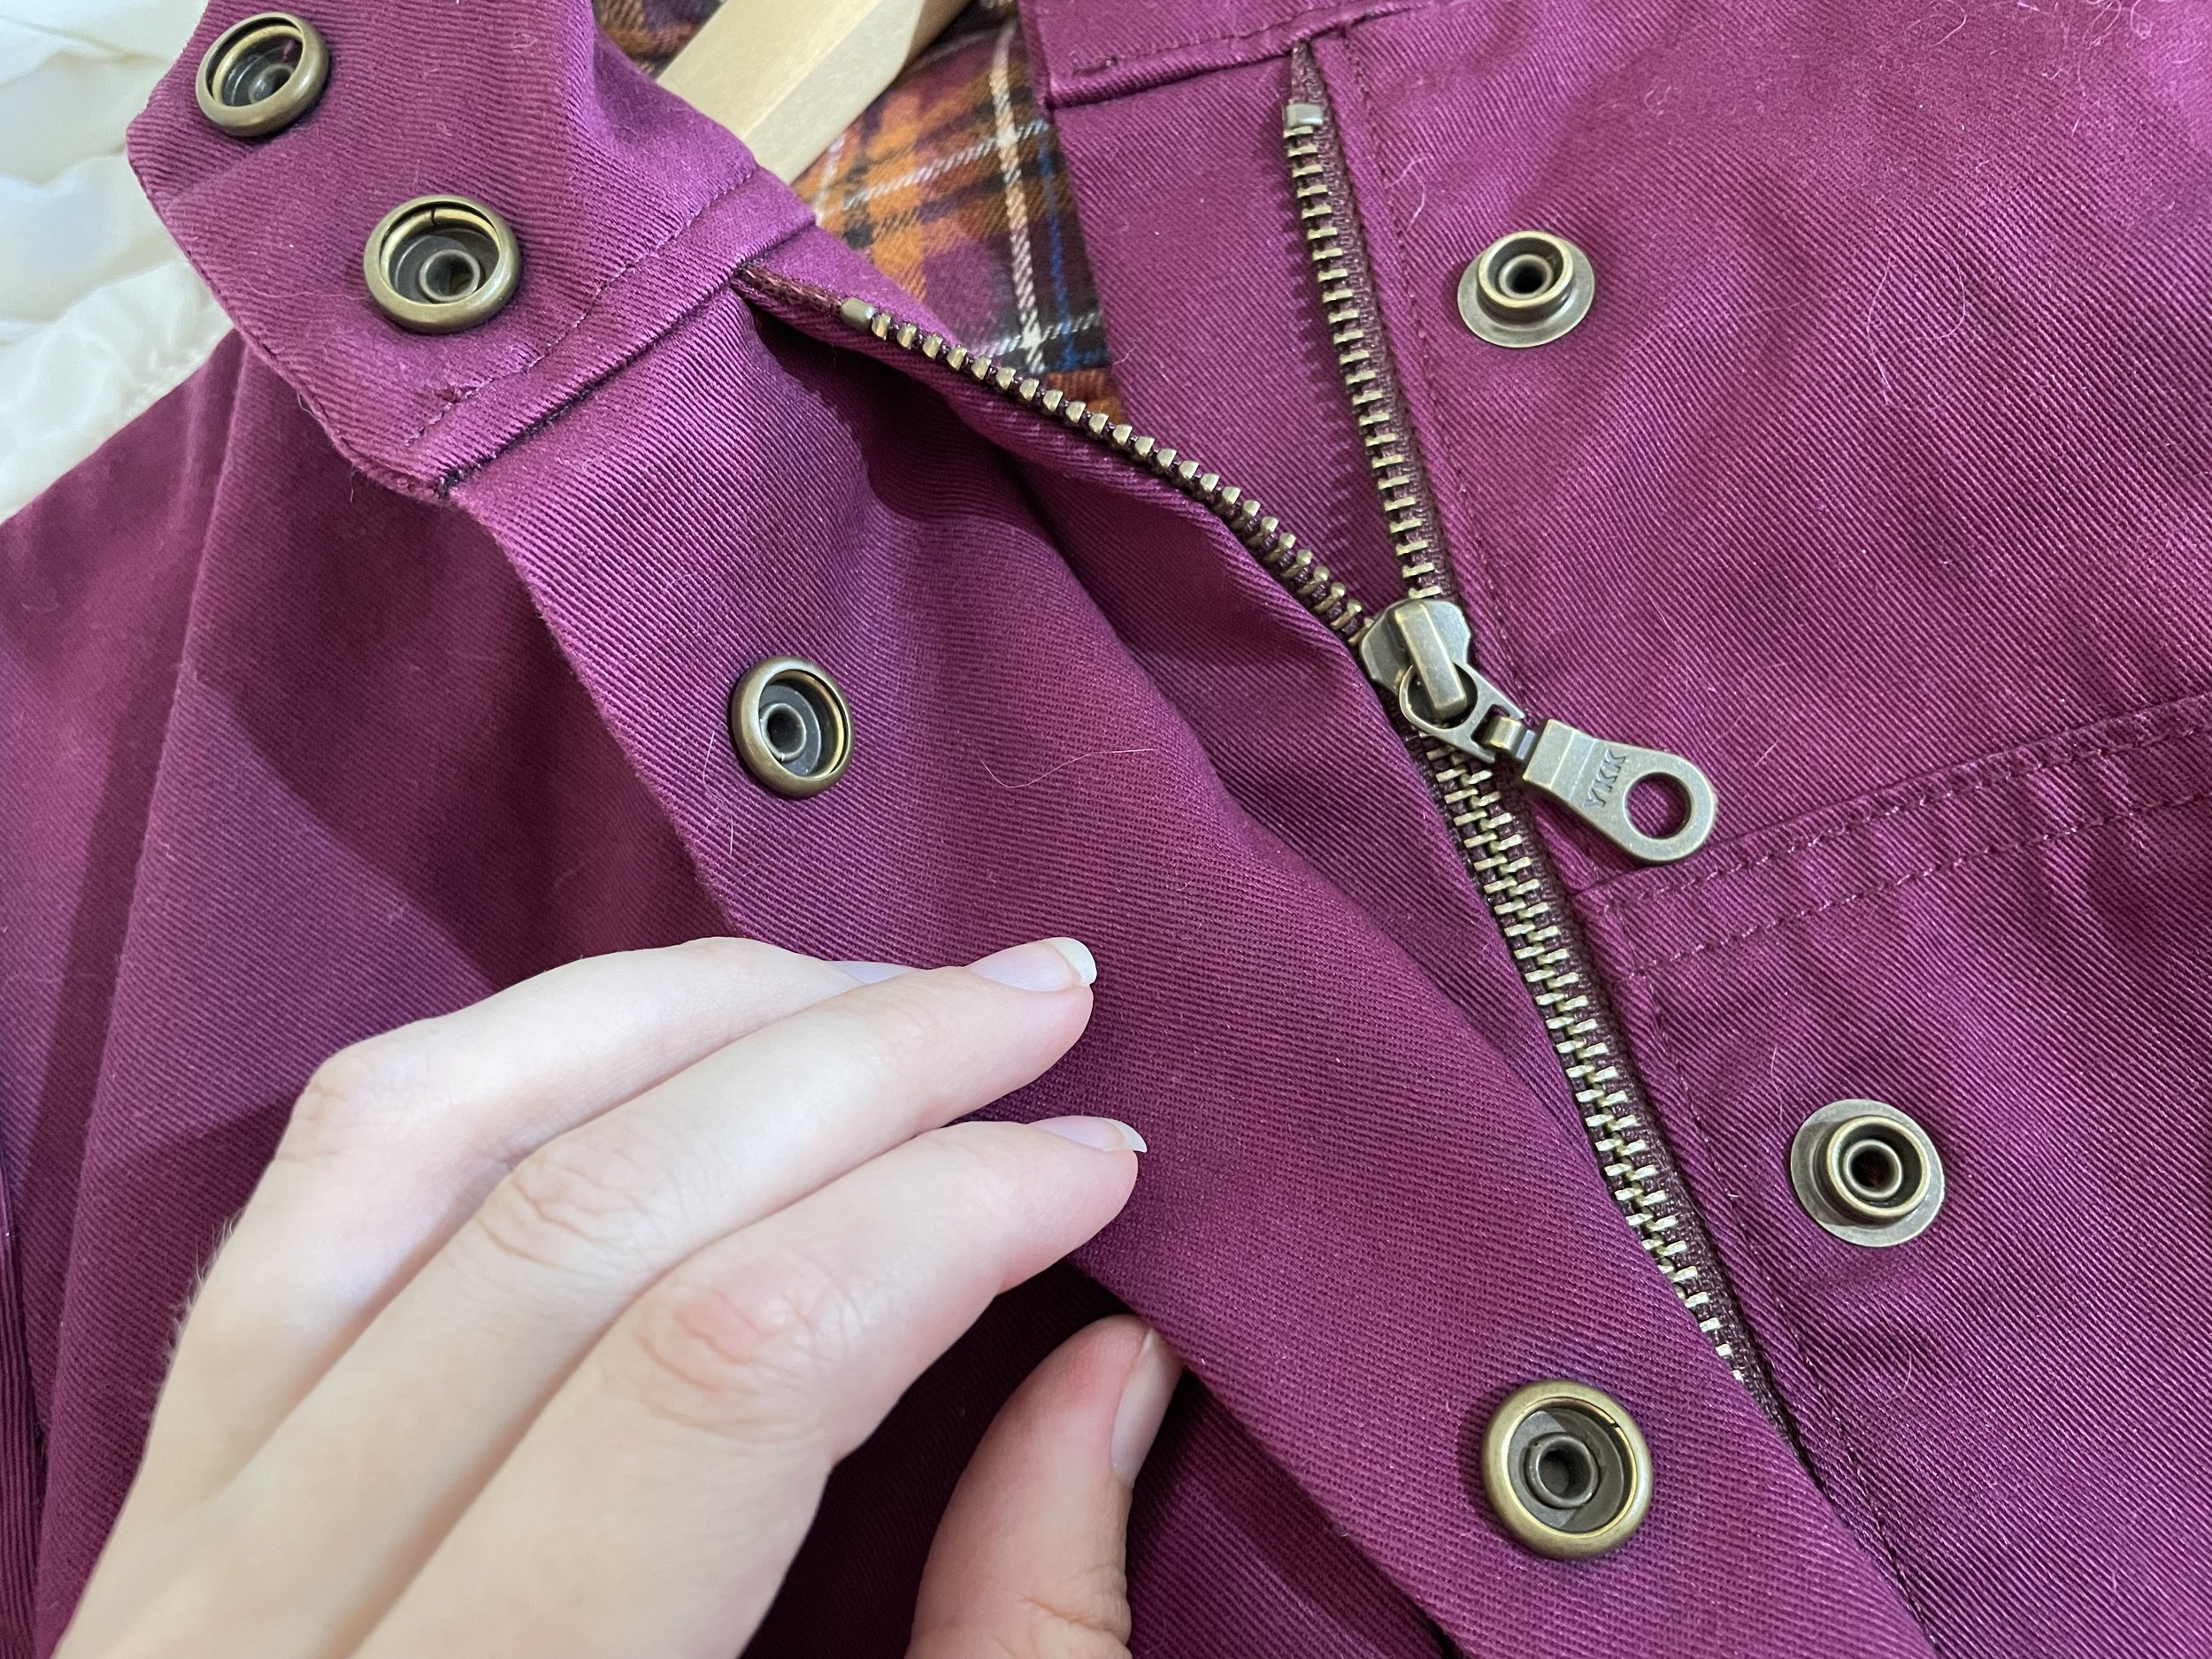
So! Personal recommendations? Utility snaps are hit or miss - they’re great for firm fabrics - my Kelly Anorak, utility garments or bags, etc - but they’re just too strong for baby clothes. Spring snaps are great, but they're more than twice as expensive per snap as the KAM snaps which in my opinion are similar on the snappability scale. If you're looking at one or two onesies, Spring snaps or open-ring/prong snaps would be cheaper than the outlay for KAM snaps though. Prong snaps are good for certain uses - I used mine for the inseam placket on a sleeper suit because they're lower profile and I was applying them to two layers of fabric plus interfacing, rather than a knit binding. One could also make the binding wider or grade to reduce bulk, which would make the prong snaps a better option. Overall, I'd say that the KAM snap wins hands down, but the setup is not without its disadvantages, and if cost were no object I think spring snaps would have a better chance in this fight. That said, you may find that after you get your hands on a pair of KAM snap pliers, you suddenly find yourself wanting to install snaps on EVERYTHING... just me? oh... okay.
This little guide was a result of my quest to find the ideal snap for the baby clothes I've been making, so I hope you find it useful as well! If you have any questions (or if I've left off your favorite snap!) let me know in the comments - I'd love to hear from you!