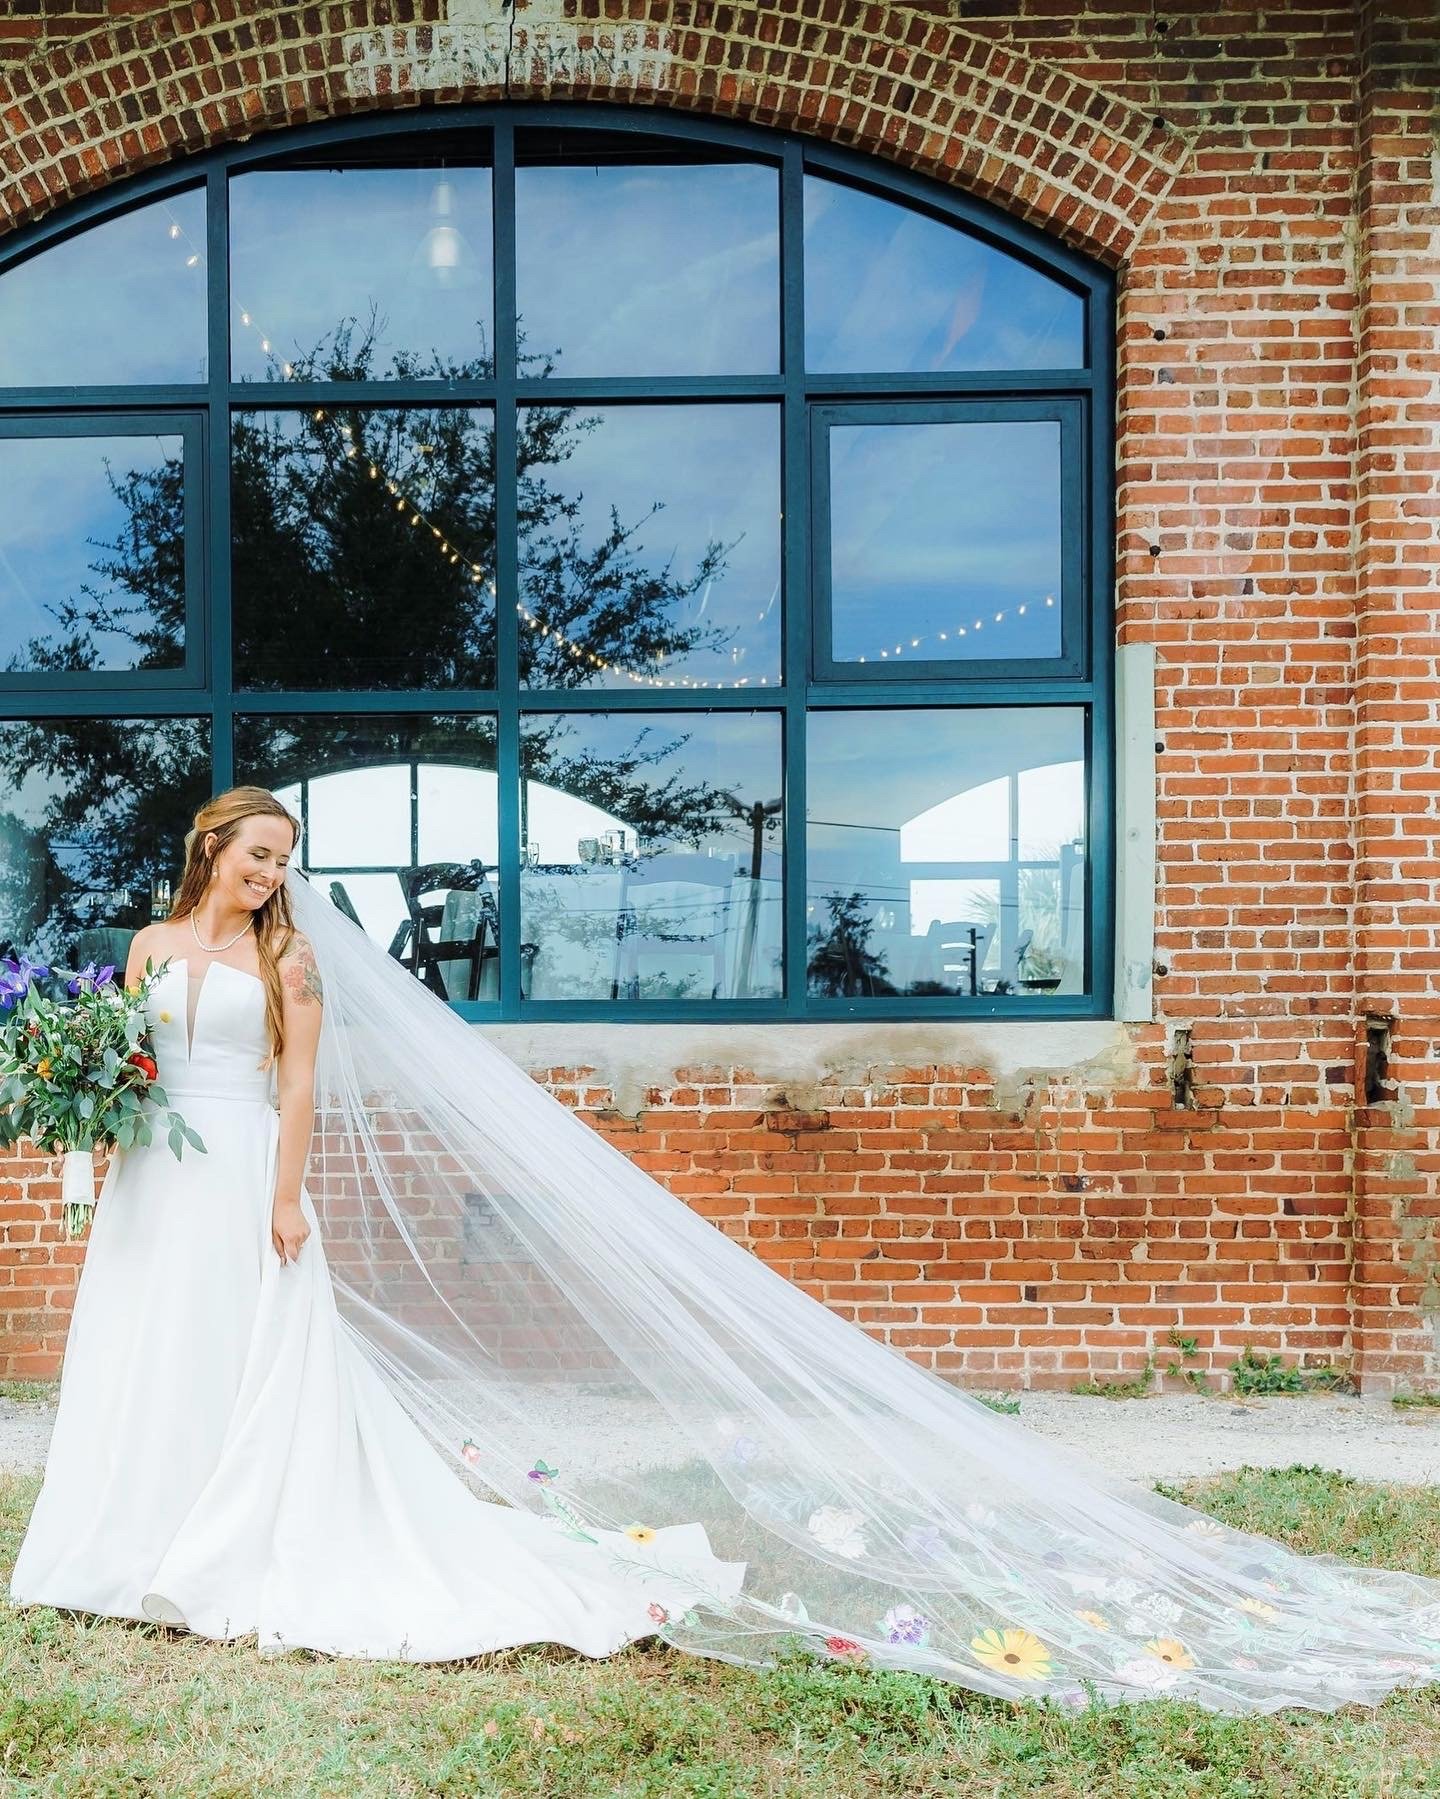
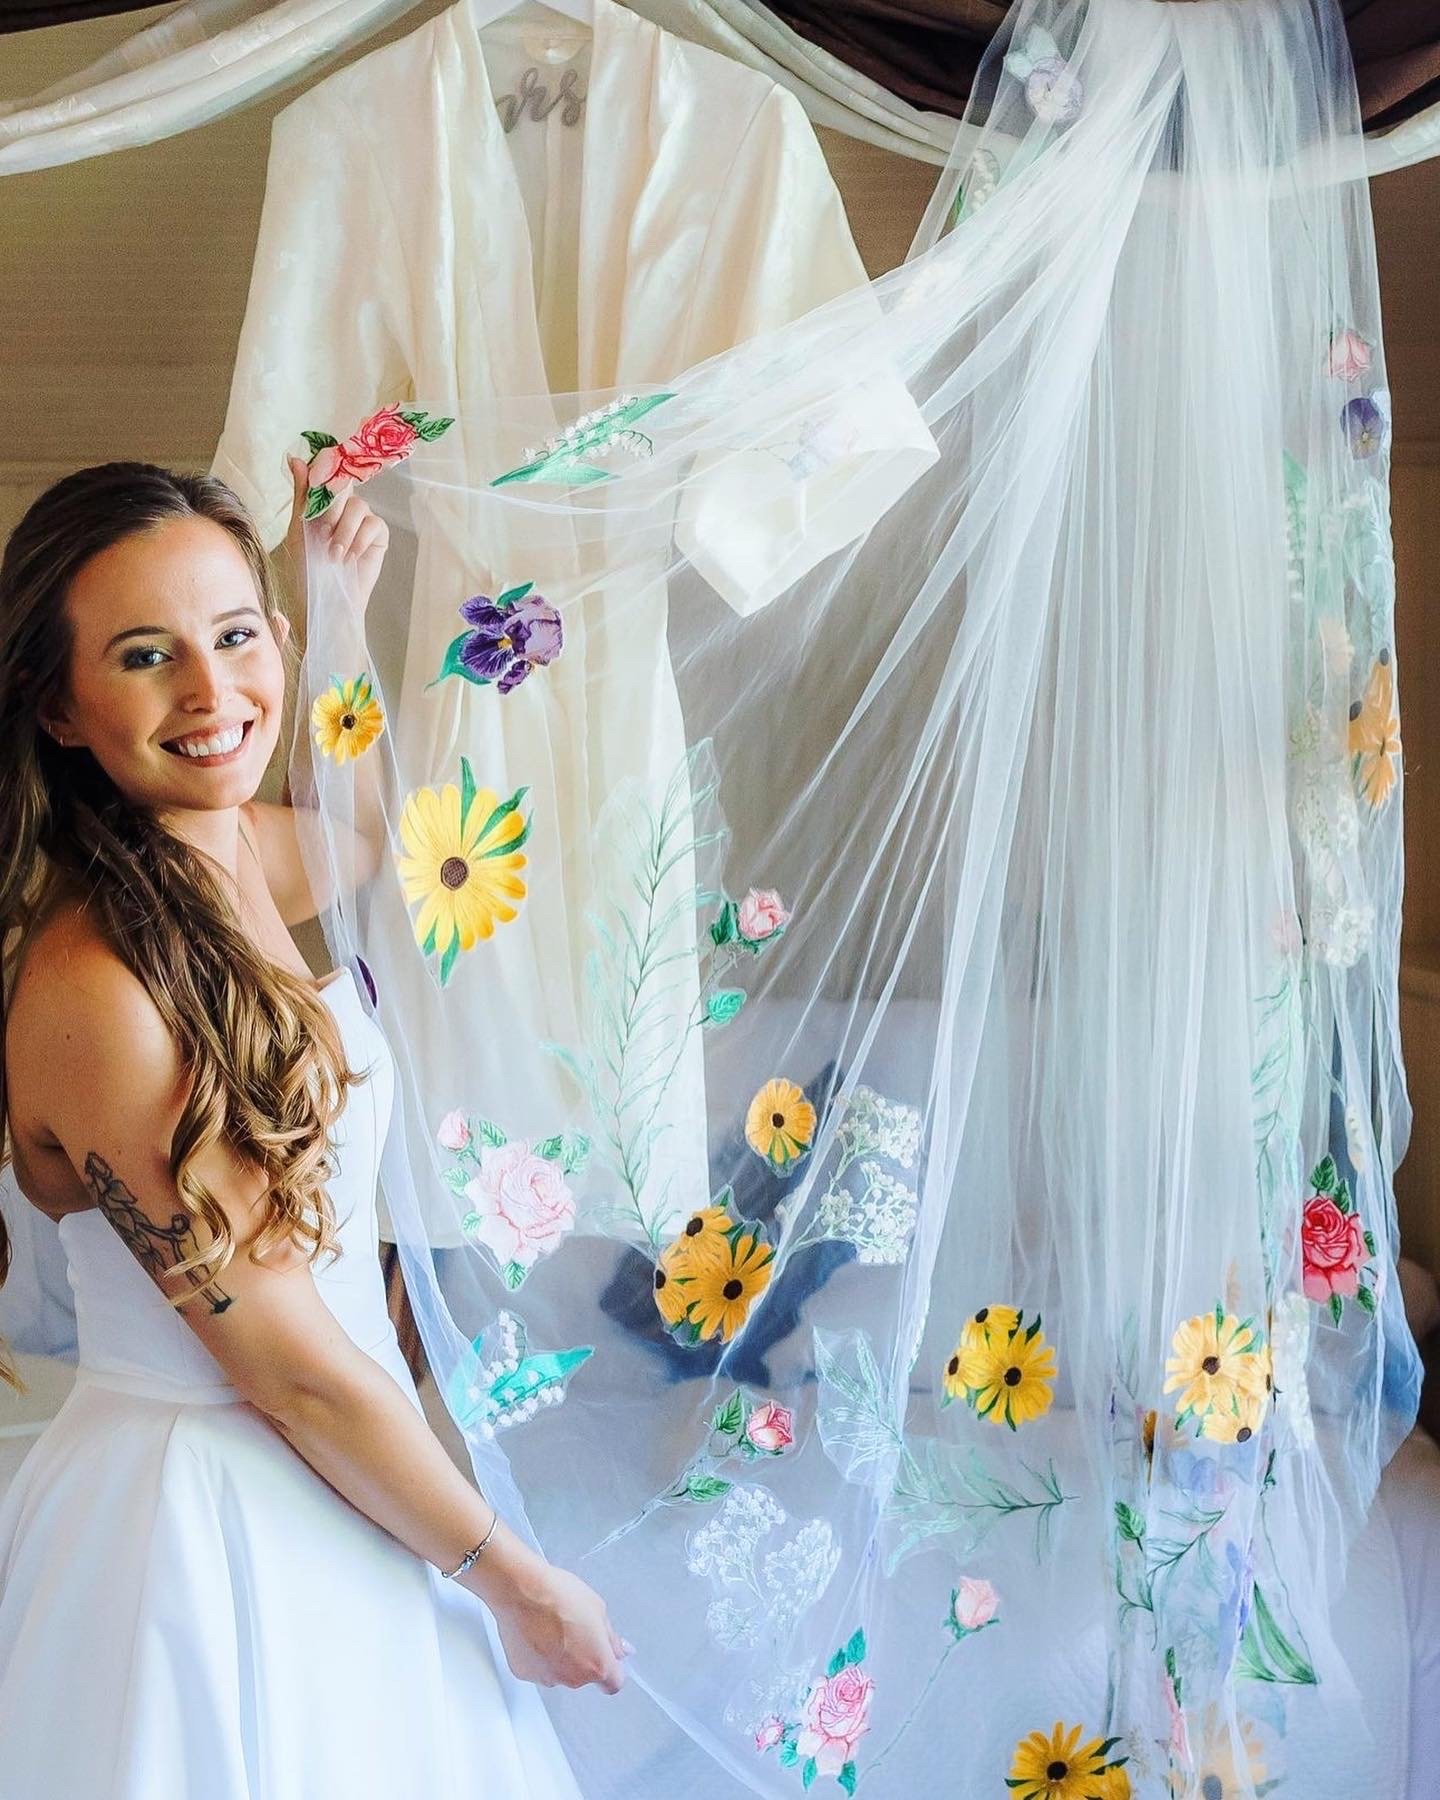
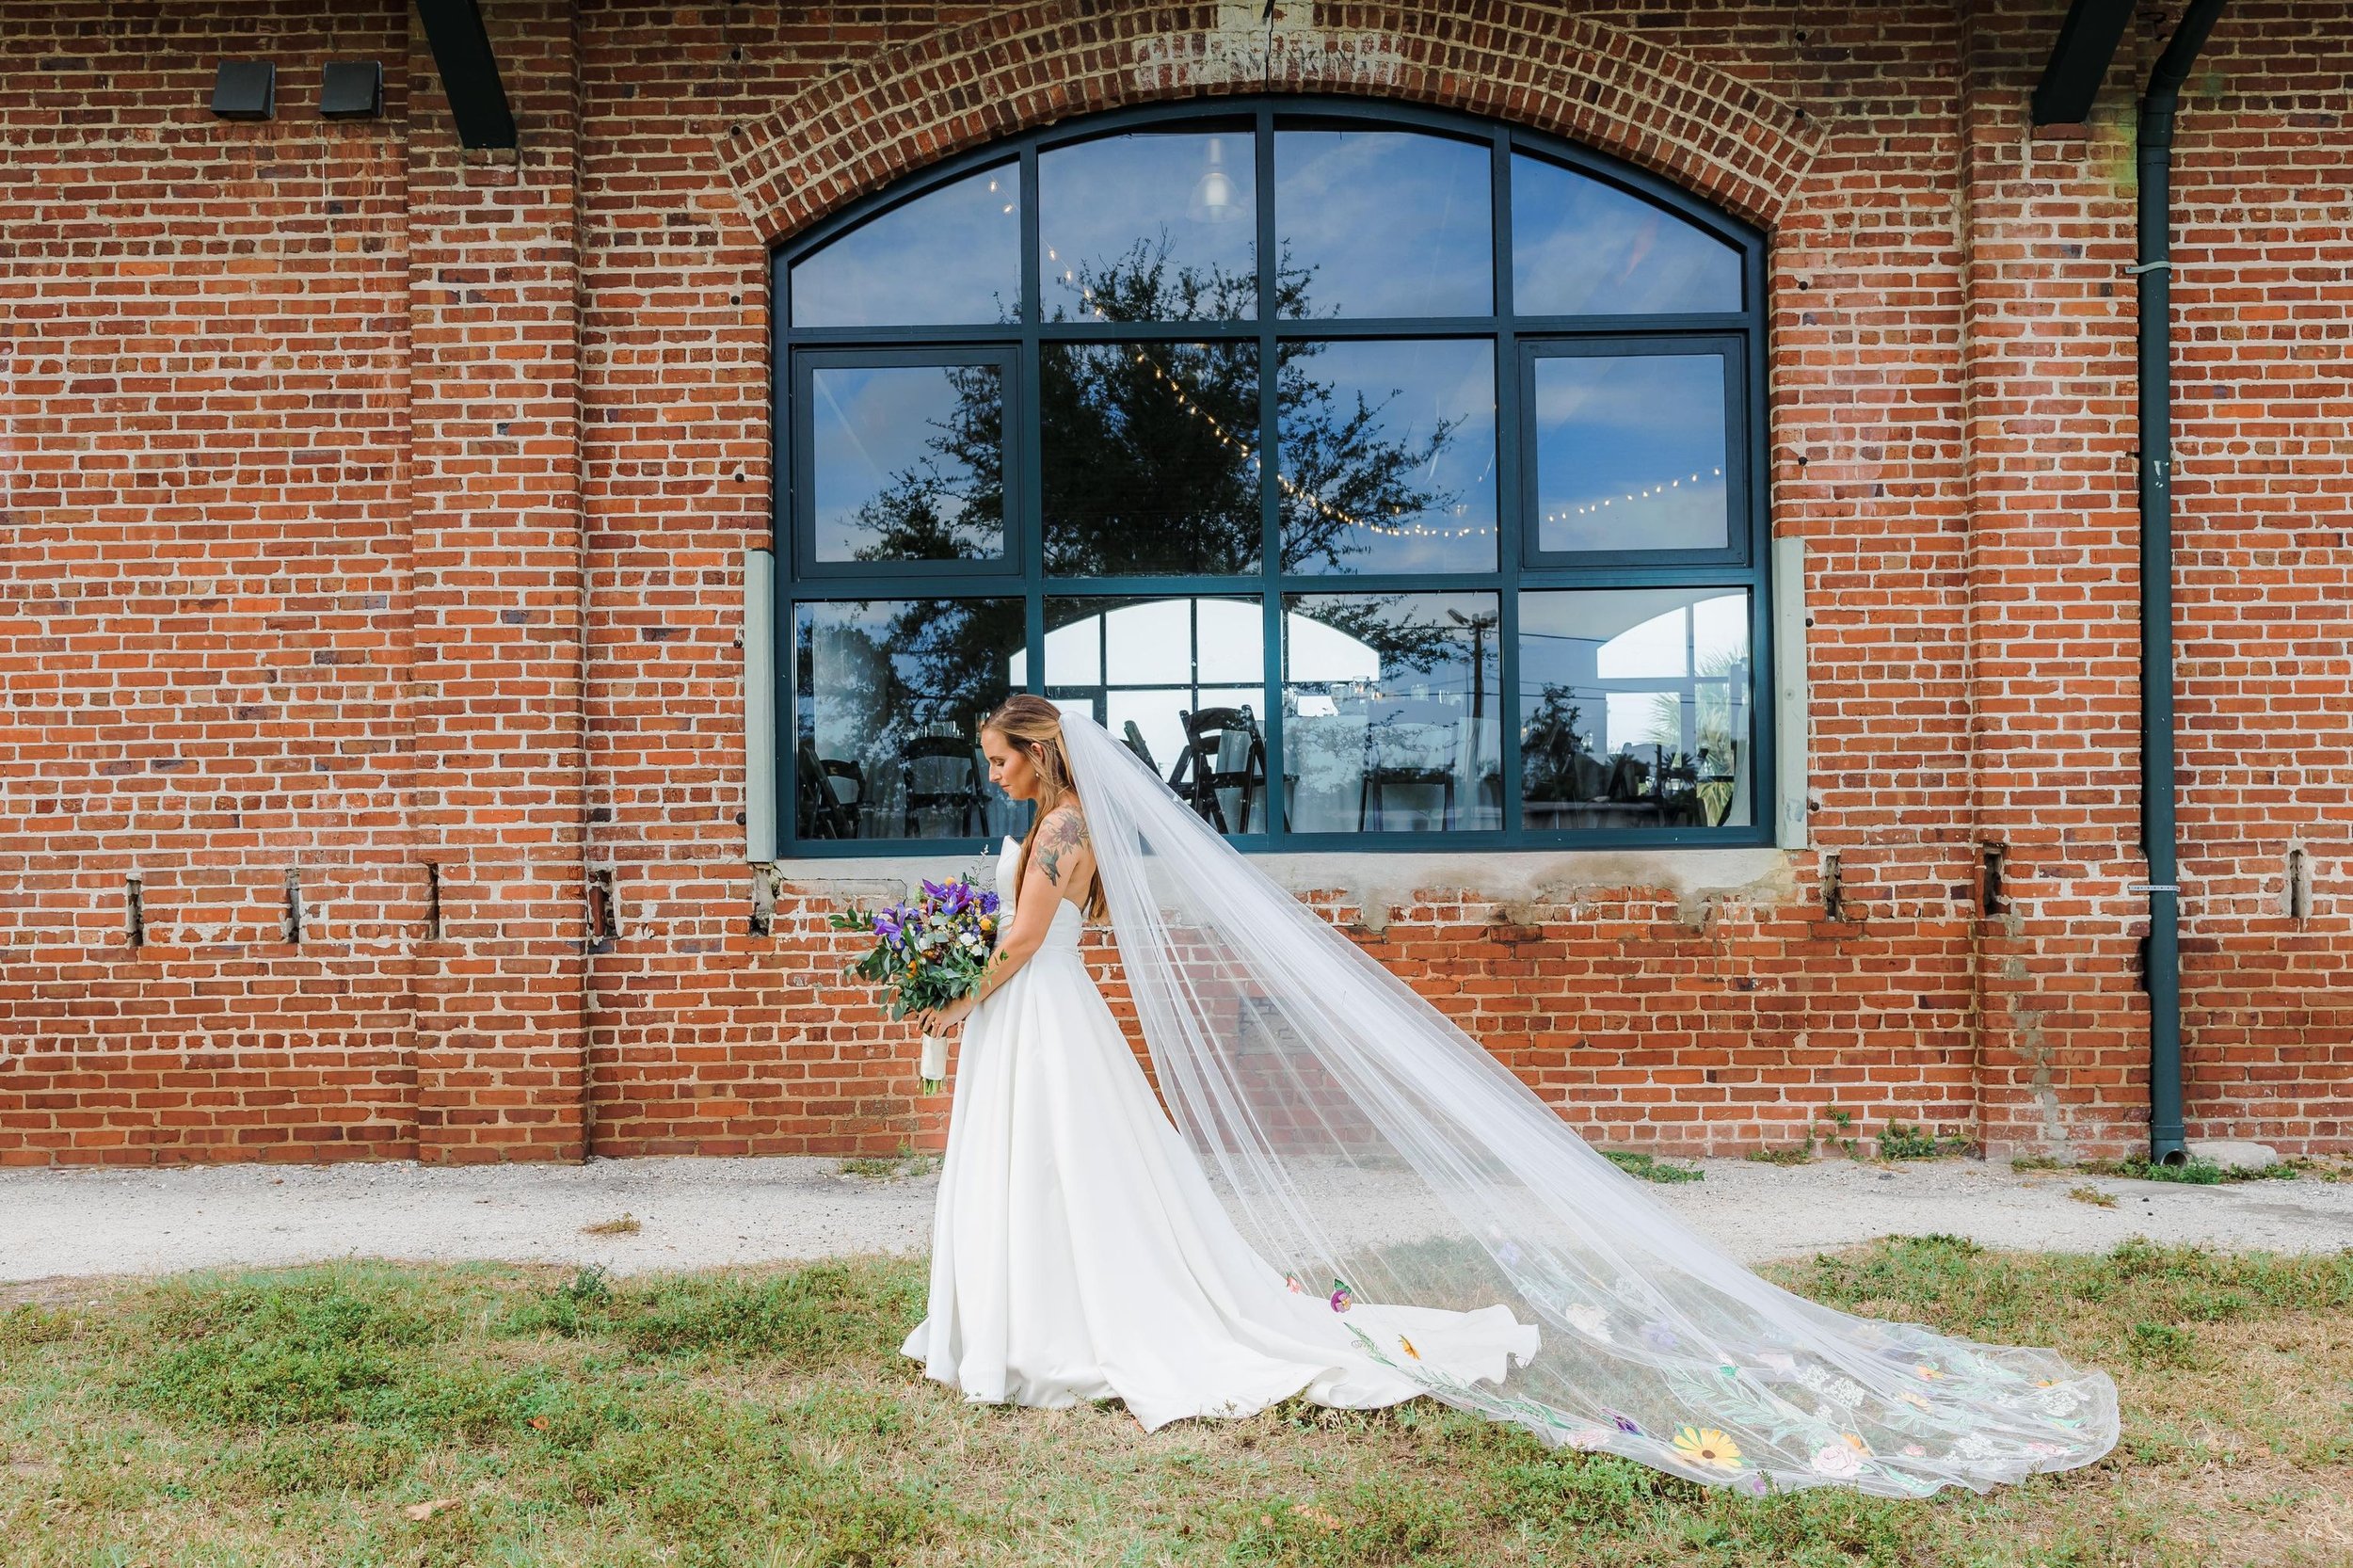
Meet my sister, Lillian! Today’s post is a long one, but I want to tell you about the cathedral-length veil I made for her wedding, so hang on to your hats… and maybe go grab a hot drink - I told you it’s a long one!
I have two sisters. You’ll remember I made my own wedding dress - but I also made all three of our prom dresses, so the concept of working on something for each wedding (if/when it happened) was more or less understood. Making dresses from half a world away is a bit too much, but a veil? Well. A veil’s very easy to fit from a distance!
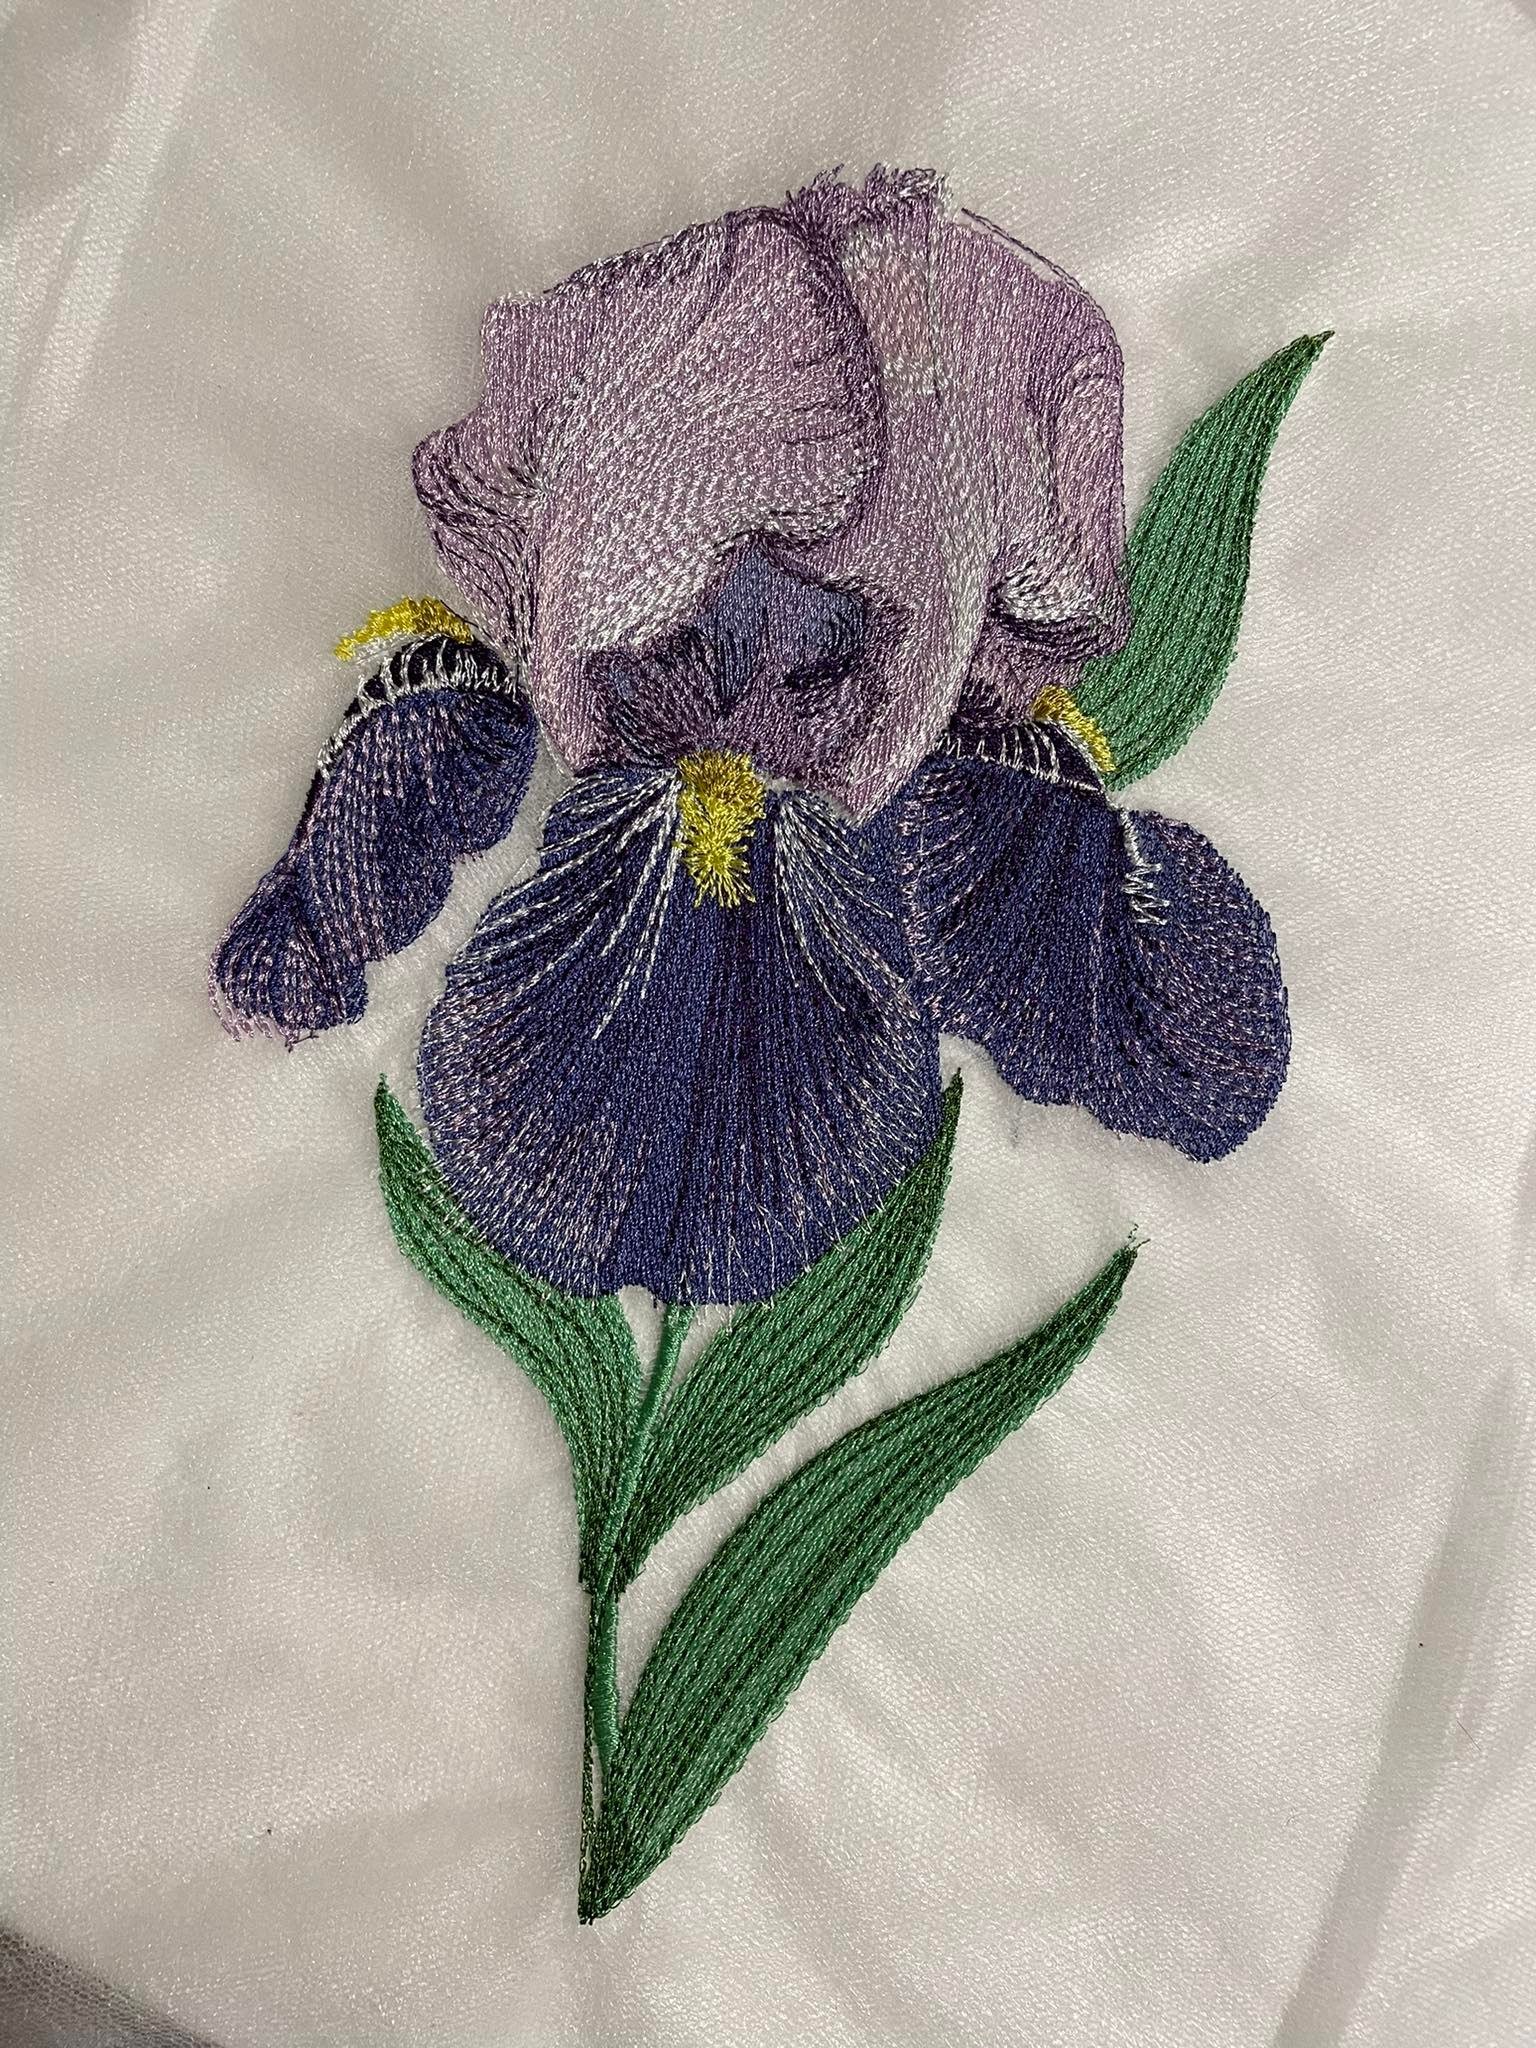
Lill’s dress was quite modern, and she wanted to pull some colour in with embroidered flowers on her veil. The dress had a short train, so the veil would extend beyond the edge at full cathedral length (“Cathedral length” equals 3 metres, or 108 inches!). The flowers were also specific - a list of particular flowers in particular colours that are all, in varying ways, significant. I realised pretty quickly that since the list of flowers was so specific I’d need to draw and digitise each one myself rather than hunting down existing embroidery designs online - especially considering they’d all be gathered together in one place, so consistency was important! Before I got that far though, I needed to figure out whether it would even be possible to get a good result with machine embroidery on tulle.
I’m using the bernette 79 - it’s a combination embroidery/sewing machine at the top end of Bernina’s bernette range. I’ve had this machine for almost two years as of the writing of this post, but when I started Lill’s veil it had been less than six months - plus, we’d just bought and moved into our first house so it’s safe to say there wasn’t terribly much sewing going on at the beginning of our relationship! Lill’s veil was my first significant embroidery project with this machine, and I was still getting to know her!
I started with scraps - I tested one of the bernette’s built-in flower designs on a piece of scrap tulle using the supplies I thought would be most likely to work:
60wt bobbin thread (thinner than standard sewing thread to decrease bulk)
Rayon machine embroidery thread (the silky kind that comes on a little cone - I used Simthread)
water-soluble nonwoven stabiliser (this is NOT the transparent, plasticky Solvy-type stabiliser - this stuff kind of has the consistency of one of those reusable shopping bags, but it’s water soluble)
I used one layer of tulle and one layer of the stabiliser to start with - intending to need to fuss around a bit to get things right… but it worked on the first try! I did end up lowering my thread tension from the default 4 to 2.75 after the first colour of my test - the fabric is so thin that I wanted to have the upper, colourful threads pull down underneath the embroidery to neaten the edges. This worked so well that I kept the 2.75 tension for the entire rest of the veil project!
I can’t understate how useful this water soluble stabiliser has become in my sewing practice. It’s extremely strong, with zero mechanical give, which means you can hoop it with abandon when using delicate fabrics like tulle, and then lay the tulle gently on top. Since it washes away, puckering is a problem of the past - I love it! I bought mine in bulk rolls on Aliexpress as there are limited local options, but depending on the country you live in you may have better luck.
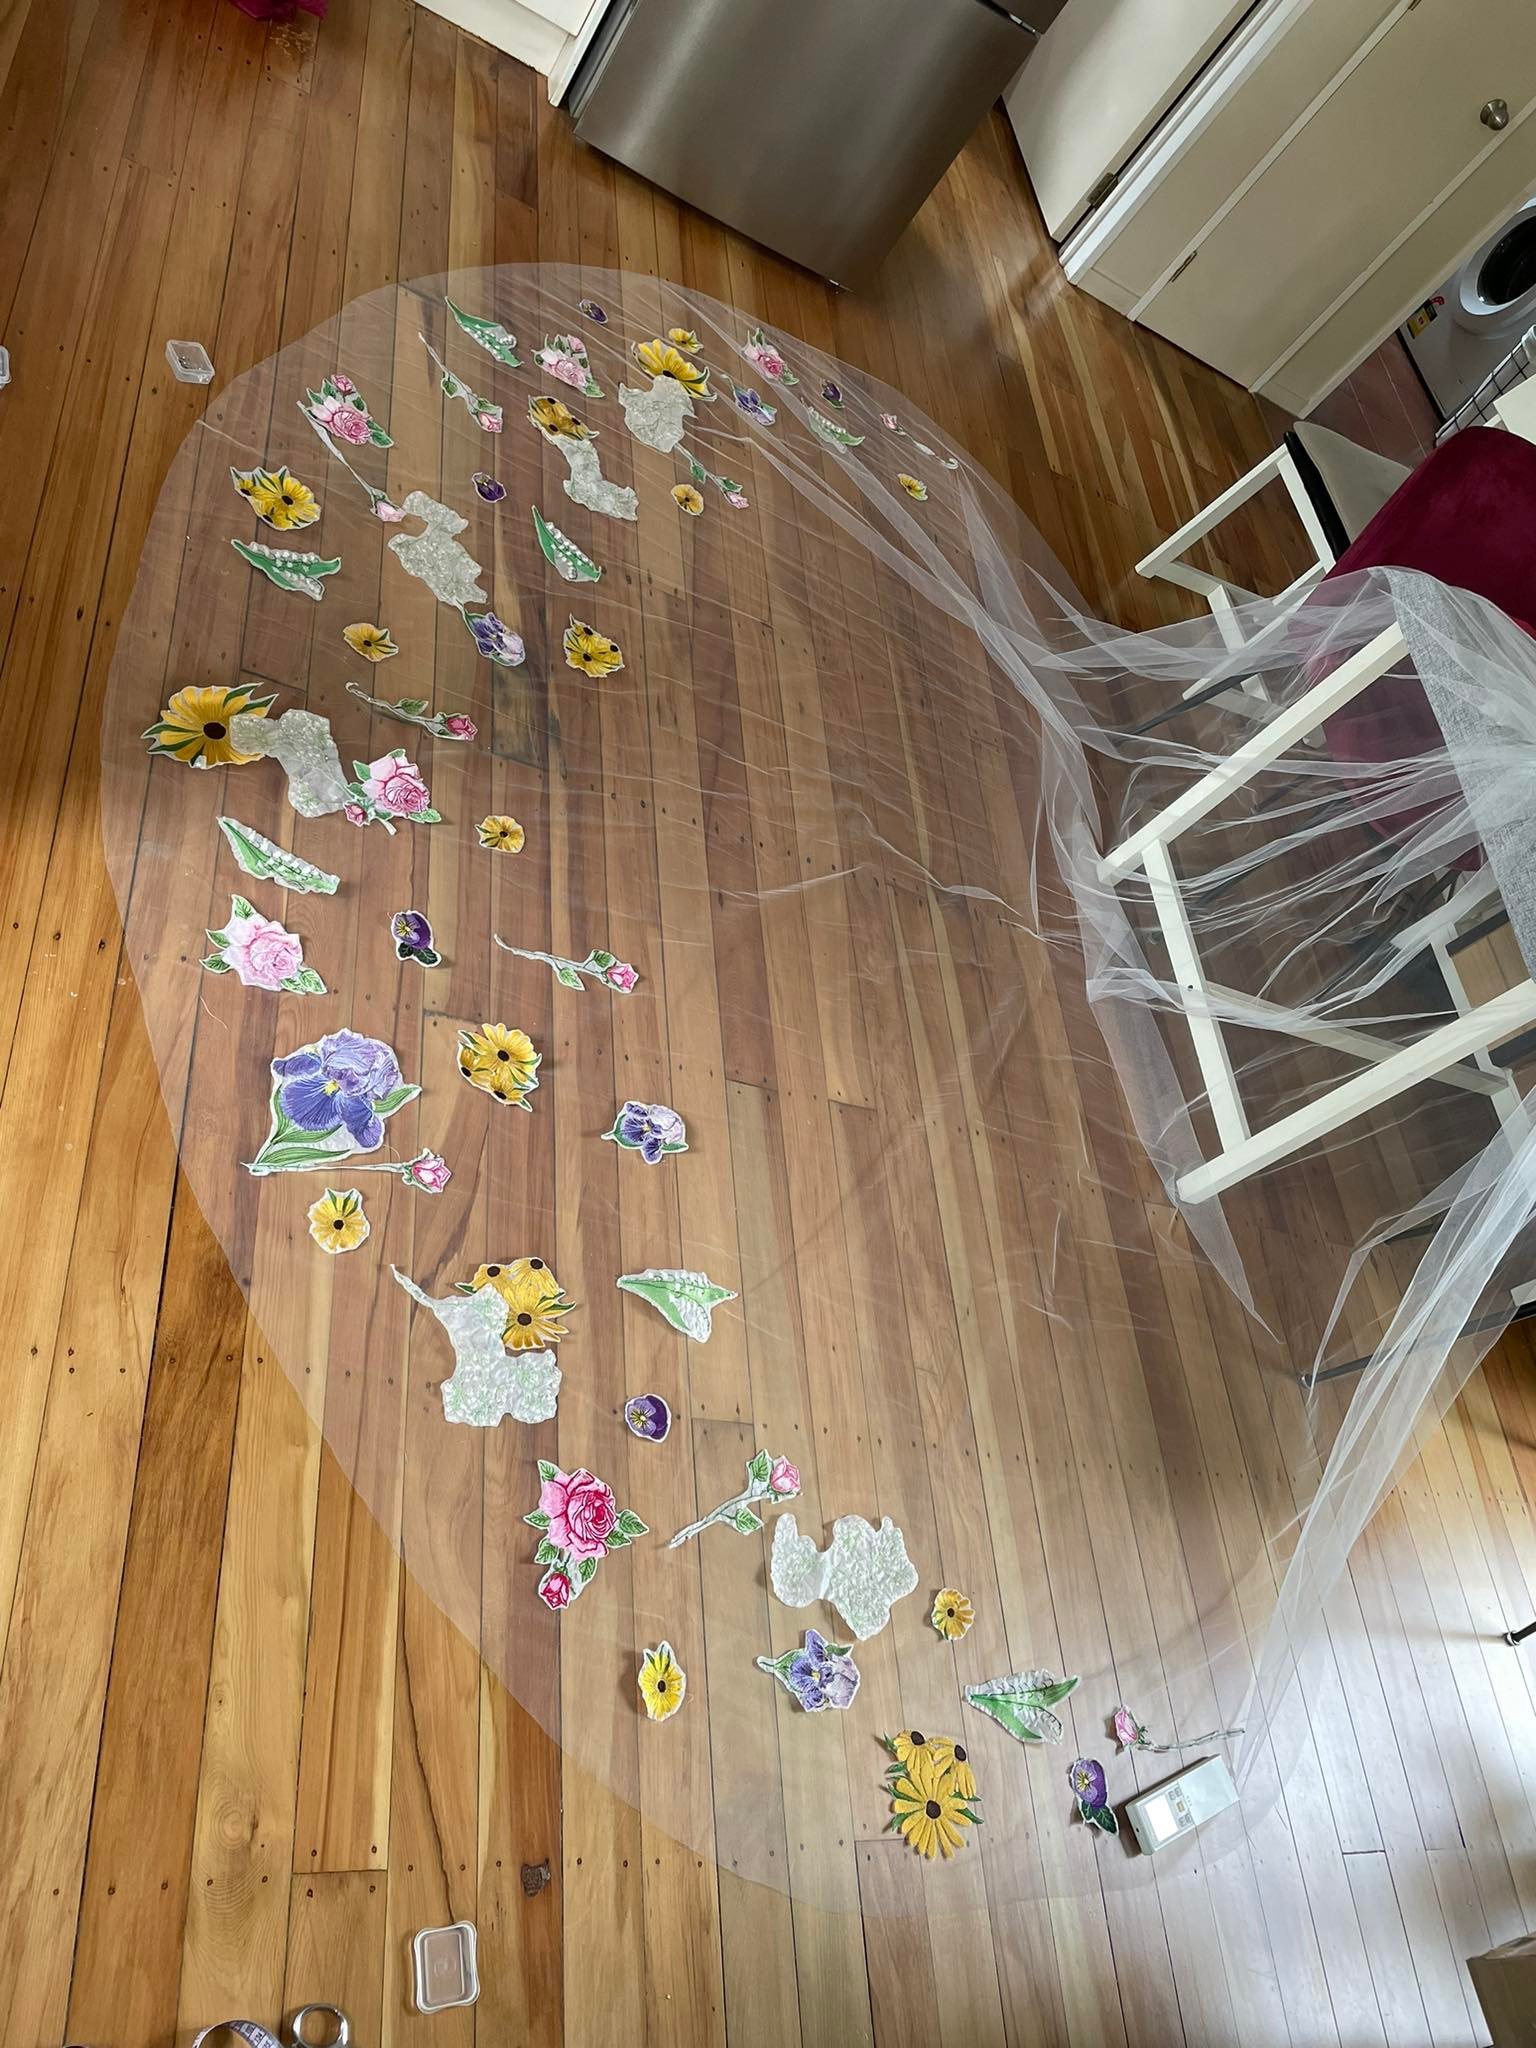
So. We can embroider on tulle and it’s not even as hard as we thought it was going to be. The next thing to sort out was how this project was going to come together. Making the veil itself was quite uncomplicated - it’s three metres of tulle, one end cut in a semicircle for the lower edge, and the other end gathered and stitched to a veil comb. I decided early on that I wanted to stitch the flowers out separately and apply them to the veil as appliqués - if I were to stitch them directly on the veil tulle, it would be impossible to change the flower placement after they were stitched, not to mention the risk of messing up a design or changing my mind about the shade of a particular colour to use. I’m so glad I ended up deciding to treat them as appliqués - we ended up changing our minds quite a few times about how the flowers should be placed, and it was so good to have our options open!
The next big task - we’re not even making the veil at this point - was drawing and digitising the flowers. I’d done a bit of digitising years ago (I used to work for a place that did in-house digitising for logos to be embroidered on shirts and hats and such) but aside from a basic understanding of the steps involved, I was basically starting from scratch.
For digitising software, I chose Embrilliance StitchArtist (Level 3) - the options for embroidery software that is mac compatible are extremely limited, which was how I found Embrilliance in the first place, and it’s also quite well priced for the features you get. I can explore Embrilliance more in depth in a future blog post if you like, but basically - it’s a super powerful digitising software that does everything I need it to do, and I suspect that the reason it’s less expensive than the likes of Hatch is because the user interface is a bit clunky. The manual is a very comprehensive and searchable PDF, so as long as you’re willing to have a hunt for information as you’re learning, it’s definitely manageable! InkStitch is a free digitising option - it’s an add-on to inkscape, and it does have quite a good wiki as well but it’s a bit glitchy.
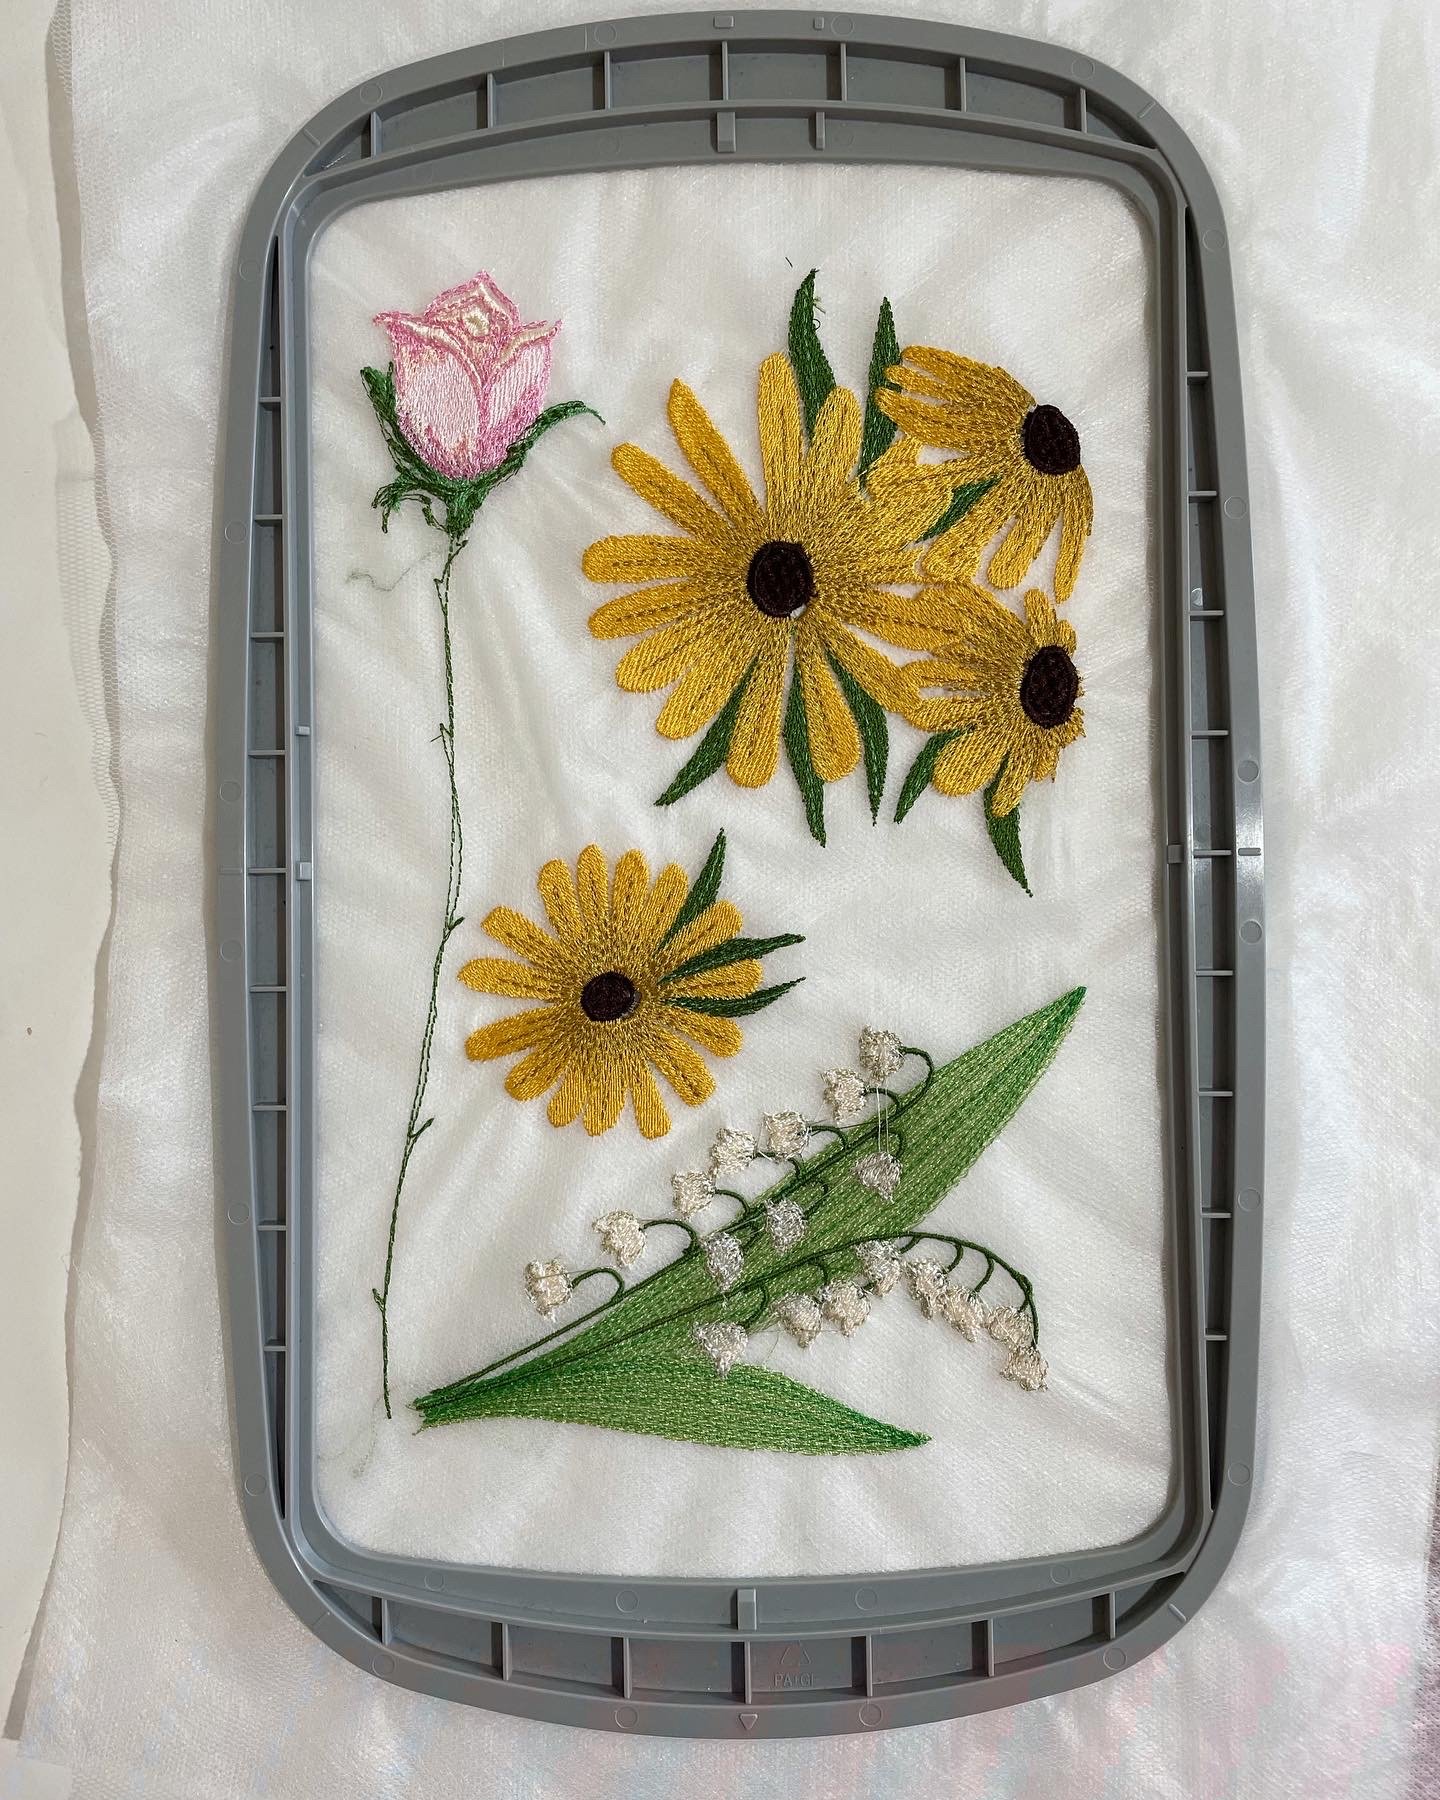
Above, you can see little scraps of blue fabric on the four edges. Since the tulle and stabiliser is so thin, I added these scraps to help the hoop hang on to it a little better - since I was doing multiple embroideries in one hooping, it was starting to loosen up over time.
So. The workflow goes like this:
1, Draw the flower in a vector program (I use Adobe Illustrator for iPad because I have those things, but they are expensive - you can use anything that allows you to save a vector file - I use SVG). When doing this, think about thread colour changes, stacking order, and keep in mind that the paths of the drawing will either be fill areas or lines that the stitching follows.
2. Import into Embrilliance (or other embroidery software) - sort the components of the SVG in the order you want them to stitch out in, assign start and stop points, densities, colours, etc. - and also set the sizing. The digitising process itself is definitely more than I feel I can tackled in this post (again, perhaps separately) BUT if you’re working on designs for tulle like this project, I highly suggest decreasing your stitch density. It’ll help your design stay soft and organic - in general, the lighter the fabric you’re embroidering on, the lighter your density should be.
3. Export from Embrilliance - the bernette 79 has a USB port, so I save my files on a flash drive to bring to the machine. Make sure you save the live file too in case you want to make any changes!
4. Machine and hoop setup - Hoop one layer of tulle and one layer of stabiliser, making sure not to over-stretch the tulle (It’ll pucker quite easily.) Tension down to 2.75, and lay out your embroidery files. The first time I stitched each flower, I did it on its own to test and see how it went to make sure I didn’t need to make any adjustments, and after this final test I used the biggest hoop my b79 came with and crammed as many flowers in as possible to save stabiliser! I also didn’t cut the stabiliser between hoopings, so I ended up with some very fun long trains of embroidered flowers!
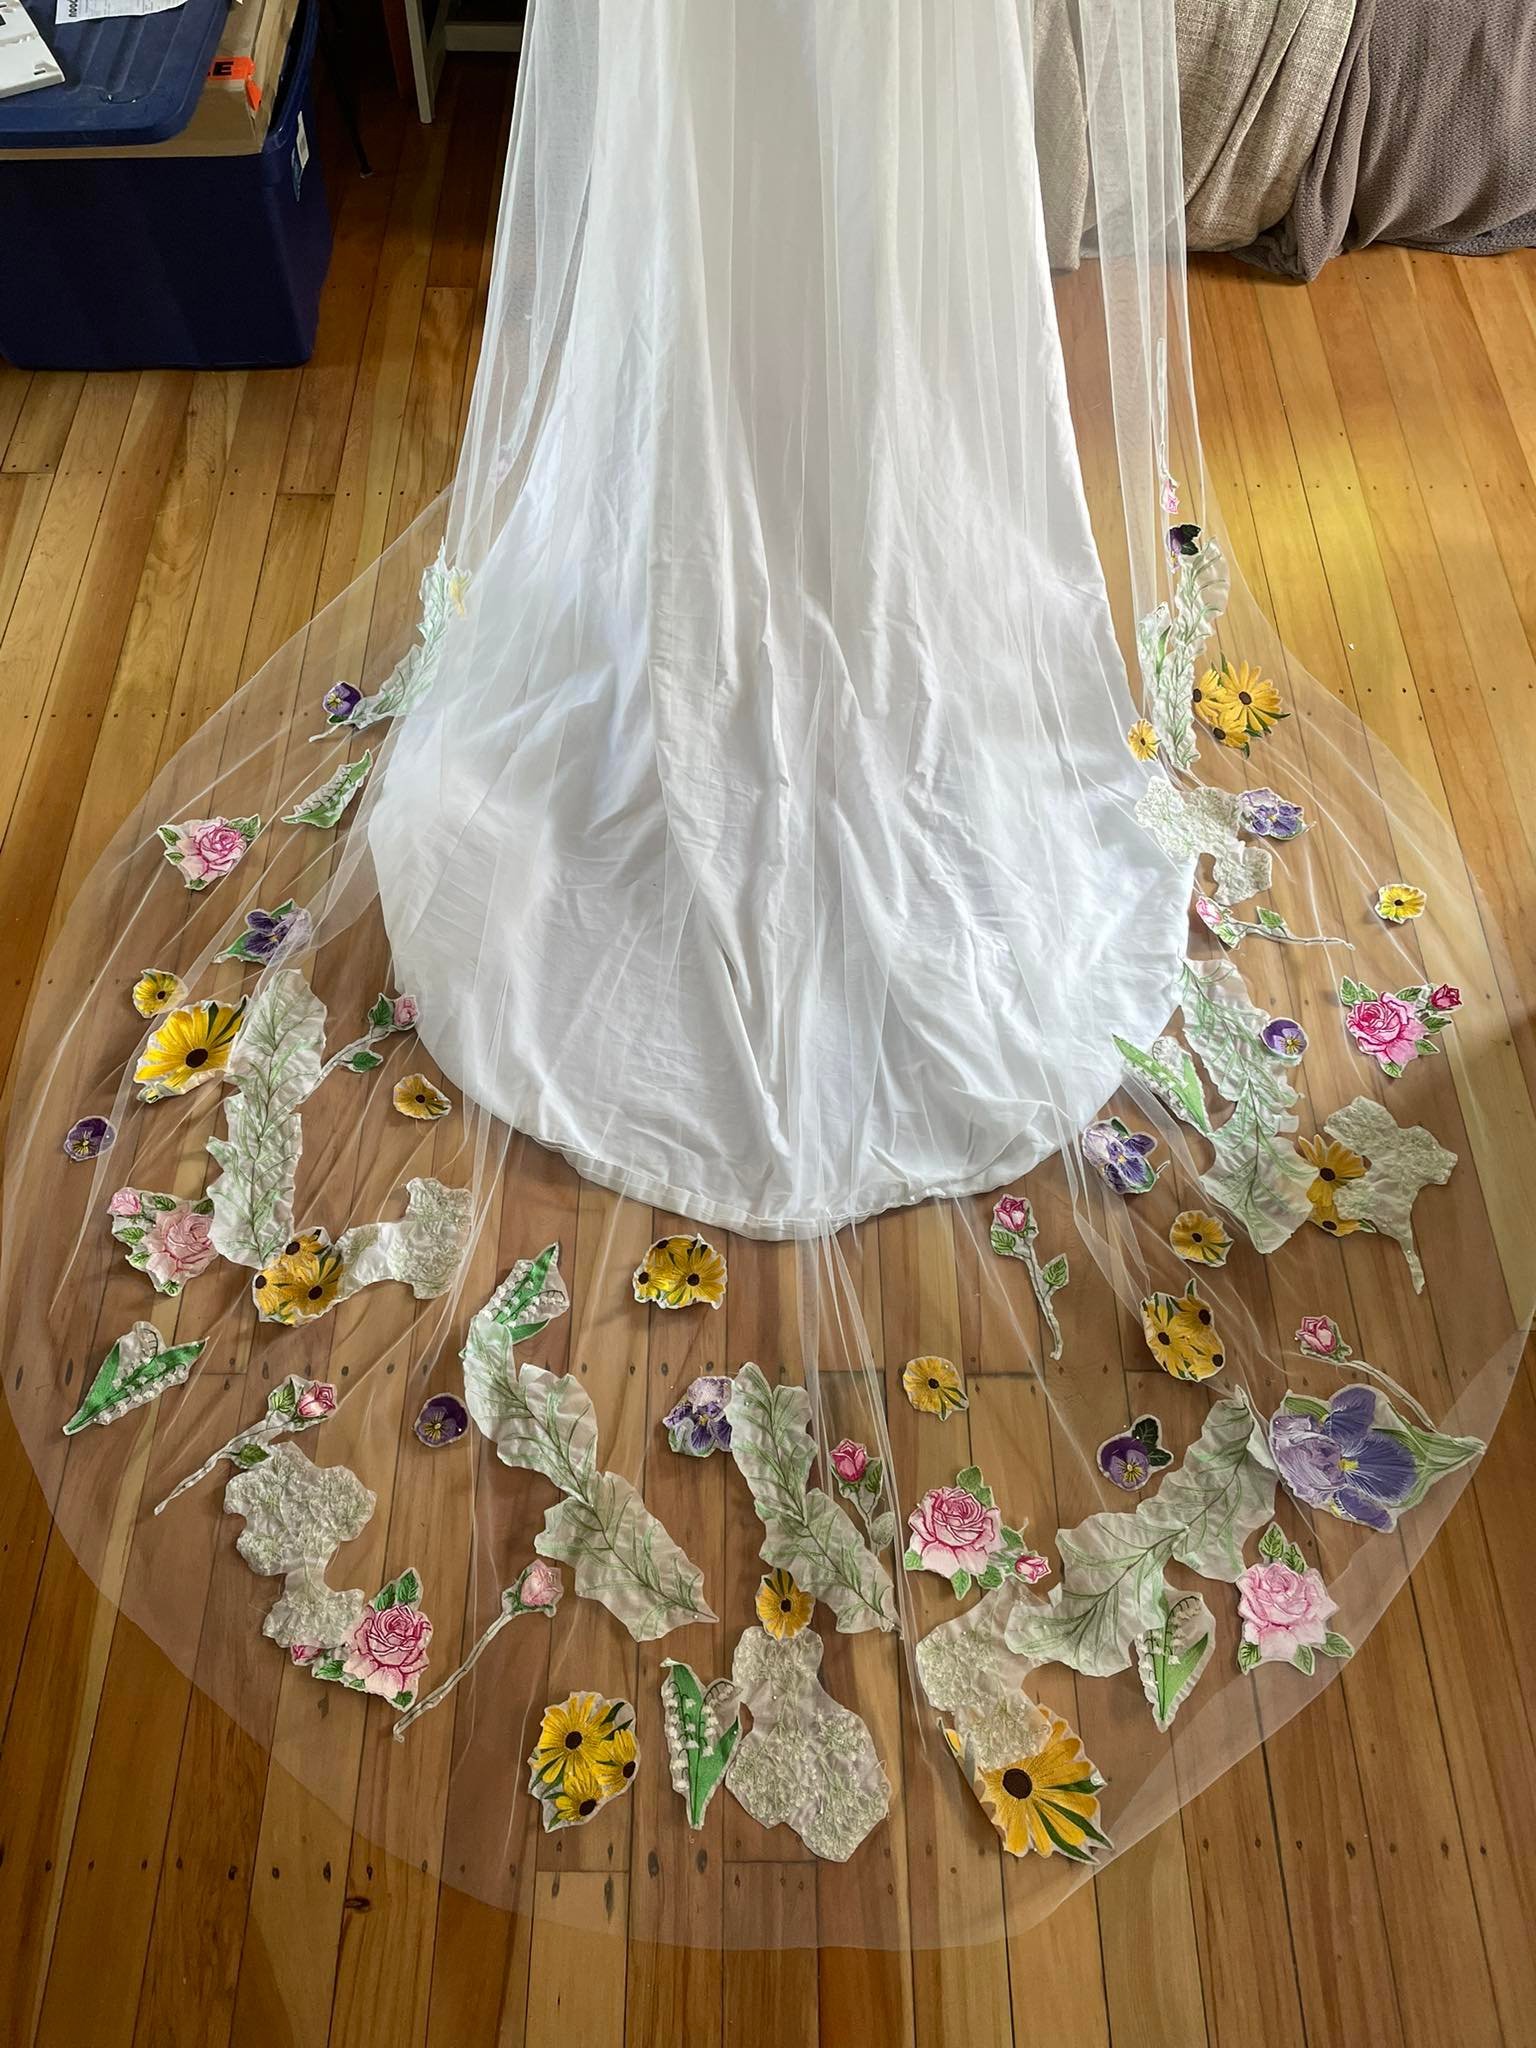
5. After stitching out, I didn’t dissolve the stabiliser right away. I trimmed as close to the edges of the flowers as possible (they won’t unravel as long as you don’t cut any threads) and then laid them out on the veil, pinned in place. I did this over time as I had more flowers, video calling with Lill to check placement, and then once we were happy with everything, I stitched all the flowers down to the veil and THEN dissolved the stabiliser. The flowers are stitched with invisible thread - the clear monofilament kind - and keeping the stabiliser for this part made the process of stitching them down and making sure they wouldn’t pucker easy as pie!
That five step process makes it sound so easy, but this process took months! As part of the layout phase, I draped my dress form in a sheet (the “wedding dress”) and placed a stuff sheep on its neck to stand in for the extra height of the head. Sheep wore the veil so we could establish the length of the train and the length of the veil, and every time I worked on flower placement I brought this setup back out. It’s also worth mentioning that the flowers took a few stitch-out tests to get right before I could make more - I got better at digitising over time, but I made the lazy susans first and those took five or six stitching attempts before I was happy with the result! By the time I did the last things - the eucalyptus and baby’s breath - I had a much better handle on digitising and I got them both on the first try. It’s all about practice!
I had initially estimated the number of flowers we’d need and we turned out needing twice as many which was dramatic in and of itself, especially considering I ran out of stabiliser at one point! the B79 was an absolute beast throughout the process - I feel like I really got to know it during this project, and it was quite willing to take whatever I threw at it.
Once the veil was finally finished - stabiliser washed out and a final press completed - I wedged the whole thing in a courier bag along with a couple of extra flowers that I’d backed with iron-on adhesive just in case they needed to be used as patches - and sent it off to Lill. This, of course, was the height of the covid lockdowns (so I wasn’t able to attend the wedding) and the veil ended up stuck in a Los Angeles sorting centre for nearly a month - it arrived to Lill’s house just in time, the Thursday before her Saturday wedding. To say we were all panicking at that point was an understatement!
I got to watch Lill and Connor get married on a livestream - I wish I could have been there but I’m glad I got to watch this way! Jon and I were there in the form of an almost-life-sized cardboard cutout - you might recognise that as my first Frocktails dress! She also specifically asked the photographer to capture photos of the veil so that I could share it with all of you - the photos turned out so beautifully, and I love how colourful everything looks together!

