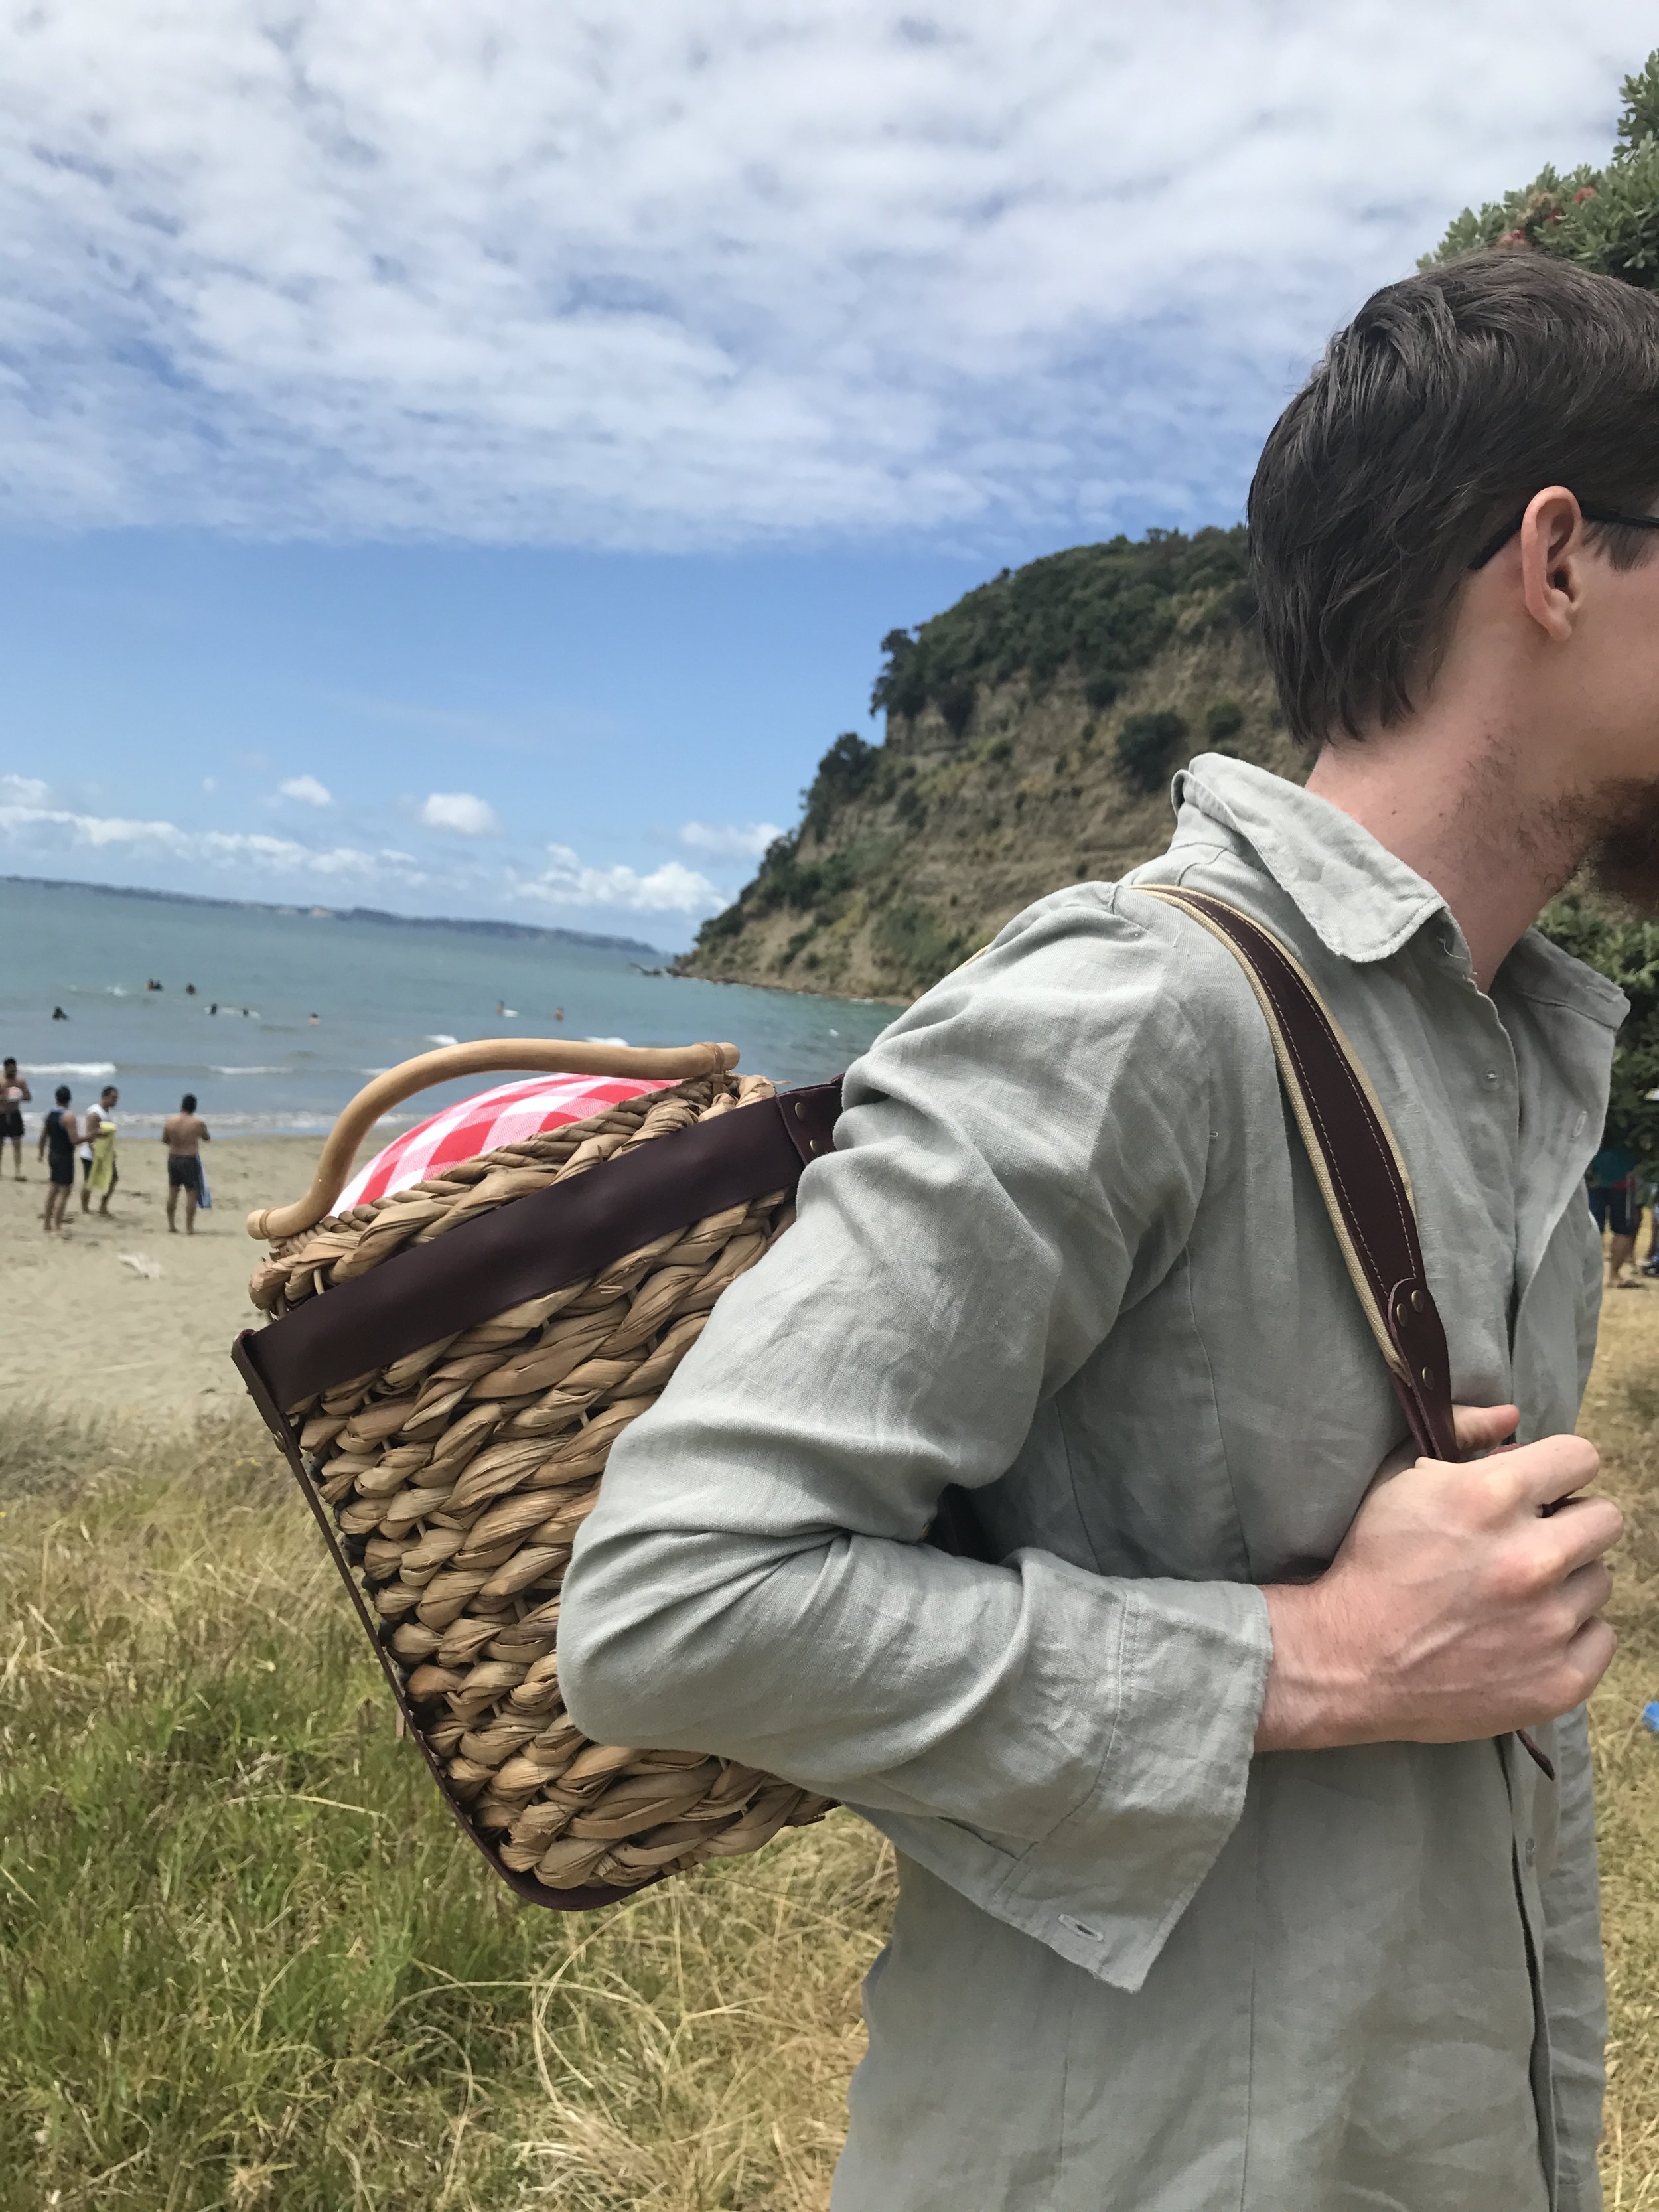
For the last three Christmasses, Jon and I have spent the morning having a picnic on the beach. How many years in a row does it have to be before you call it a tradition? This was the first year we planned it more than a day in advance - and I planned a bit further ahead because I had an extra surprise up my sleeve.
This year, Jon's Christmas gift was a picnic basket, though I admit its creation was at least a little bit selfish. It was actually a much bigger ordeal than you'd think to put together, because baskets of the right shape are in scarce supply in New Zealand, apparently. There are a lot of readily available picnic options, but all the basket type ones were suitcase shaped, so you'd end up carrying your food on its side (spilled salad dressing anyone?). There are some non-baskets: just an insulated soft sided cooler, but that doesn't really scream 'picnic on the beach' to me as much as it does 'soccer mom in charge of juice boxes' and I'm just not about that life. (Of course, the week after Christmas I found upright baskets in a shop - not nearly as nice looking though!)
Instead of settling for what was apparently the ill-fitting 'ready to wear' equivalent of the outdoor dining world, I decided to take matters in to my own hands. Instead of searching for the perfect picnic basket, I focused my efforts on the perfect basket. Our particular gem was discovered in the home wares section of Freedom Furniture - the perfect size for a two- to three- person picnic, and upright to allow for minimal jostling during transport. Then, I hopped across the parking lot to Spotlight and grabbed a bit of cute cotton gingham fabric and some horrible, polyester insulated batting called "Insul-Bright" that goes against everything I believe about wearability and breathability and natural fibers, but was also the only thing I could find that would keep our snacks and drinks cold. It's not like I'll be actually wearing the thing, and covering it in cotton at least means I don't have to touch it.
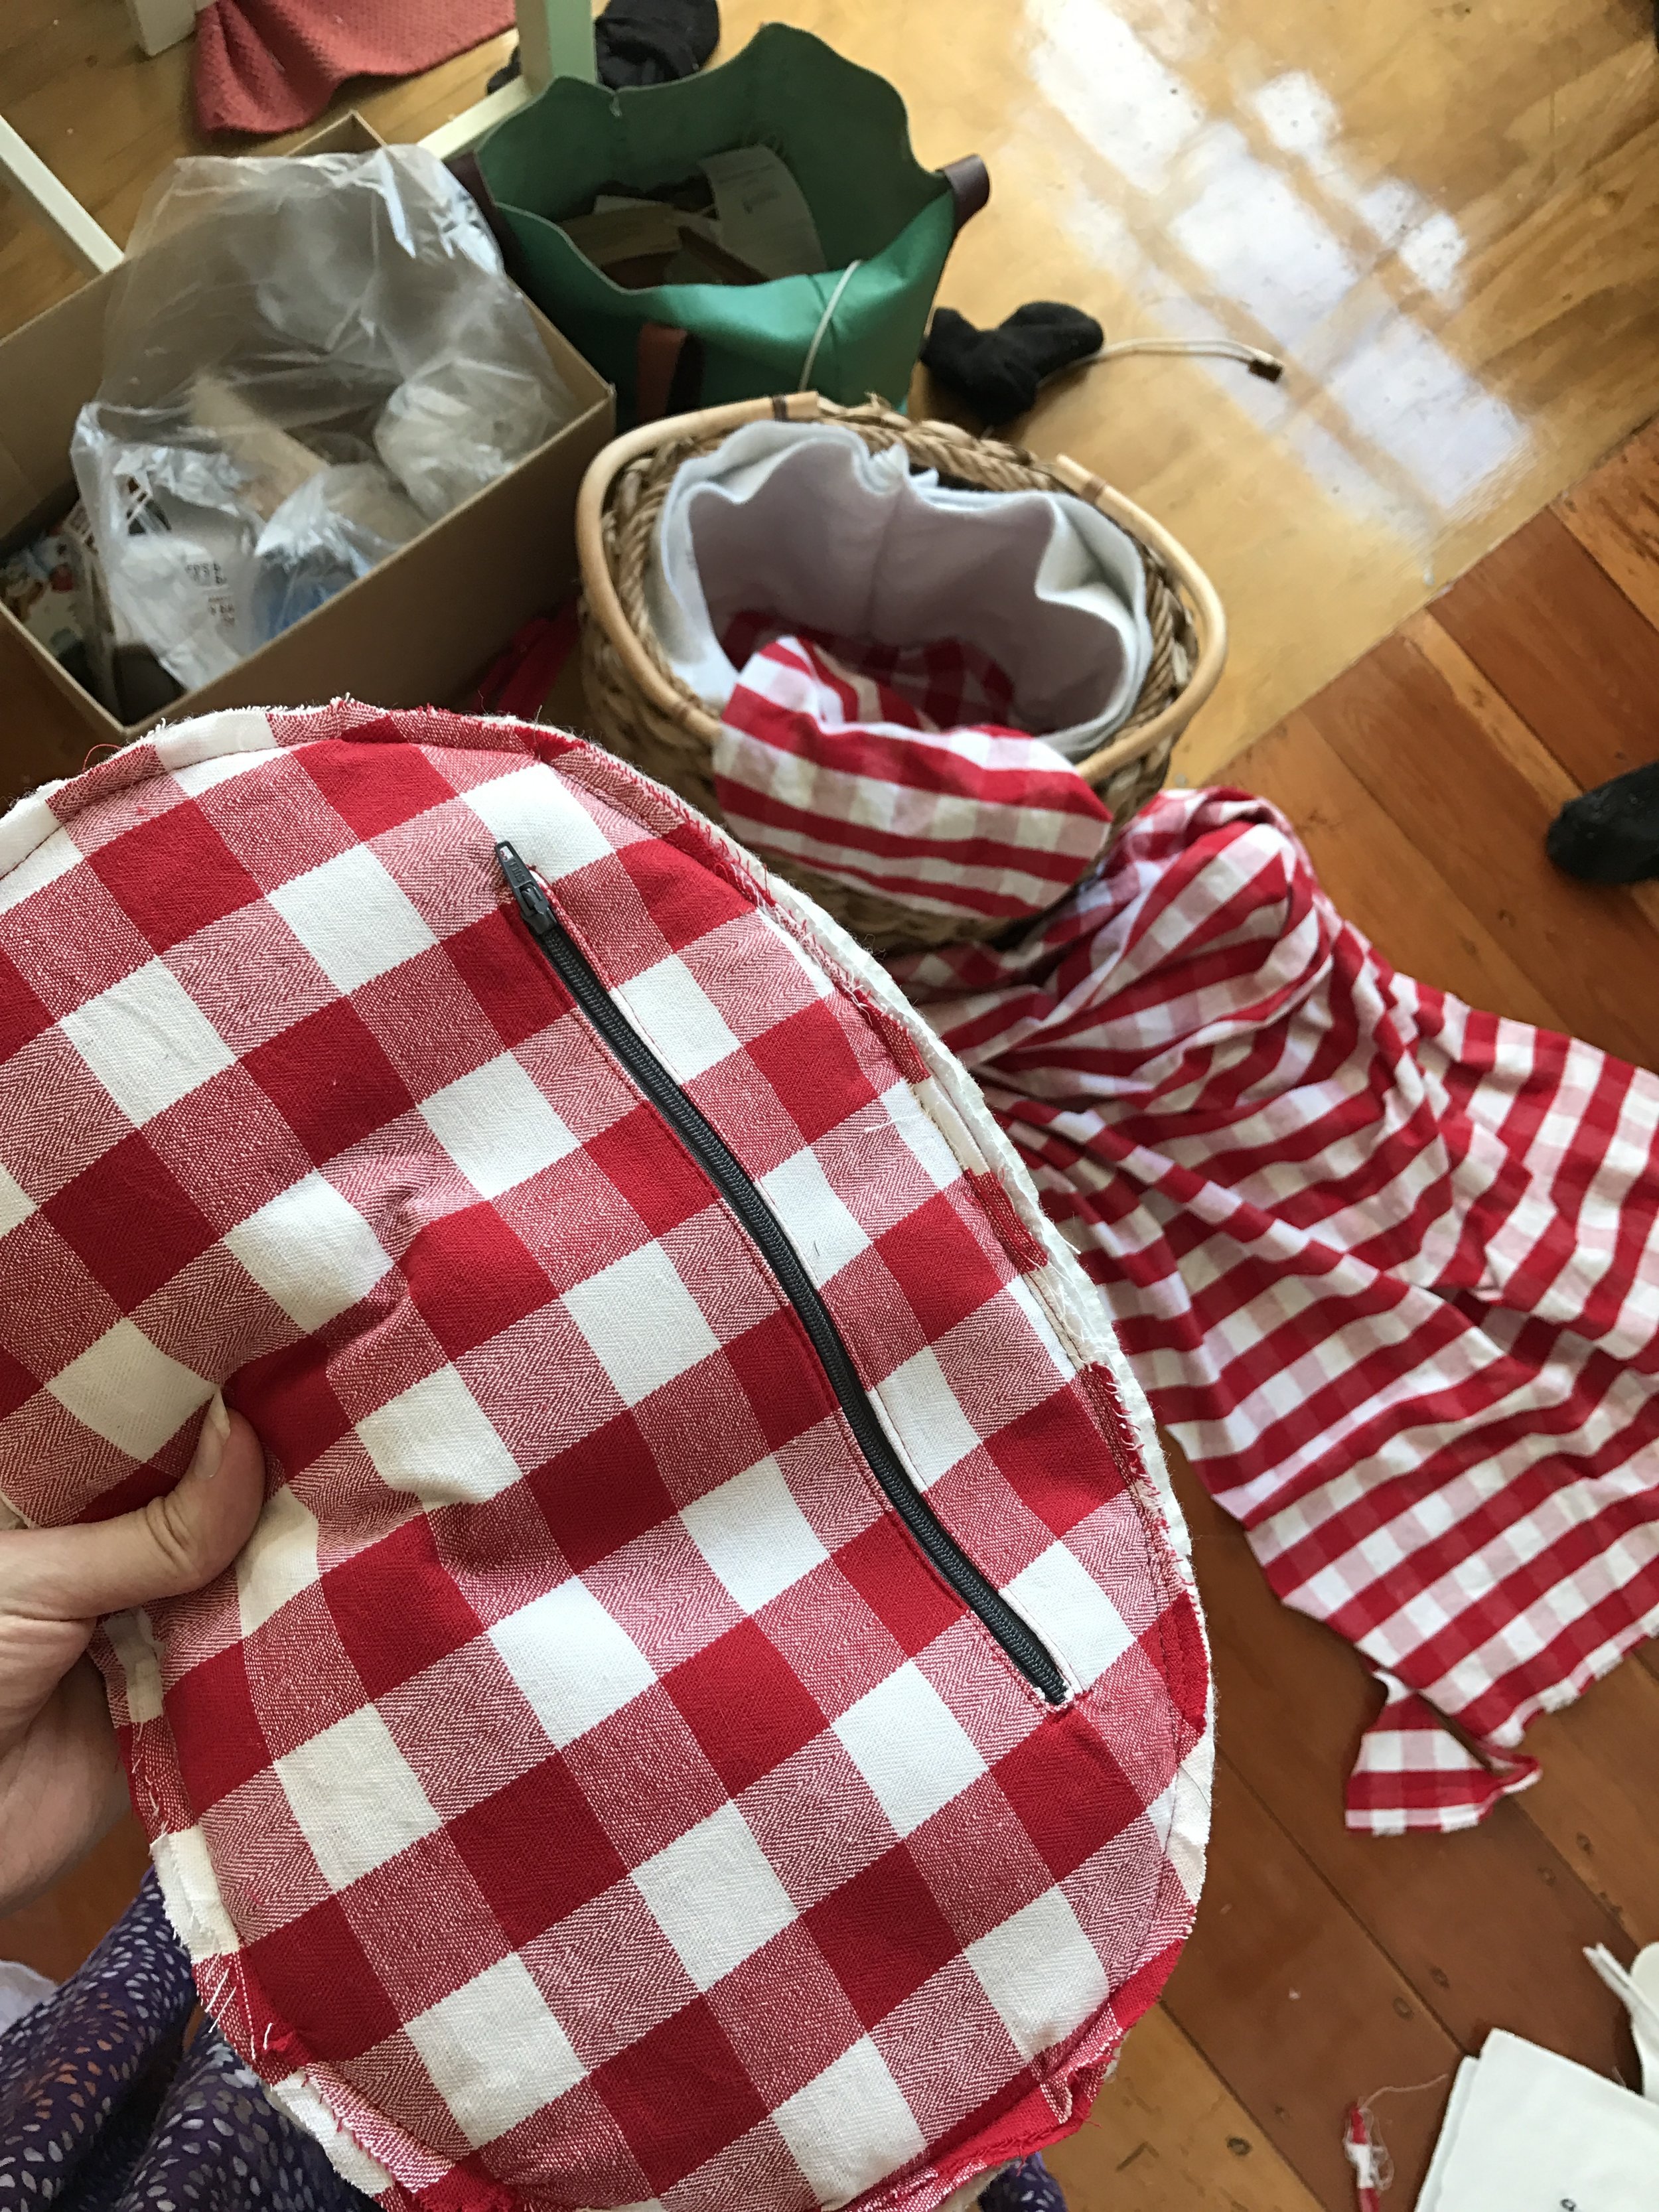
The 'insert' is made with two layers of insulation, sandwiched between an outer and a lining made from the gingham fabric. The oval-shaped base and lid match the shape and size of the basket, but it's a completely separate entity which makes it removable and machine washable, should we have any disasters. The basket is just high enough to contain our bottle of bubbly - a very important part of the Christmas tradition! The lid zips closed, and inside the lid I've added a welt pocket for silverware or napkins (The zipper doesn't match because it's from my stash and I didn't want to face the crowds for a second trip). The hinge part of the lid is a little wonky - mostly to do with the bulkiness of the center back seam with all those layers of insulation plus seam allowances, but I don't quite know what I can do to fix it... It's functional, so I'm leaving it alone.
One of the things that's very important for our picnic basket is that it be easy to carry to some semi-unusual places. It's too heavy and impractical to take on hikes where we'd use our packs, but some of our favorite spots are down hilly trails, precarious stairs, or over slippery rocks exposed at low tide. This basket has handles, but it's awkward to carry on its own. I could have built a simple shoulder strap, but a lopsided walk wouldn't have been pleasant. That's how I landed on the backpack straps. The first time I'd ever seen a backpack basket (Basket pack? Pack Basket? Back-sket?) was this one on Saki's Instagram feed (She made her basket though, I wish I'd come up with this idea soon enough to learn basket weaving! - PS you definitely need to go follow Saki and read her blog if you don't already!) but apparently it's A Thing - emphasized by a quick google image search for an Adirondack Backpack.
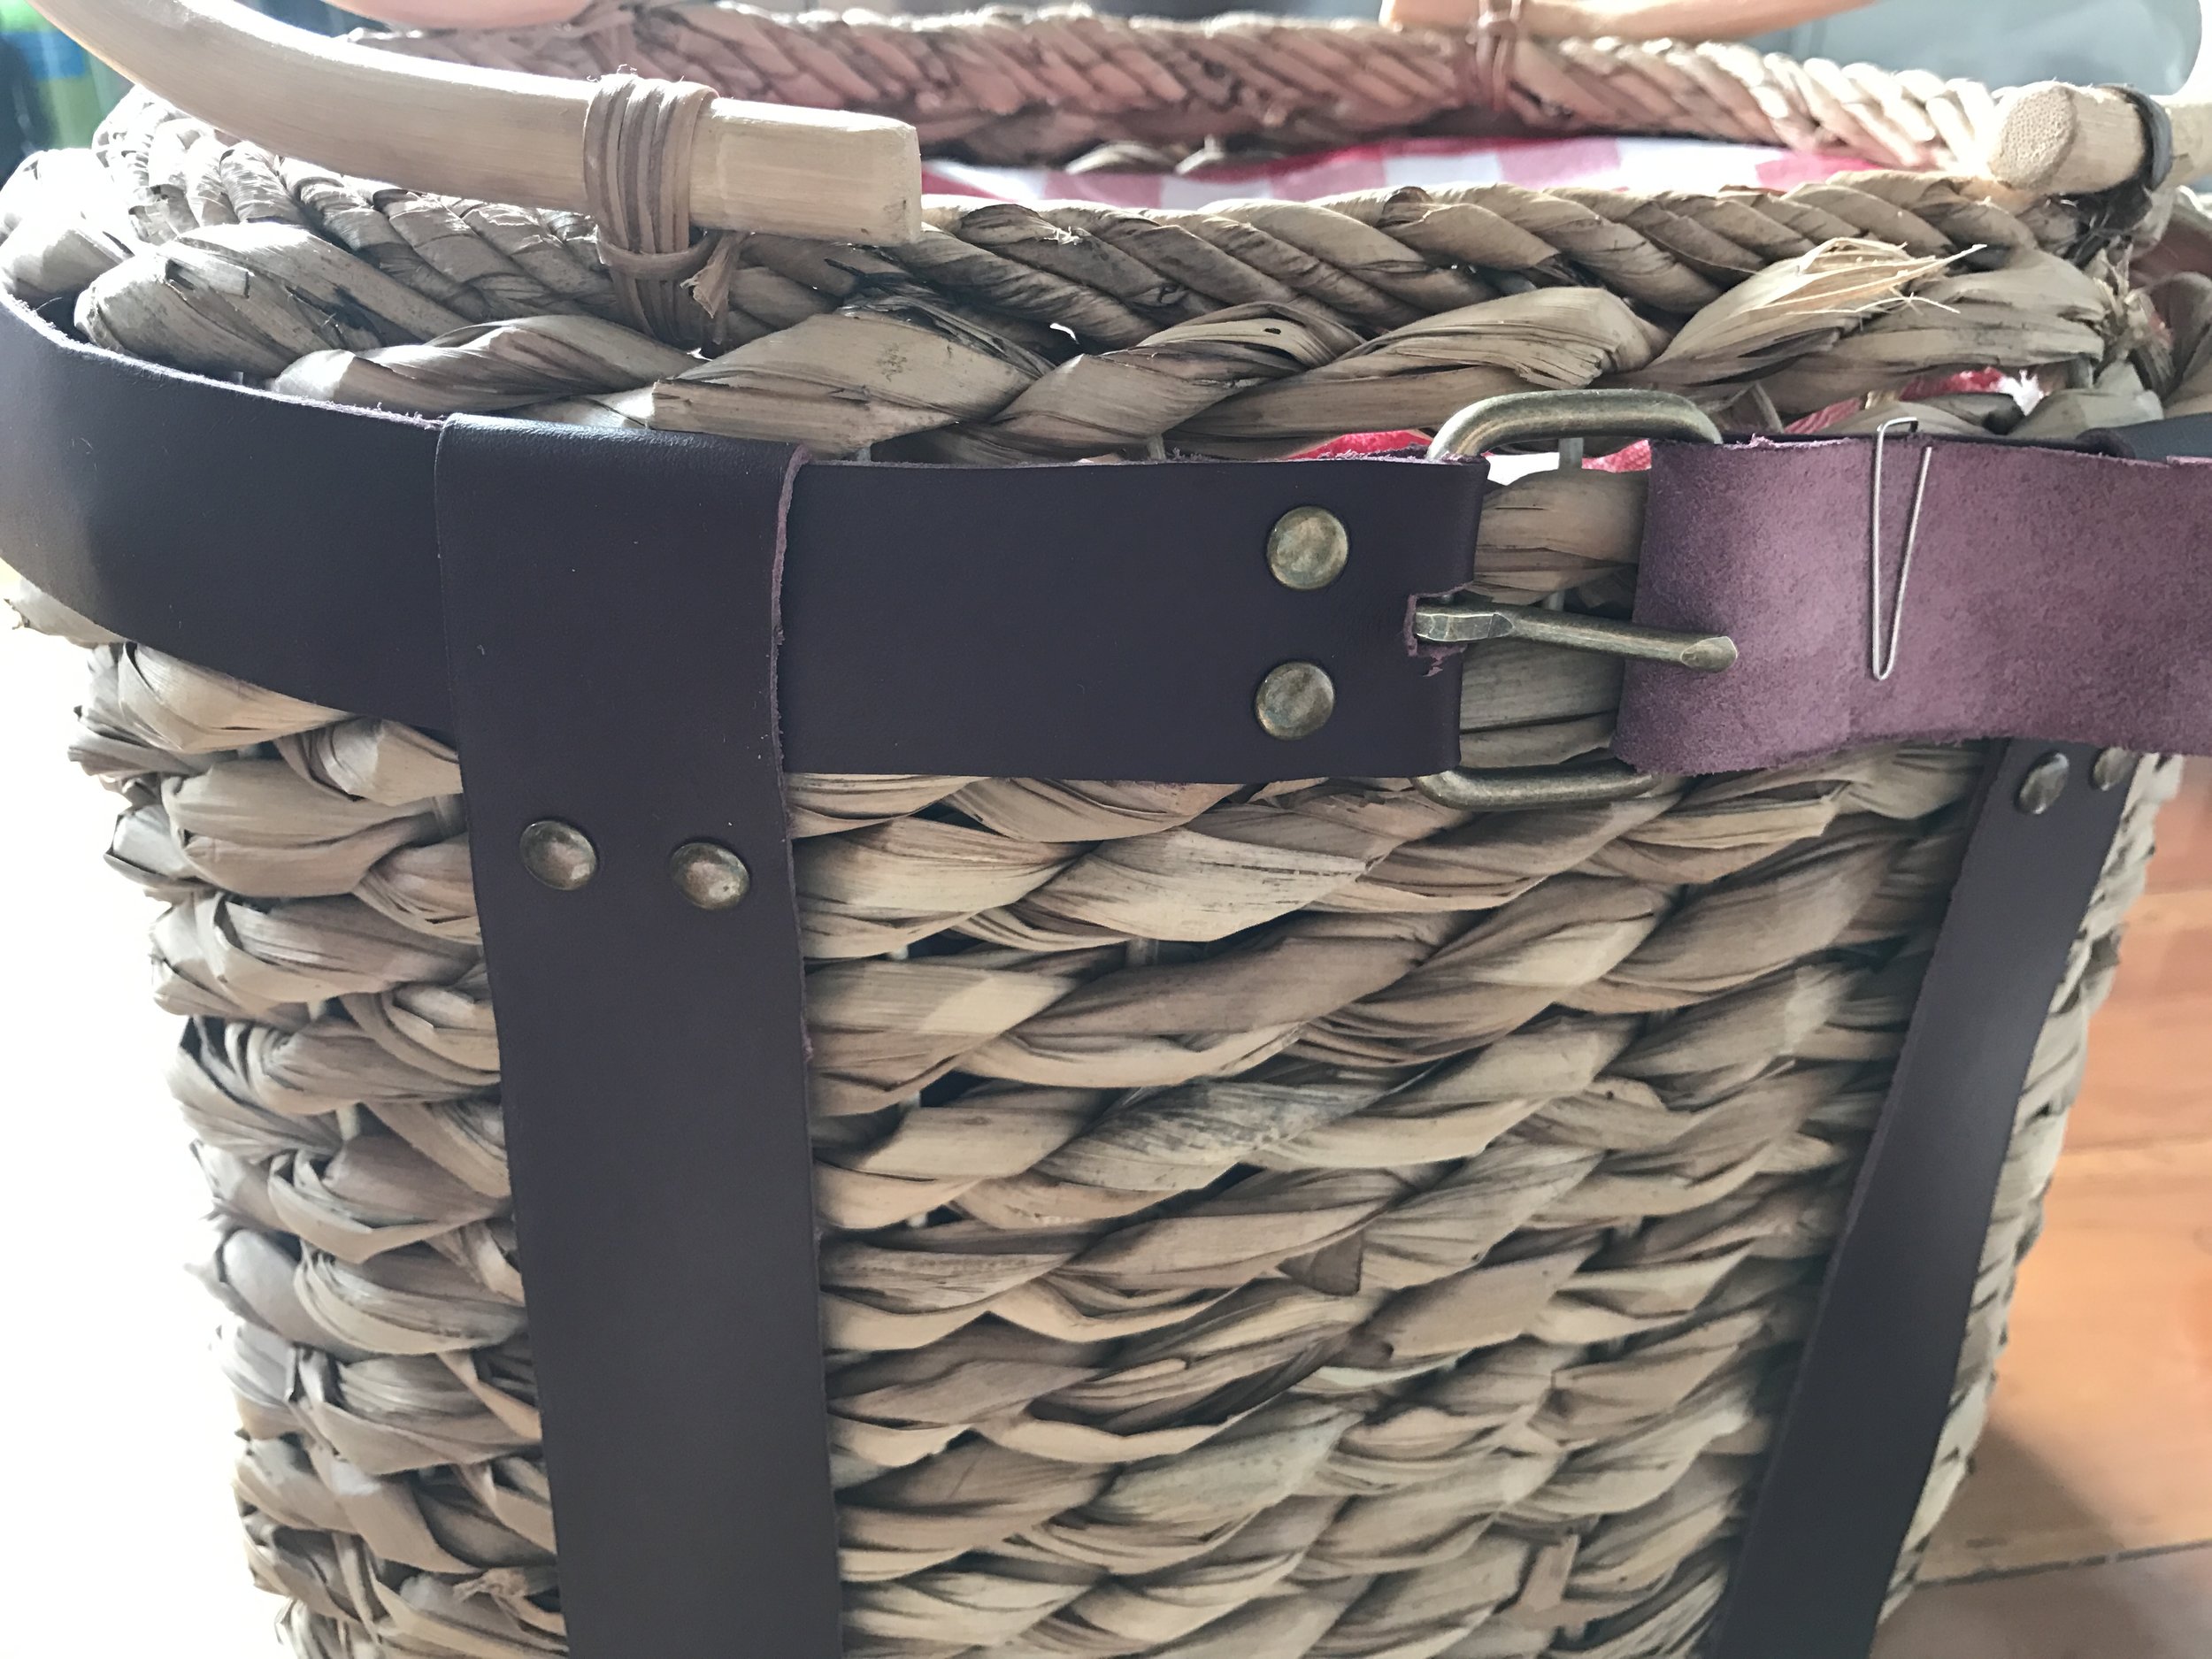
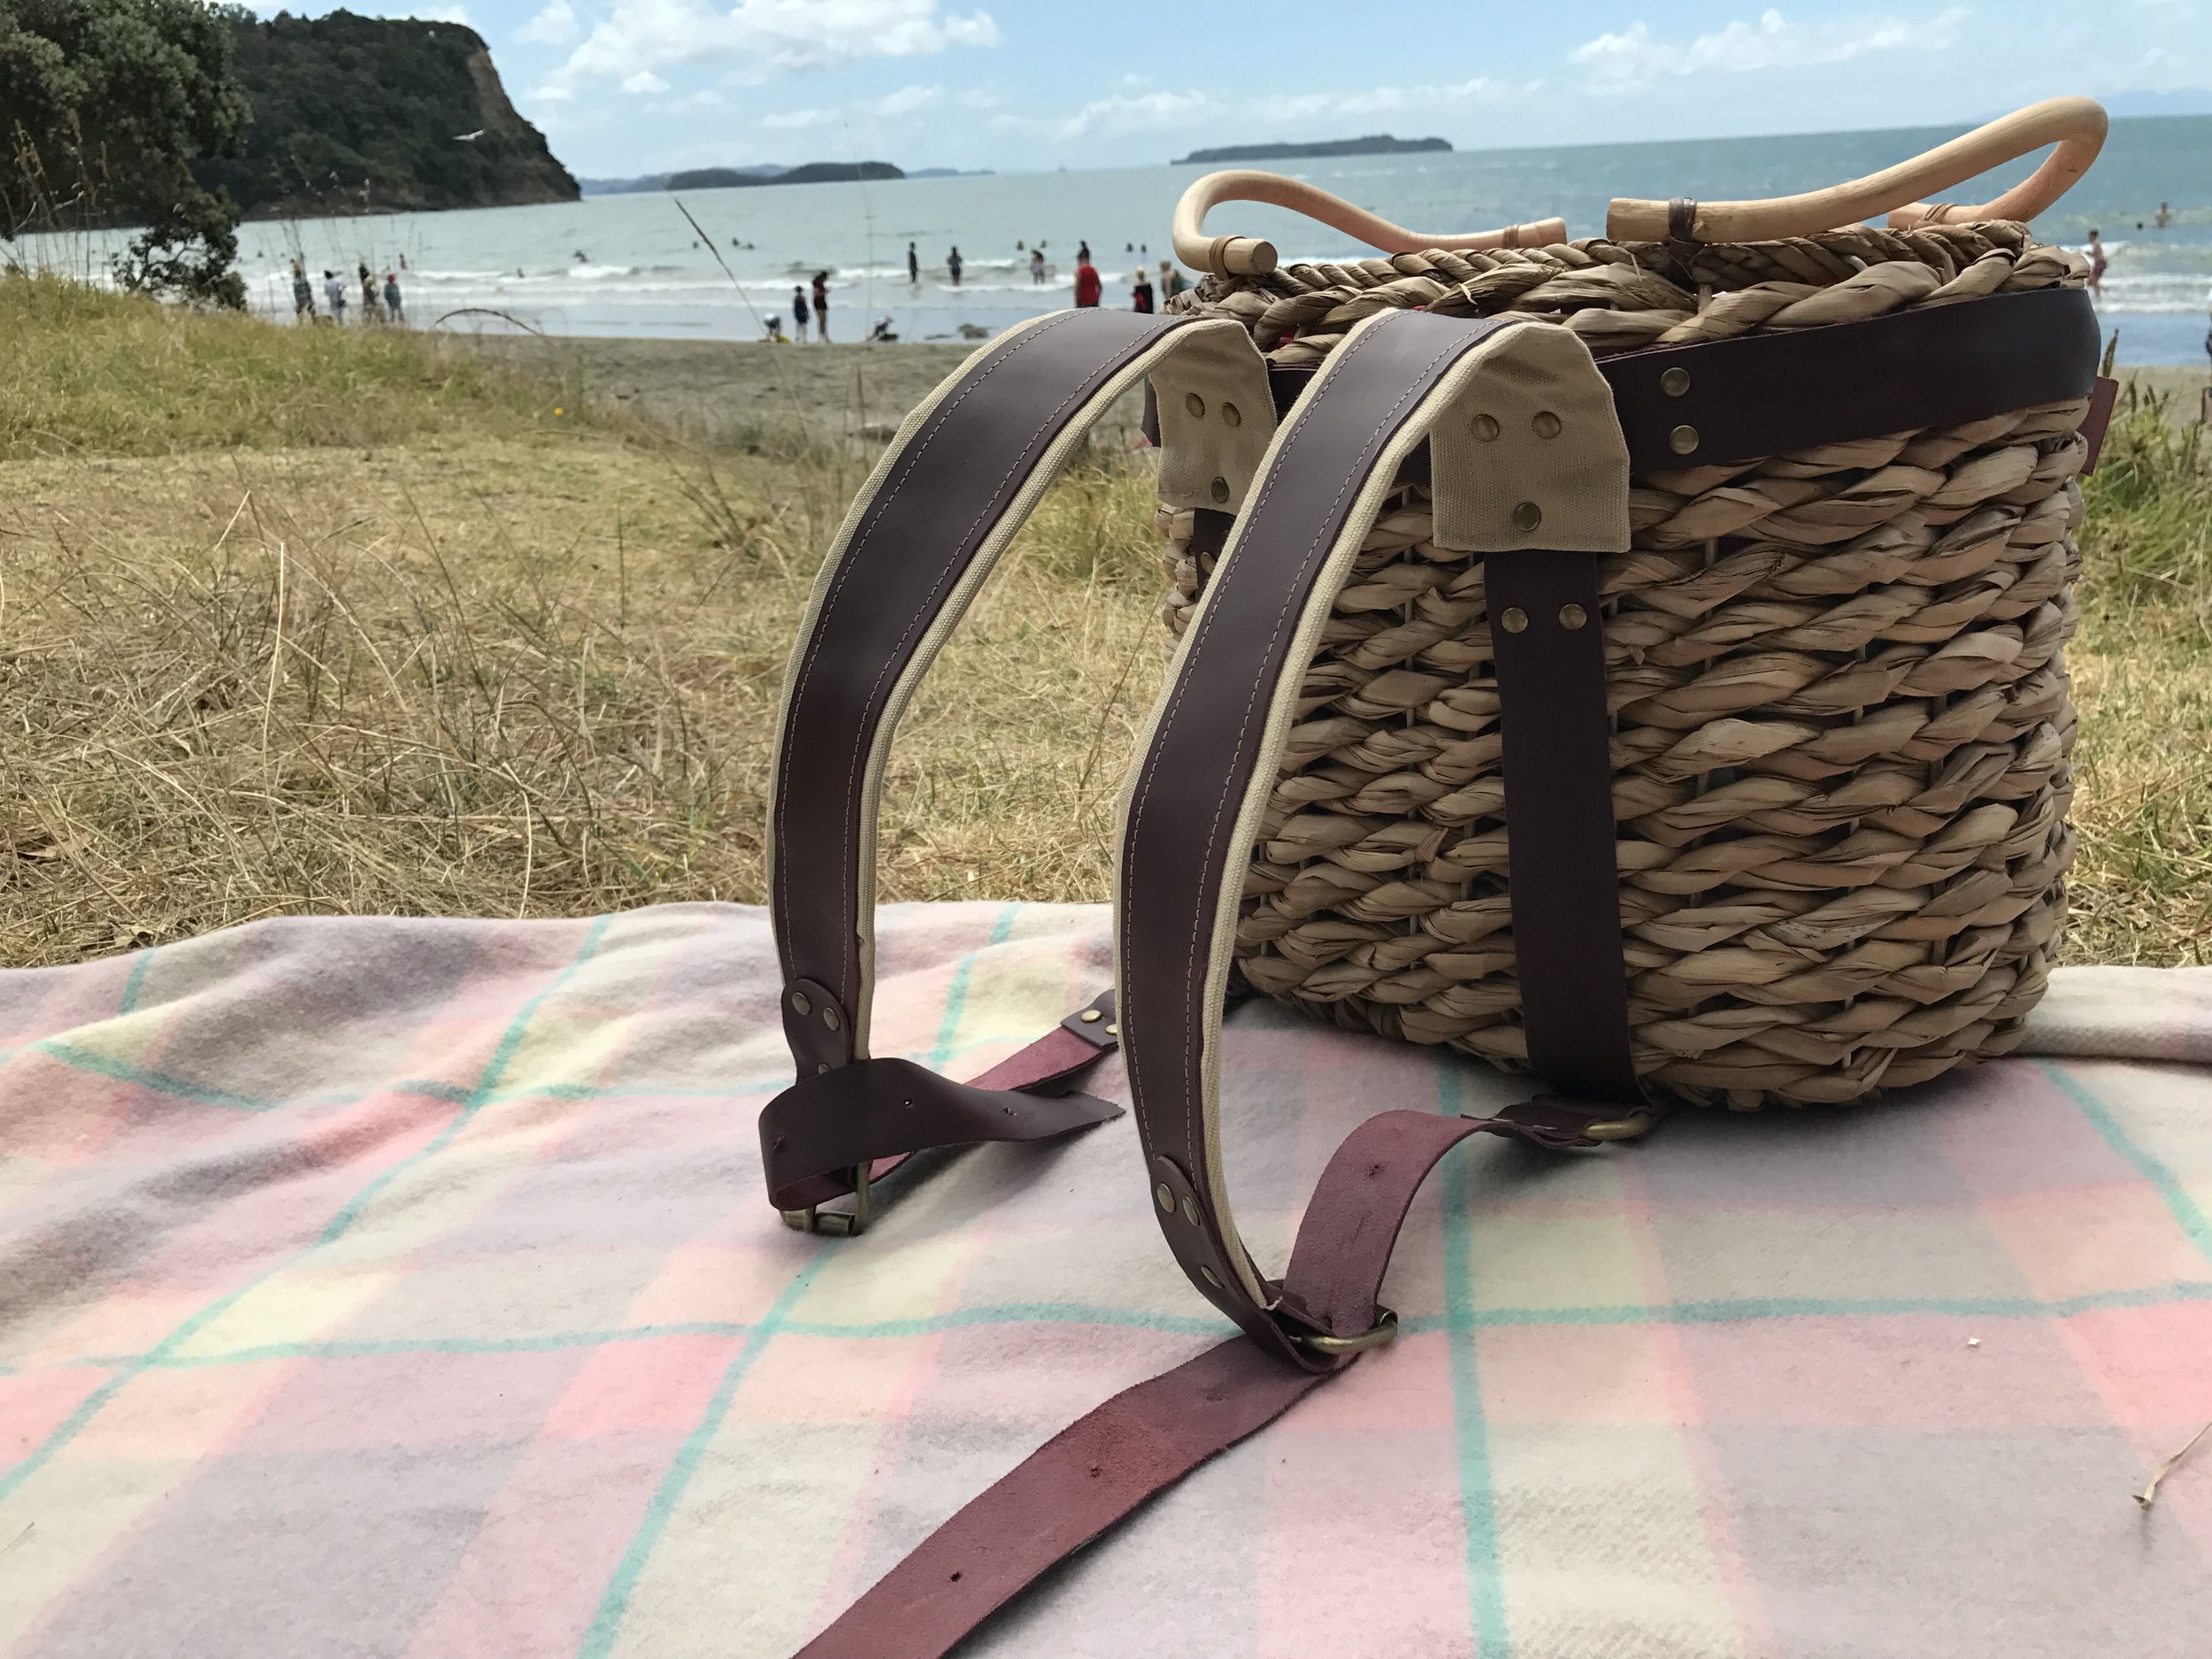
I think the best way to describe the carrier it to call it a harness. The anchoring loop wraps just below the upper edge of the basket, and can be tightened with a buckle. There are two vertical straps which wrap under the base of the basket to support it, and these offer structure for the backpack straps, which are attached at the top and bottom. I made it using a leather hide I'd originally bought to make myself a new purse more than a year ago, but there was so much left over when that project was finished. In fact, there's still a large chunk left over, even after making another gift with this leather as well! (Keep scrolling, friend!)
I also cut into a piece of canvas that I bought for another project to make the backpack straps. It's a good match for the overall aesthetic, and I think lining the leather straps with the canvas will help with the durability in those high-stress areas. The buckles and rivets are from a place here in Auckland called GDL Trading. I stumbled across their website looking for snaps, and the coolest thing about them is that you can buy - get this - individual snaps! So If I need 13 snaps for my jacket, I don't have to buy a pack of 30. They also have loads of other things like buckles, rivets, and leathercraft tools and their service is super quick (like, I ordered on Tuesday afternoon and my package arrived on Wednesday at 8am and the courier even got our unit number right - that never happens) so if you're in New Zealand and looking for hardware, check them out. As a side note, the amount of hammering required for this project was extremely satisfying.
There are two other gifts I want to tell you about - and am allowed, now that the recipients have opened them! Jon and I worked together to make each gift, and it was really fun to have him interacting with a sewing project (and me interacting with a food item, that's usually mostly his thing!) He's got a good eye for design, and the interesting thing about working with someone who has less experience sewing is that he comes up with really unusual ways to construct things in ways that I definitely wouldn't have thought of.
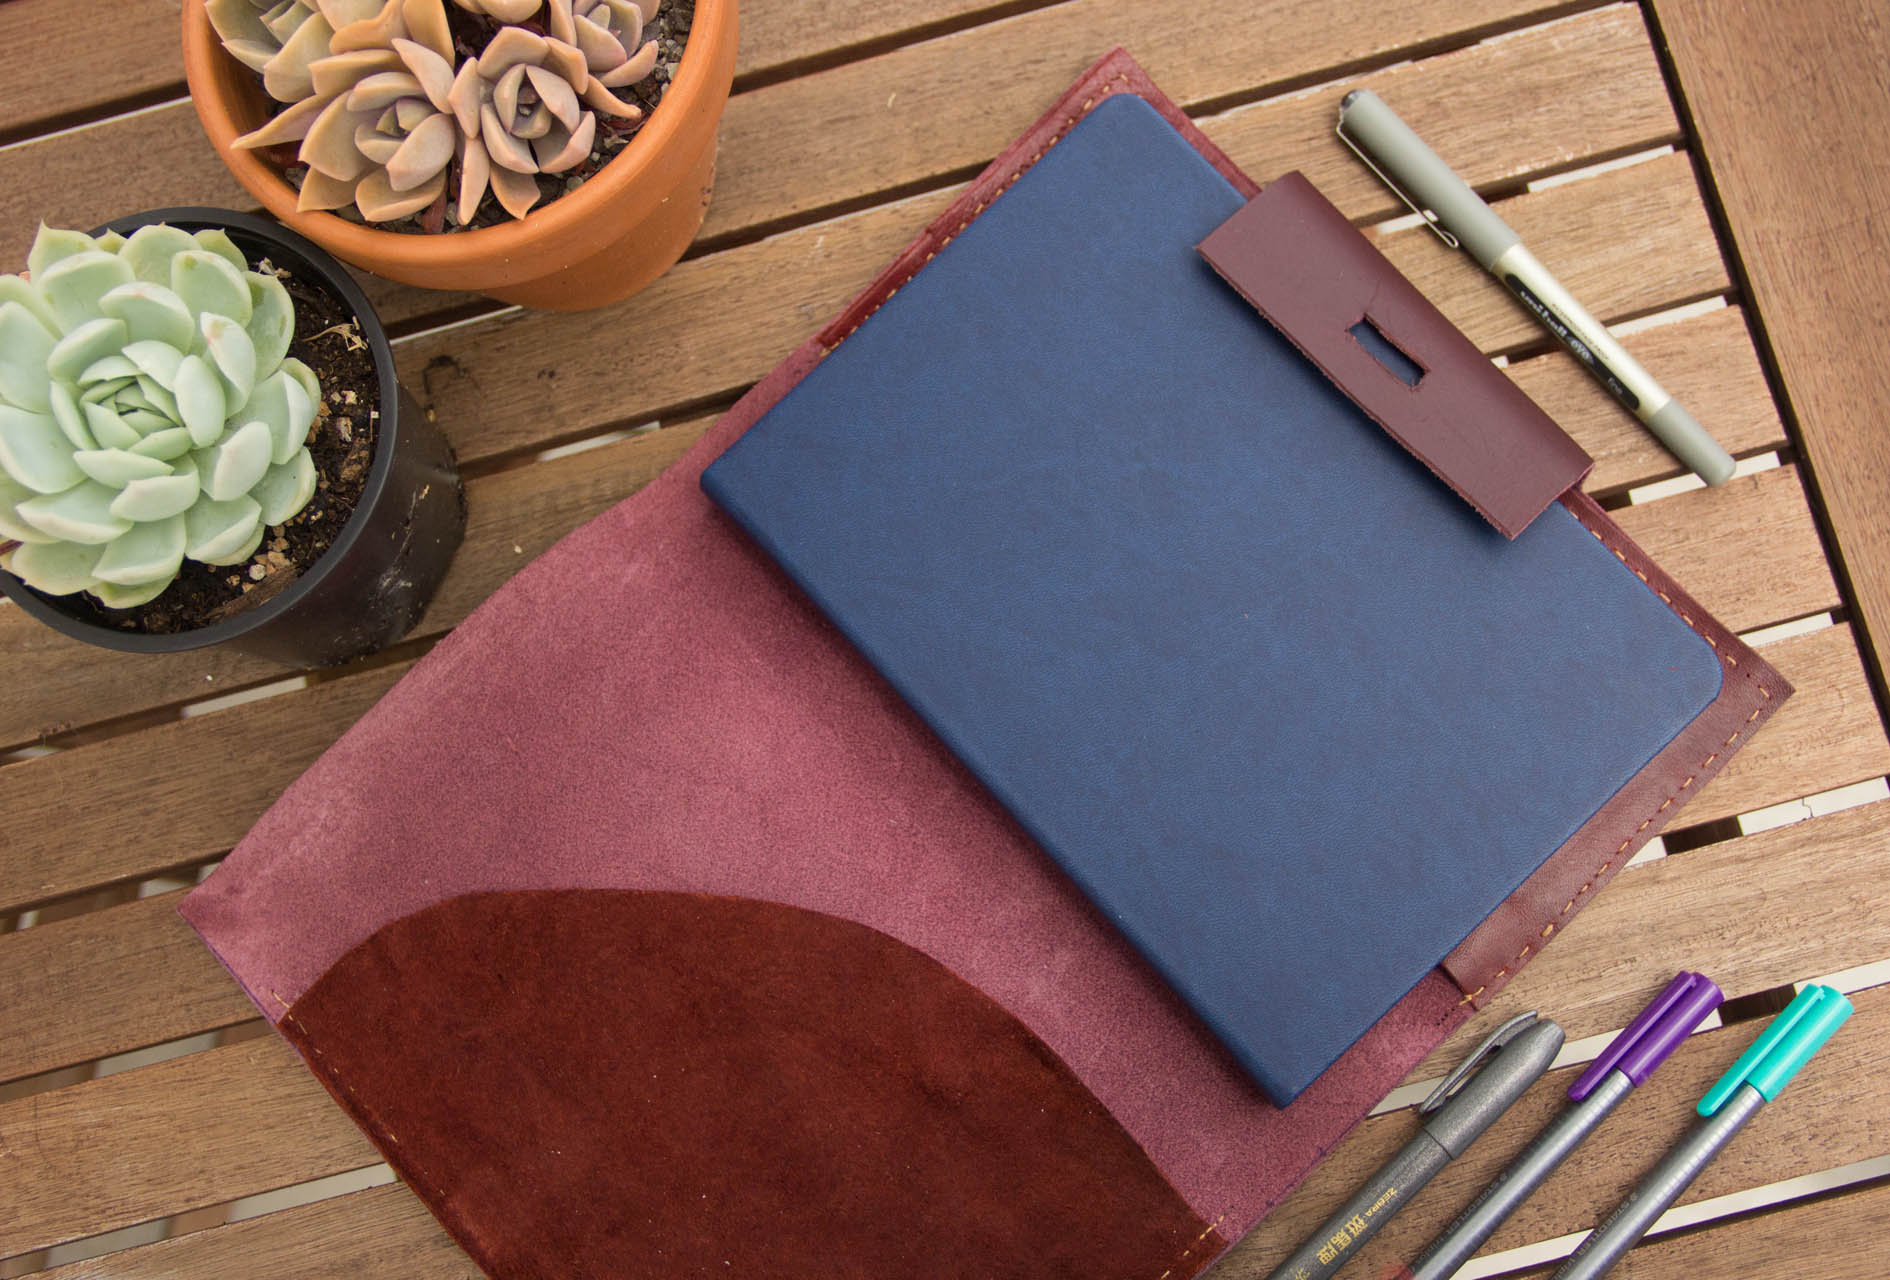
For his brother Matt, we made a leather notebook cover out of some more of my leather hide. It has the notebook pocket, as well as a curved pocket to store other loose bits of paper. We worked together to come up with the design, and then he hung out with me while I cut the pieces, attempted to sew them with my machine (too thick, birds nest tension issues) - and then gave up and sewed through the machine needle holes by hand. The clasp is also the pen holder, and is made with a piece of bra strap elastic I had in my stash.
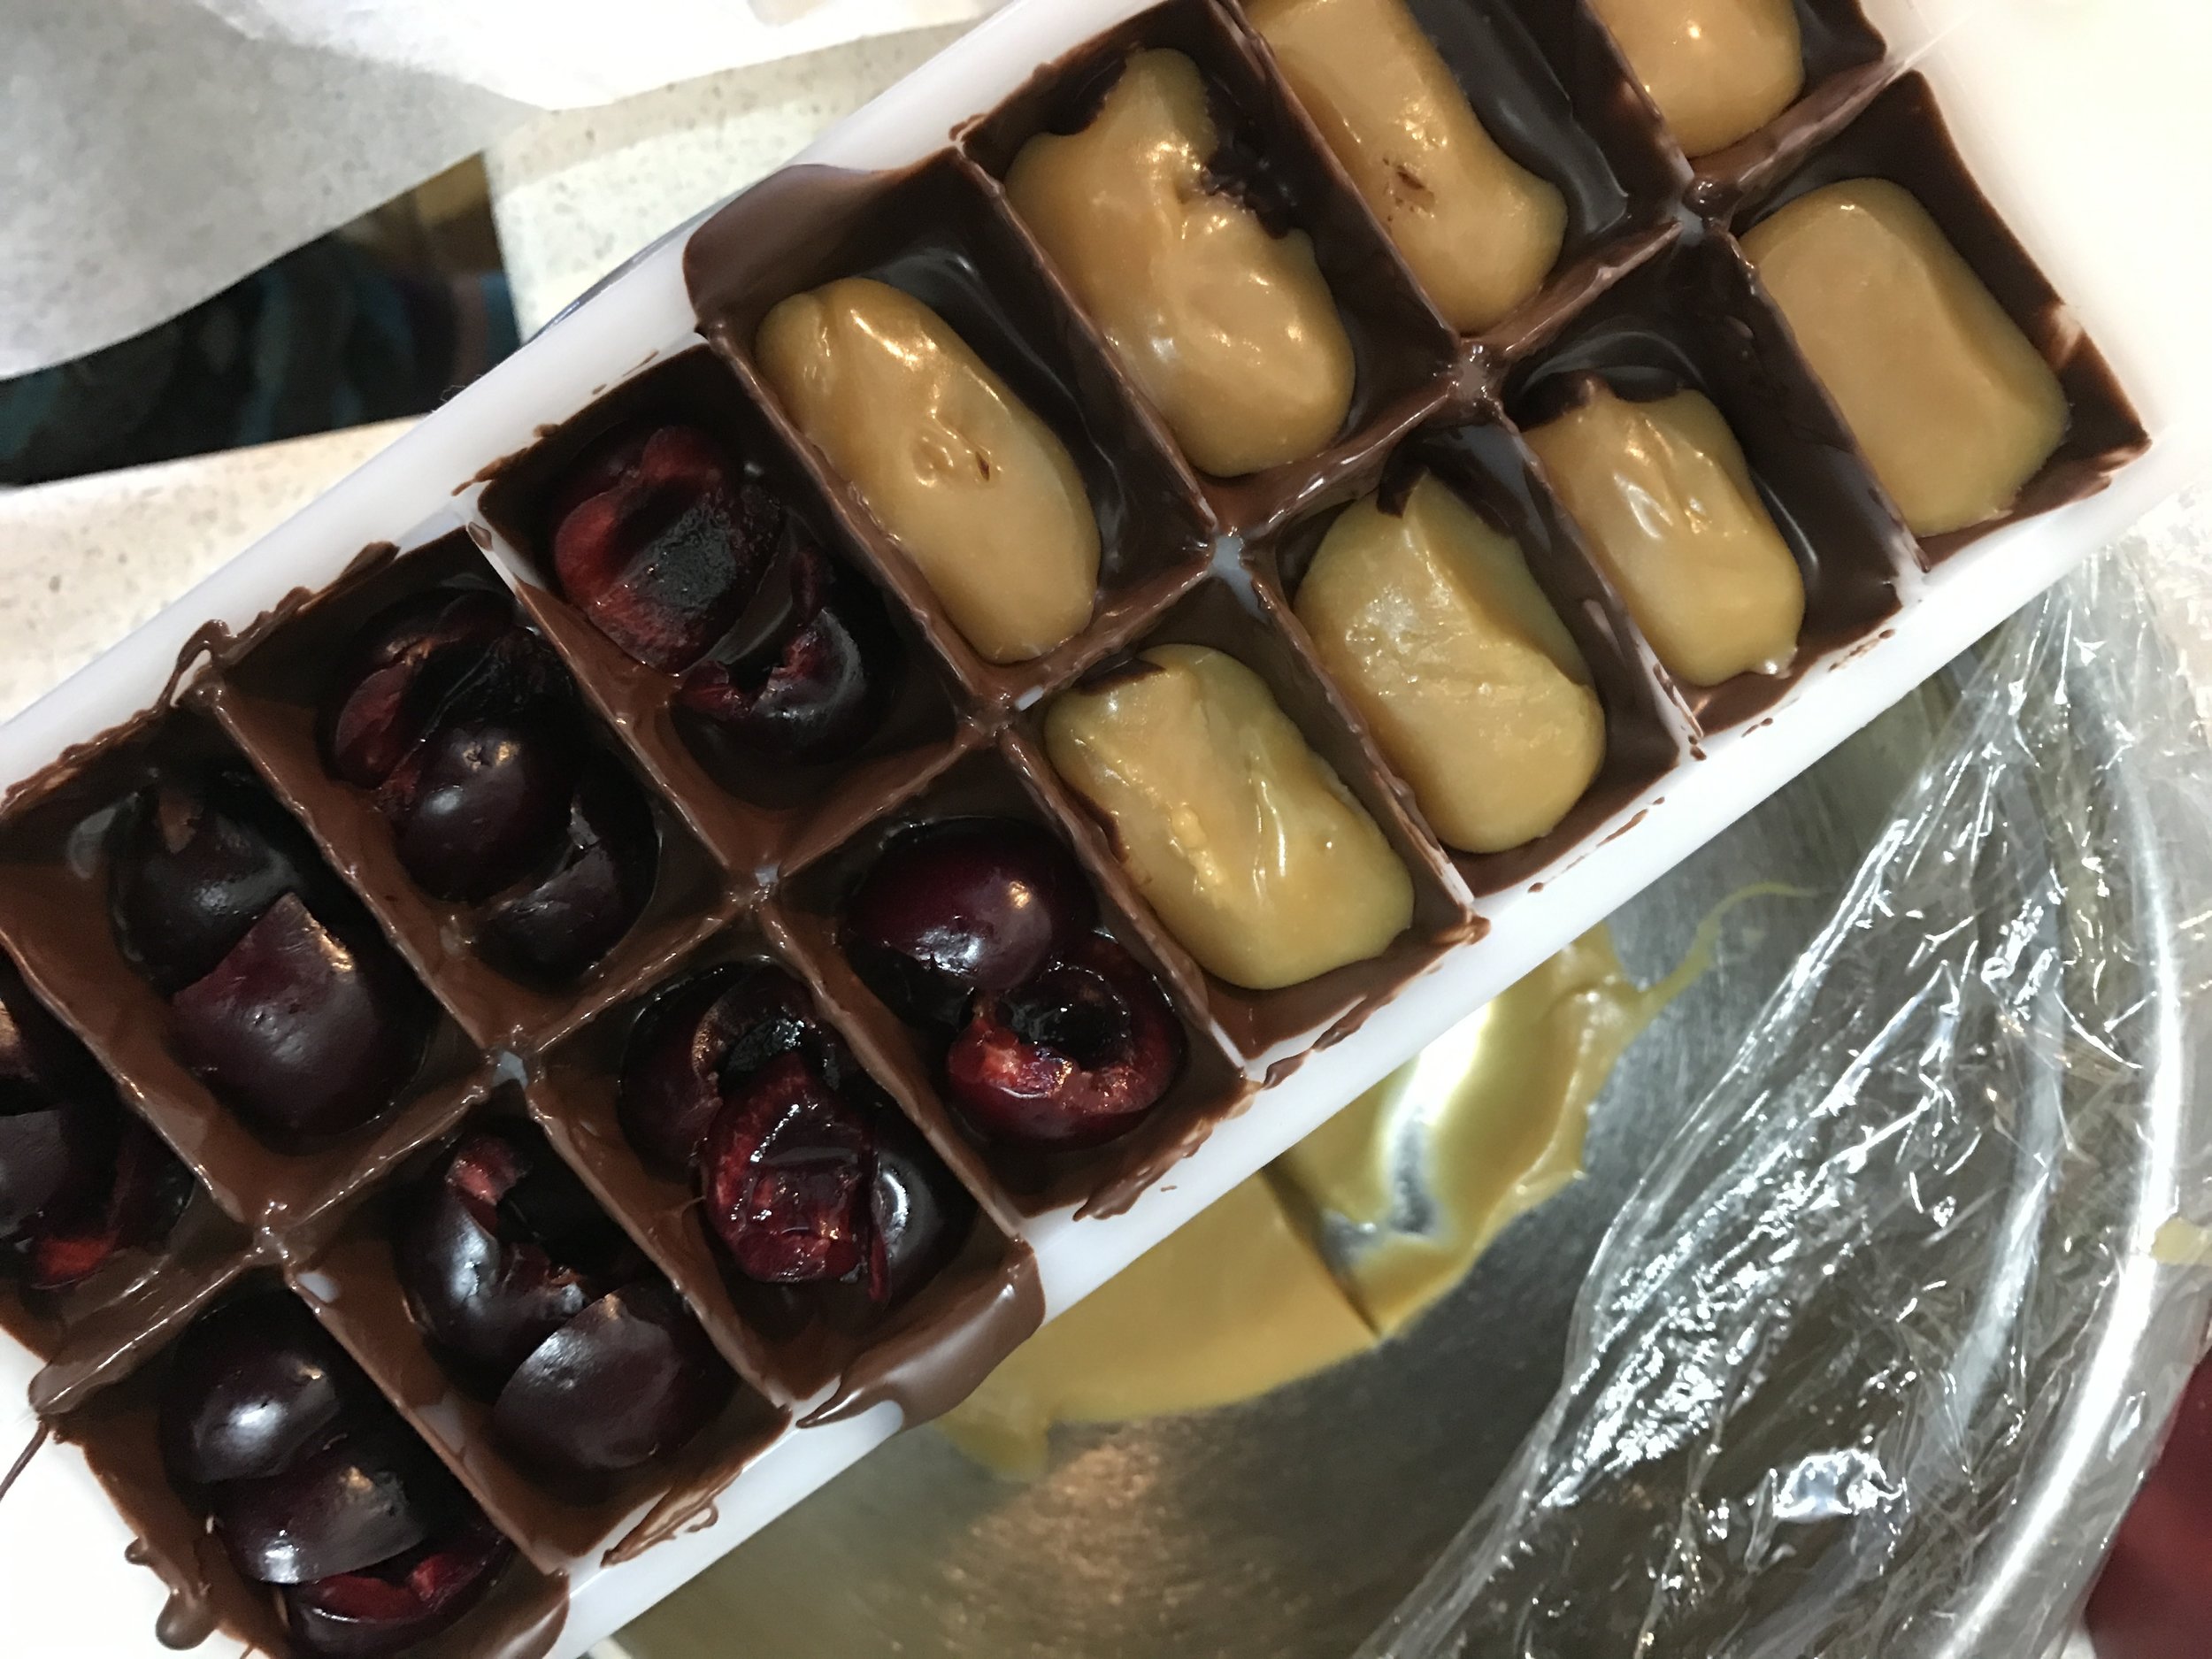
For Jon's dad, we made chocolate turtles ( an adventure undertaken wearing gloves, as Jon is allergic to pecans) and some filled chocolates in an ice cube tray like the true Pinterest mavens we are. We used this recipe for the turtles, including making our own caramel, and we mostly made up the ice cube tray chocolates, though if you search that phrase on Pinterest you'll see what I mean. They turned out amazingly, and they didn't even stick to the tray! We filled them with more of the caramel from the turtles, as well as cherries, and although Christmas is all about the giving we were both super excited that we'd made enough to try a few chocolates ourselves.
My mom's decided that we are postponing our Christmas this year since Jon and I are visiting at the end of January, so that's all the gifts you're allowed to know about for now. I'm particularly pleased that my gifts this year are all handmade, and that I managed not to visit a single shopping mall for the entirety of the Christmas shopping season. Introverting and non-traditional gift-making for the win! (Yes, I promise I'll get back to showing you my sewing projects soon! Just because I'm not showing them to you at the moment doesn't mean they're not happening!)


